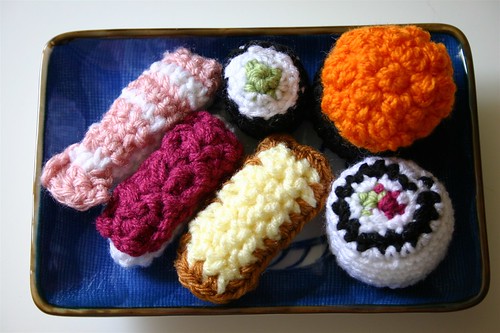
I've been wanting to put together a set of fruit, but I keep getting stalled out or distracted. But here's a pear that's going to be a part of the set (this one is smaller than the last, enormo one), along with some strawberries, and maybe one or two other fruits, if I can come up with something good. I realized it's hard to have fruits that aren't all the same shape and/or color, and aren't impossibly time-consuming to make.The recent thing that I'm most proud of is a set of sushi pieces, currently up. It took me a while to get the sizes and such just right, but I think it looks pretty good. As realistic as you could hope for, considering that it's made of yarn.
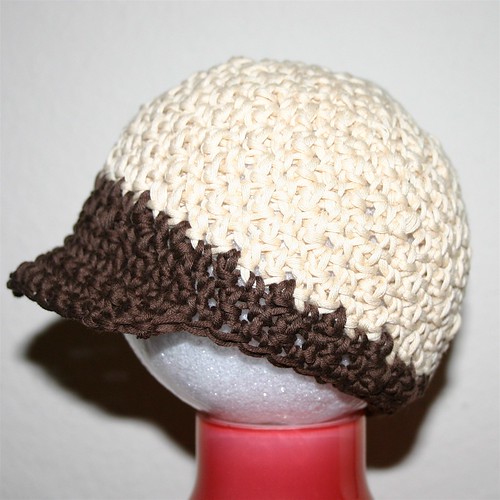
 I've also done a couple boy-ish hats in the same brimmed beanie style. Figuring out sizing has proved to be a lot more difficult than I thought. The hats have a pretty fair amount of stretch, so I'm nervous that they're going to seem too small for bigger kids, but actually be too big for smaller kids, especially in terms of the length of the crown. I've been trying them on a few different kids, trying to get a better idea, only to realize that every kid is different. So a hat might fit a very big 18-month-old, but then be too big for a 4 year-old. I'm worried this is going to turn into a nightmare of returns. *sigh*Anyways, this hat is already up. And the one below should be up in the store soon.
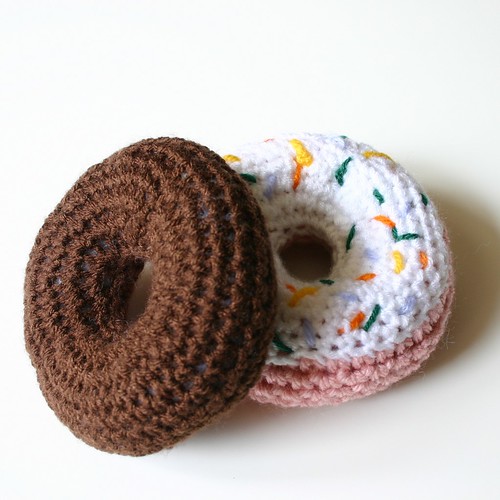
 Also going up soon, this pair of donuts (or doughnuts, if you prefer). And I'm currently working on more sweets - cupcakes, ice cream cones, cookies, etc. Stay tuned...
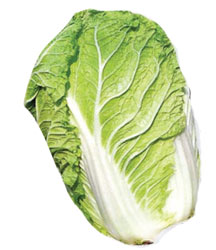
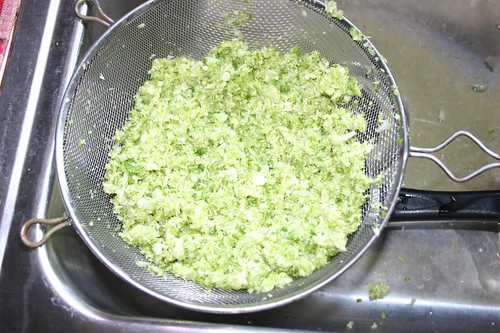
(For Part 1, click here.)Sorry for the delay. I went to the store on Friday night, only to discover that they were out of the fresh skins. Grrr. So I had to revert to frozen, and since they were, well, frozen I couldn't make any more potstickers until Saturday.For my second batch of potstickers, I decided to go with the more traditional pork/cabbage variety. This was pretty much the standard flavor in our family since as kids, my brother and I thought the leek chives were icky. What did we know?This time I started out with 2 lbs. of ground pork. The Chinese grocery store near me has three kinds of ground pork: regular, lean, and fatty. I went with regular. I probably could've gotten away with lean, but again, you want a little bit of fat in there or they taste dry. Too much fat, and you're eating sausage. Bleh. I also picked up a small head of napa cabbage. In case you're not familiar, it's oblong in shape, and has a milder flavor and crisper texture than the regular kind. I forgot to take a picture, but it looks like this. When choosing a head, I prefer ones that have nice green leaves, but I'm told that they're still good if they're mostly white. Just avoid heads with lots of little black dots on the white stalk part, near the bottom.Basically, I took the whole head of cabbage, chopped it into large pieces and then threw the whole thing (or as much would fit in one batch) into my food processor and chopped it pretty fine. You don't want it to be liquefied, but you want it pretty small. Put all the chopped cabbage into a sieve or colander and sprinkle with a very generous amount of salt - like a whole tablespoon. Basically, this is going to help the cabbage release all of its excess water so that later, when you cook the potstickers, they won't go all soggy on you. I'd leave it for at least 5-10 minutes. Then rinse with water, squeeze all the excess out, and salt again - but use 1/2 as much the second time around. You don't want your filling to end up too salty.
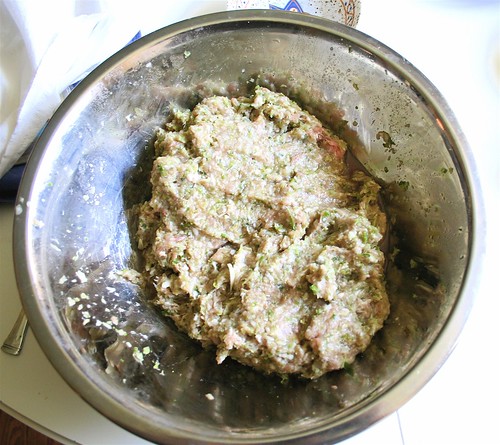
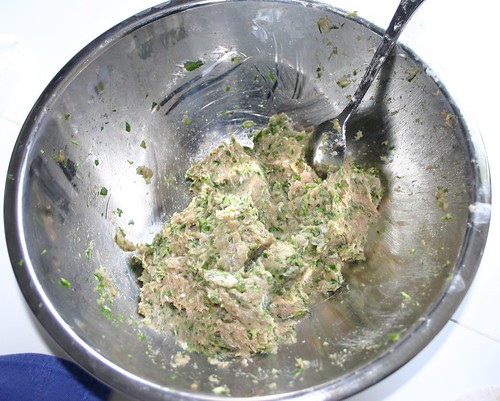
 To the ground pork, I added a couple tablespoons of rice wine, a couple tablespoons, and a about a tablespoon each of ground ginger and garlic. I'll admit, I cheated and instead of chopping fresh, I used 2 tablespoons of a chopped garlic/ginger paste that I bought at an Indian grocery store in a gigantic jar. It's very handy. Now mix everything, including the cabbage together. Your hands probably work best, but if you're squeamish about meat...well, you might not want to be making this recipe. Oh, and add salt & pepper to taste too.I underseasoned the last batch, so this time, I actually cooked up a tiny bit of the filling in a pan so I could taste for seasoning. But you don't have to go that far if you don't want. The dipping sauce will probably make up for any lack of salt. Here's a pic of the raw meat mixture. Again, not pretty, but it will be later.
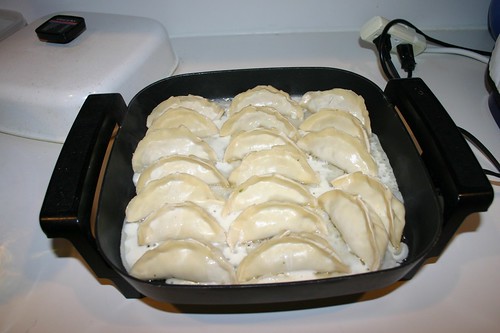
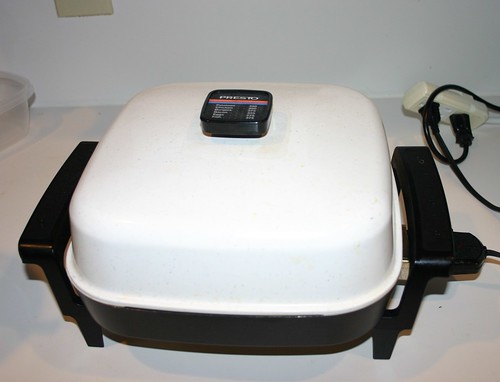
 I got into kind of a crunch and didn't get any more pictures of how to wrap them dumplings. Sorry. But I did take plenty of pictures of the cooking process. Again, the easiest way to cook these is to throw them in a pot of boiling water. But I think they are much tastier when pan-fried. I also feel compelled to mention that it drives me crazy when I order these at a restaurant and they're deep-fried. Totally wrong, bordering on travesty. But I digress.The best way to cook these is in an electric skillet. They're great because you can set the temperature and they pretty much regulate themselves. You can do these in a pan on the stove too, but it will probably require a little more monitoring and tweaking of the heat. Heat the pan to 350 degrees. Give it a while to get good and hot. Then pour in a tablespoon or two of oil and swirl it around to give the bottom a good coat. Put the dumplings in the pan. I prefer to line them up in rows. You want to make the pan pretty full too, like this:
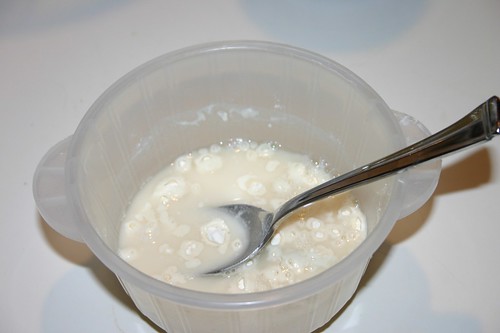
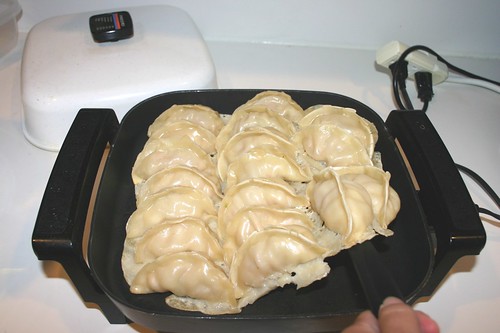
 While those brown up on the bottom a bit, mix together a couple tablespoons of flour and about a half cup of cold water in a small cup or bowl. (You want it to be smoother than the lumpy mess in this picture)
 Now pour the flour/water mixture into the pan, around the dumplings. You want to cover up any parts of bottom of the skillet that are showing.
 Now put the cover on and leave it alone for a good 10-12 minutes. Resist the temptation to open it up and take a peek because you'll be letting all the heat out and they'll just take longer. Seriously. Don't touch.
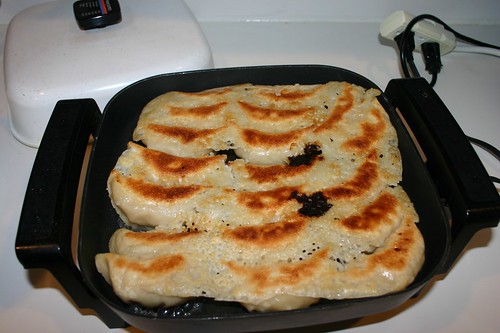
 The flour/water thing was my grandma's trick to making a nice crispy crust on the bottom of the dumplings since the water evaporates, leaving another thin layer of "dough" on the bottom. That was the real secret about these potstickers; they're really cooked more by steam than anything else, even though they're technically considered pan-fried. So you could almost convince yourself that they're not that bad for you. Almost.After the 10-12 minutes have passed, your dumpling should look something like this:
 They should be all glued together in more or less one big piece on the bottom. Using a spatula, carefully ease up one edge and check to see if the bottom is golden brown. If not, cover again and leave it for a few more minutes.
 Once the bottom is brown, you have the option of flipping the whole thing over to brown the top a little too. But you really don't have to unless you want. It should look golden brown, with a thin lacey crust on the bottom.
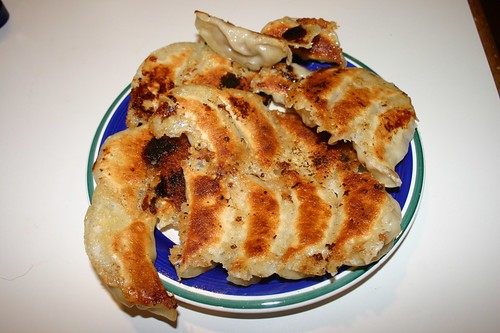
  My grandma told me that they are actually supposed to be served "upside-down" this way, so you can see the golden crustiness. In our family, these were never just an appetizer. We used to eat whole plates of potstickers for dinner. Cooking them this way gives them a nice crunch on the bottom, but you still get the chewiness of the rest of the wrapper. T and I gorged ourselves last night, almost to the point of being total gluttons. They were so good though, if I do say so myself. Definitely one of my better batches.
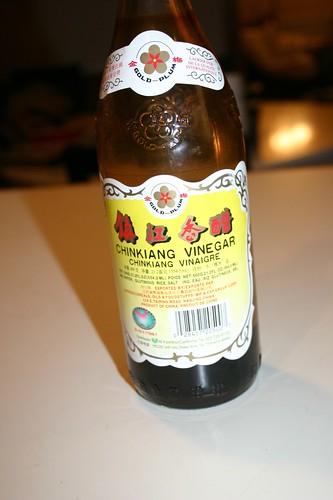
 Oh, I almost forgot about the dipping sauce. Mine is pretty simple. It's more or less equal parts soy sauce and Chinese vinegar. I prefer Chinkiang, pictured at right. I don't know if it's a specific variety or what, but it doesn't taste like any other vinegar in my pantry, and it's what we've always used in my family. I also add a dollop or two of the ginger garlic paste, a splash of sesame oil, and (if I happen to have them) chopped green onions. Chili paste is also a good addition, if you like a little spice. Mix everything together and go to town.
 Or maybe this should be called Hello Kitty madness. I have to confess, I'm a bit of a hypocrite. I am normally against buying my kid "character" toys and other items (in particular, Disney princess stuff), but when it comes to Hello Kitty, all that goes out the window.
E starts preschool in a few weeks (she'll be going one day a week), and I may have gone a little bit overboard buying bento stuff for her lunch. To be fair though, the big pink box at bottom was given to me by my friend, Shannon. And the top three items (lunch bag, box, and ice pack) are all from Target's Dollar Spot.
So the overboard part really only applies to the red box and the extra silverware set (which is actually for everyday) I bought at the Asian grocery store yesterday. I really had to restrain myself there, and in fact, bought an extra HK box with the excuse that another friend might need it, which she did. I should have taken a picture yesterday, before I gave some duplicates of the Target stuff and the extra box to her. And maybe thrown in all the bento-making supplies that I've acquired over the last couple months. Then you'd really see the madness. Can you tell that I can't wait to start making cute lunches for E?
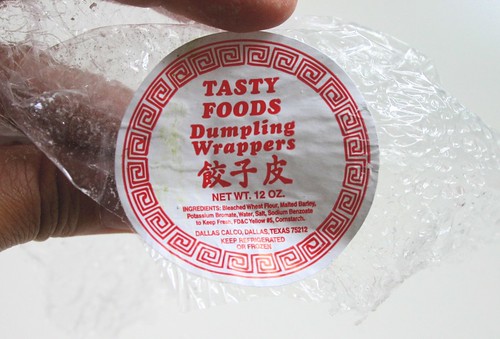
I have barely cooked any Chinese food ever since my rice cooker blew up, and lately I have just been crazy jonesing for some home-cooked Chinese food. A couple days ago, I decided screw it, I'm going to cook some anyways, even if I have to cook rice on the stove (which I've NEVER done before) or *gasp* buy cooked rice from a takeout Chinese place. So over the next week or two, I think I'm going to post some pictures and maybe even recipes. The problem with me posting recipes (besides the fact that I'm giving away all my secrets) is that I don't really measure things. I'm kind of a touchy-feely cook. So if you decide to try any of these recipes yourself, keep in mind that my measurements are all approximate.So first up, potstickers! I decided to make these for a potluck I was going to last night. Of course, it didn't occur to me to take pictures until after I'd already started making the filling, and by then my hands were a bit dirty to haul out the camera. I decided not to let that stop me. But I did decide to cook the dumplings on site at my friend's house, so no pics of the finished product.I'm actually making more tonight (made WAY more filling than I had wrappers for), so look for more and better pictures tomorrow. In the meantime, a little backstory. My grandma used to make dumplings for us all the time when I was little. Actually, my parents made them too, but somehow I always remember my grandma's as being better. It may have had something to do with the fact that my parents boiled theirs, which technically makes them "jiao-zi" as opposed to pan-frying them, which is what makes them "potstickers."I started with about 1 1/4 - 1 1/2 lb. of ground turkey. Normally I use ground pork, but my friend doesn't eat pork, so I decided to try out turkey instead. I figure you could say they're sort of healthy that way. But be sure to get the fattier kind, not the all-lean ground turkey breast, or they will be dry dry dry.Next I added about 1 tablespoon of Chinese rice wine and 1 tablespoon of soy sauce. In a food processor, I finely chopped 2 cloves of garlic and a bunch of Chinese garlic chives. I've also seen them called leek chives - they kind of look like green onions, but with out the white part on the bottom. It came about to about 1 cup, chopped. Mix that into the meat. Salt & pepper to taste. It'll look kind of like this.  I know, not super appetizing, but it's raw meat. You can't expect too much. Now for the fun part, filling and wrapping!I'm usually not a big fan of store-bought wrappers/skins. They tend to be a bit on the thin side, especially if you're going to be pan-frying. My parents used to make their own skins, but then I think that was out of necessity since I don't think they sold pre-made ones back then. I don't have the patience to mess around with making my own, so I usually make do with what I can find. I did discover this brand of skins at my local Asian grocery, and they seem to be about the right thickness. It was in the refrigerated section instead of frozen and is actually made locally. Score!
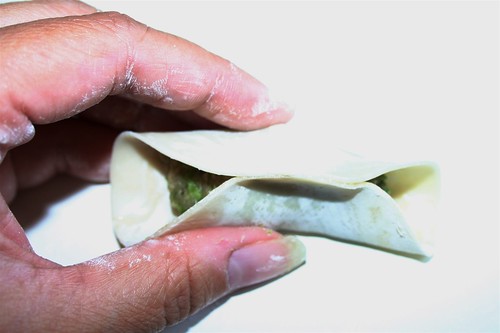
 Put a dollop of filling in the center of a wrapper - I'd guess a little more than a teaspoon. You want them to be nice and meaty, but you also don't want to overstuff them because then you'll have meat squishing out the sides when you try to seal them up. Ick. Next, dip your finger in a bowl of water, and moisten around the edge of the top half the wrapper (in a semi-circle).
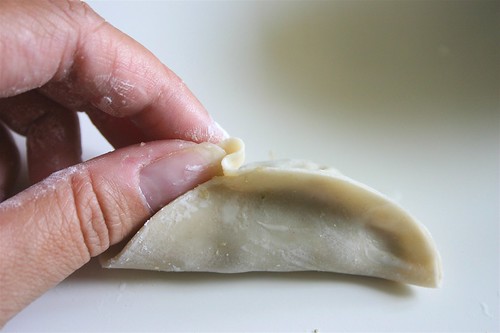
 Fold in half and pinch in the middle to seal (excuse the crappy quality of the picture):
 Now you want to crinkle or pleat the edges and press to seal. It's hard to show in a picture since I usually use both hands to do it but I needed one to take the picture. Basically, think of when you crimp the edge of a pie crust. It's sort of like that.
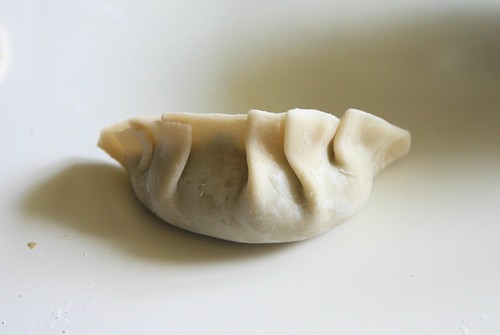
 Depending on how big the wrapper is, I do maybe 2-3 pleats on each side of the center. When you're done, it should look something like this:
 There are actually different ways of folding these, but I like this method because they kind of sit up on their own, which is nice for pan-frying. If you're just going to be boiling them, you could just fold them straight over in half and pinch them closed to make a semi-circle.One package of wrappers yielded just under 40 potstickers, but didn't use up all my filling. I tried defrosting a package I had in the freezer (different brand, so they were a bit different in texture and size), but they were a bit old and freezer-burned and after cooking up a couple testers, I decided against it. As I get them wrapped, I usually put the dumplings on a cookie sheet lined with a clean dishtowel and then keep them covered with another dishtowel (also clean, of course) to keep them from drying out. If you're not going to cook and eat them right away (or if you're making an enormous batch, like I am) then you can just stick the whole pan into the freezer. Once they're frozen, you can toss them into a ziploc bag and just cook them as needed. Tastier (and cheaper) than the storebought kind!
 In part 2, I'll make a different kind of filling and have more details on cooking and serving.
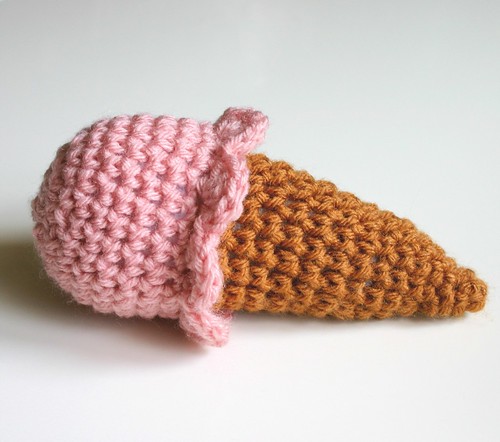
 I went to another Knitting Night last night at a friend's house. There usually isn't a lot of actual knitting that gets done, but in between gabbing and stuffing my face, I managed to make this ice cream cone. I think I'm eventually going to make them for my shop as part of a "sweets" set, but this one is for E since, thanks to a recent visit by my mother-in-law, she is currently obsessed with ice cream. It actually cracks me up because she has a little plastic ice cream cone that she carries around all the time, repeating "ice-skee" over and over again. Never mind the fact that she's had ice cream exactly twice in her life, and both times were soft serve, not scoops on a cone, but I guess it doesn't matter.
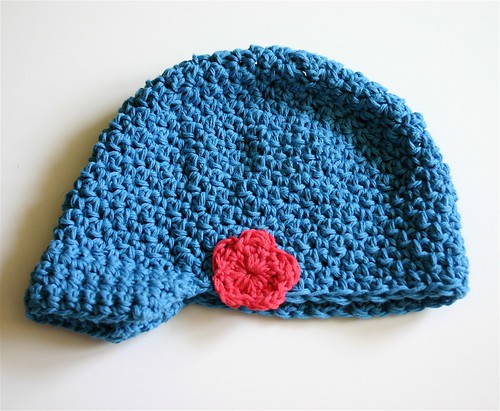
 I've been trying to work out a pattern for some hats for my Etsy shop. Here's my first try. I think it turned out pretty cute. T actually commented that he liked the texture. I was shocked that he'd even notice such a thing. I'm still experimenting with other textures, but I like the general shape of this one.
Well, after all the flurry of work getting my Etsy store up (even though there are only the three items), I kind of felt burned out. And between that and T working late all last week, I decided to take a short break from all crafting. But this weekend, I realized that E's school starts in a few weeks and I really needed to get on the ball about making her nap mat.
 As I mentioned before, her nap mat was going to be way more basic than the one I made for a friend. I managed to knock most of it out tonight, and I almost feel bad about how plain it is compared to the other one.
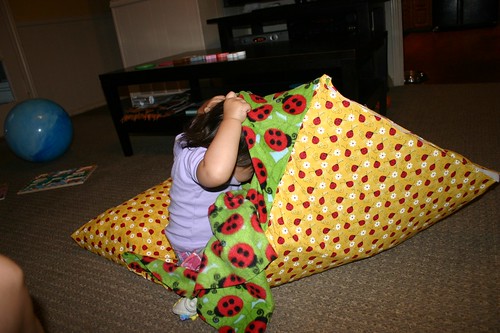
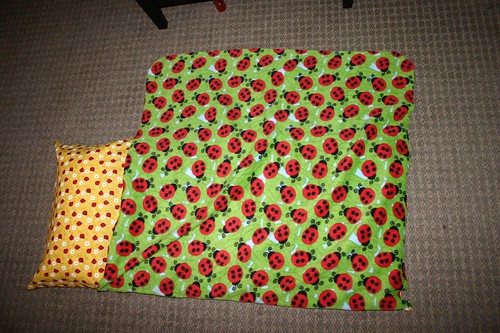
Basically, I took the super lazy way out and bought a Kindermat from Target. It's basically a vinyl-covered folding mat - kinda like a little gym mat, but a little cushier. Then I made what is essentially a giant pillowcase for it and put velcro at the very bottom to close the opening. I used a single layer of fleece for the attached blanket, and made a little pillow which I just stuffed inside the cover.
I think I may go back and make a separate segment for the pillow and attach it with button tabs. I also definitely need to add some sort of strap to hold it all together.
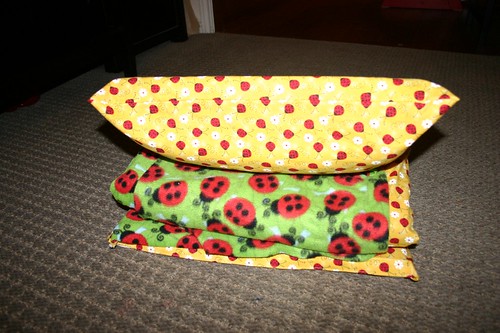
Anyways, here it is in all it's lame glory.
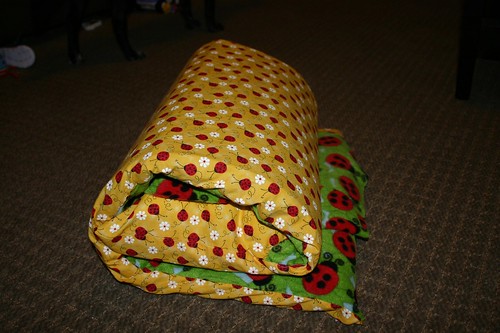
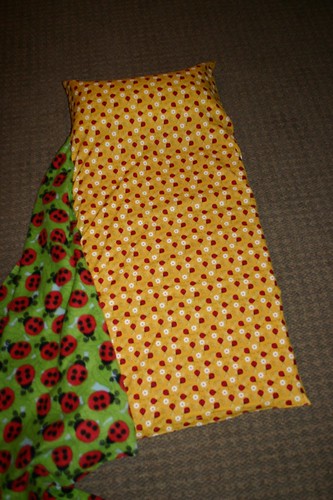
 And a shot of it folded (which doesn't work very well with the pillow shoved in there):
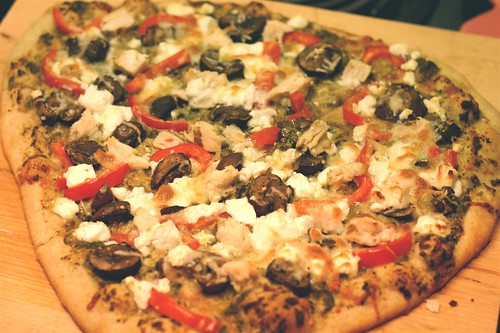
 It's homemade! Ah, I know, I'm cheesy. Ever since I started making my own pizza dough though, we've gotten to be a bit spoiled about pizza. It's hard to reconcile paying $15 for a one or two-topping pizza when T & I can each make our own with whatever we want for less than half that. And it usually tastes about a hundred times better.
Anyways, I just had to share some pics of the yumminess from last night's dinner. I made a chicken pesto pizza with baby bella mushrooms, red peppers, and goat cheese on a whole wheat crust, pictured above. It was so good, and yes, I made a total pig of myself and ate the whole thing!
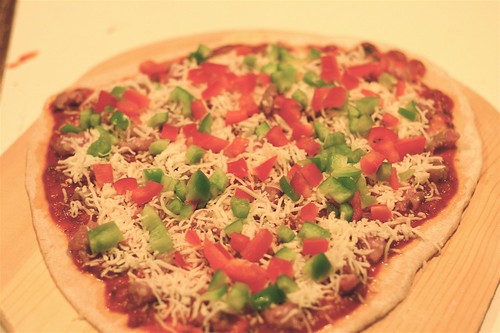
T's was a more traditional sausage and peppers (red and green) with red sauce and mozzarella. I only have a picture from before it went into the oven (he tore into it too fast after it came out). He ate all of his too. Since we only used half the dough, I think we're going to do a repeat for dinner tonight. Yeah, we're gluttons like that.

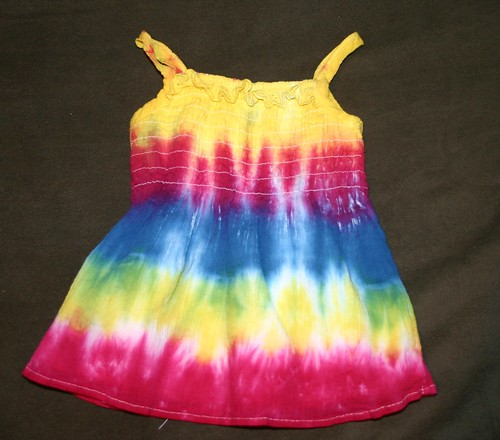
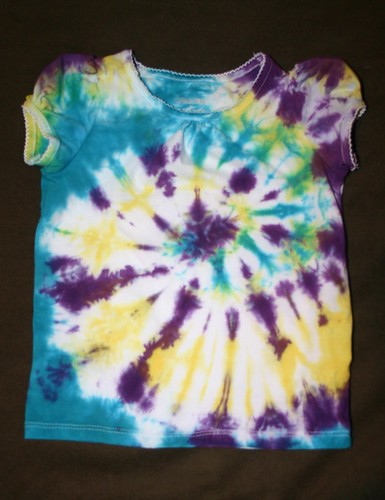
 I'm not normally into the hippie look (those of you that know me well have probably heard me curse 'those damn dirty hippies' more than once). But after seeing the tie-dye outfits that a friend of mine recently did, I couldn't resist. It's amazing how the things I find to be abhorrent on an adult are adorable on a child. Anyways, this is probably one of the very few crafty things that I've never really tried. So when the same aforementioned friend invited me over to tie-dye (and kindly and generously let me use all of her dyes and stuff), of course I said yes!First off, let me just say that I had no idea how involved this whole process was going to be. We spent a lot of time just getting the clothes prepped and ready to dye, and then the dyeing process itself was pretty messy. Definitely not ideal for little kids. While doing this, I managed to dye my leg with a few big blue patches, and E ended up with rainbow feet.The other thing tie-dyeing requires? Patience. Not something I'm very good at. Once you get all the dyes on the clothes, you have to let them sit for at least several hours, preferably overnight. I managed to wait until about 9pm, and frankly, it's a good thing I didn't wait any longer. It took me quite some time to get everything rinsed out till the water ran pretty clear and then I threw them in batches into the washing machine. There's no way I could've done this with a toddler clinging to my leg.But here are the end results. First up, E's stuff, which turned out fabulous! I think the heart one is my favorite.

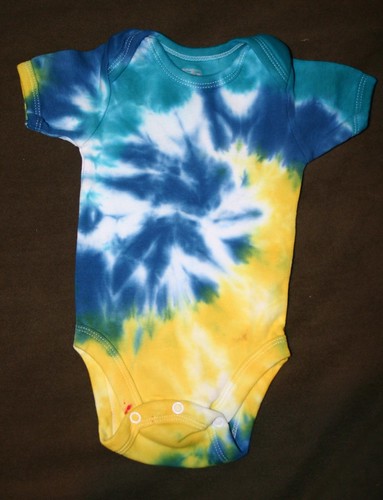
 Then a random newborn onesie that I thought might make a good gift for someone. It was supposed to be more of a swirl pattern, but well, it kinda went all wonky.
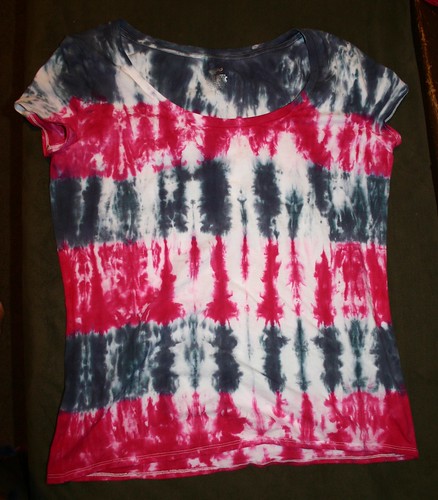
 Here's one I made for myself:
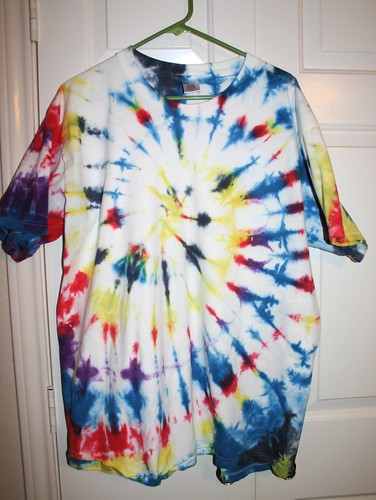
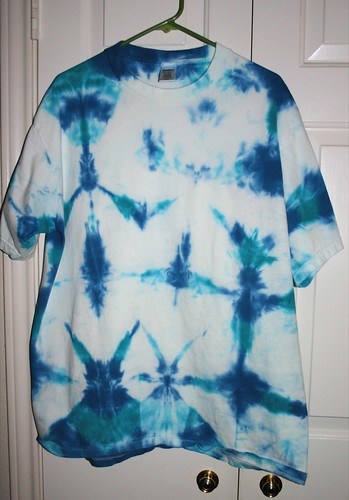
 And lastly, there are these two sad ones that I made for T. They really needed a LOT more dye, but you can at least sort of see the patterns I was going for. I told him that if he only wears them to mow the lawn, I won't be offended.


 I've been wanting to put together a set of fruit, but I keep getting stalled out or distracted. But here's a pear that's going to be a part of the set (this one is smaller than the last, enormo one), along with some strawberries, and maybe one or two other fruits, if I can come up with something good. I realized it's hard to have fruits that aren't all the same shape and/or color, and aren't impossibly time-consuming to make.