Showing posts with label how-to. Show all posts

Thursday, September 2, 2010

Finally, the nap mat tutorial!

Confession: I actually started this tutorial last summer.  I had all the materials cut and ready to go, but then time got the better of me and I never finished it.  Also, my child developed a sudden attachment to her old nap mat and rejected the idea of a new one (even after specifically picking out this fabric).  So I decided to not bother sewing a new one and shelved the tute for another time.  I didn't mean to wait quite this long, but hey, better late than never, right?
Anyways, two years ago, when I first decided to sew E a nap mat for school, I was surprised to discover how few tutorials were out there. The one that seemed to come up the most was this tutorial by Jenny Garland. I made one from that tute for my friend's daughter, but I had a really hard time with it - I will concede though that that had a lot more to do with my sewing inexperience than the tutorial itself. Difficulty aside, I knew that particular style wouldn't work for what E's school required (they had a lot of rules and guidelines). Long story short, I ended up coming up with something on my own in a backwards sort of way. You can check out the old one in this post.

Even though she is going to a new school this year and will not be using a vinyl Kindermat underneath, I decided to make one in a similar style to her old one, which is only lightly padded.  That being said, if you are concerned about the mat being directly on a hard floor or you just generally prefer something more plush, then you may want to try Jenny's tutorial instead. But if you want something more compact to take on trips, to friends' or relatives' houses, or to use on carpet or a bed, then this might be more up your alley. Another bonus of this nap mat? It's completely machine-washable!

When I came back to this project, I realized I forgot to account for the fact that kids have a pesky way of growing taller and my initial design is now a bit too short.  So to compensate, I have lengthened it a bit and added a detachable pillow which can be flipped down for littler ones, and then flipped up as they grow.  Hopefully, this will be the last one I make for a while.

So all that being said, here is the tute! I'm still rather new at writing up tutorials, so any comments or suggestions are appreciated!  Oh and I apologize in advance if the pictures are confusing - I realized after finishing the first one that I didn't take enough and took some of the next one I made.

This tutorial is for personal use only, please don't sell from it. I'd love a linkback too if you post what you make from it! ;)


Materials needed:
1 1/2 yards Top (inside) fabric
1 1/2 yards Bottom (outside) fabric (*see note at bottom if you want to use the same fabric for both sides)
1 yard fleece (for the blanket)
Poly-fil or other polyester fiberfill (for the pillow)
1 yard of 1" wide nylon webbing
Approx 12 inches of 1" wide velcro
1 package crib-size (45x60) quilt batting
1/8 yd lightweight fusible interfacing (scraps will work too since you only need enough to cut one 4" square and one 4"x10" rectangle)

*If you want both sides to be the same fabric, you can get by with just 2 yards TOTAL as long as your fabric is 45" or wider.  Be forewarned that most quilting-weight fabric is right on the cusp of 44/45" and will likely shrink a bit if you prewash, so you may want to go ahead and purchase the full 3 yards.

Instructions:
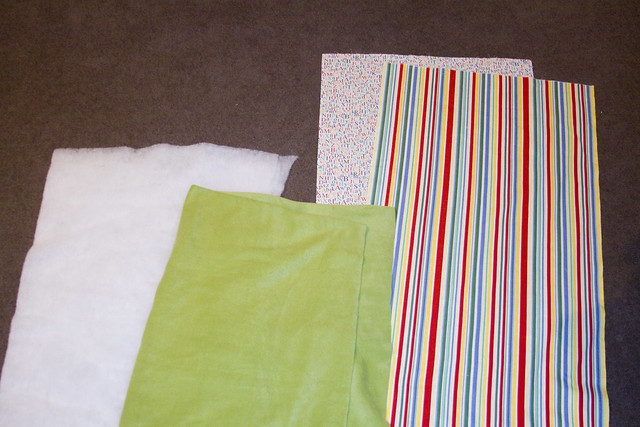
1. Cut one 22"x46" rectangle each from the top and bottom fabrics.

2. Cut a 36"x 44" rectangle from the fleece. If you like, you can finish 3 of the edges on a serger or with a overcast or blanket stitch, or you can leave them raw, like I did last time, since the fleece will not unravel.
photo

3. Cut a 4" square piece of the interfacing. Fuse to the WRONG side of the Bottom panel, 20" up from the foot/bottom (assuming your fabric orients in one direction) or short end, and 9" from either side.

4. Cut a 4"x12" rectangle of interfacing and fuse to the WRONG side of the Bottom panel, centered about 1/2" down from the top.


photo

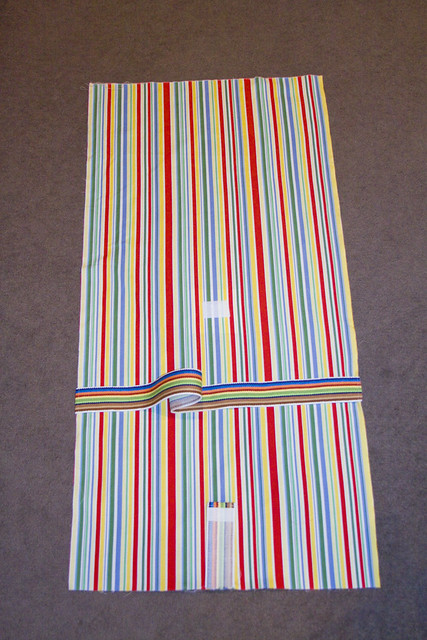
5. On the right side of the Bottom panel, in the center of where the 4" square of interfacing is, sew a 2" piece of the female side of the velcro. I usually sew around the edges and then reinforce with an "X" through the center.

6. On the right side of the Bottom panel, along the top, sew a 9" long strip of the female side of the velcro in the center of the where the interfacing rectangle is.

7. Cut 27" of nylon webbing for the strap. If you prefer, you can make a strap out of some of the leftover top or bottom fabric: cut a 4"x27" strip. Fold lengthwise and press a crease in the center. Then open it up and fold the two long sides toward the crease in the middle and press. Fold in half again and press again. Stitch 1/8" from edge to close.  If you are using quilting-weight fabric, I recommend interfacing the strap so it stands up better to wear & tear.

8. Place one end of the strap on each side of the RIGHT side of the Bottom panel, 14" up from the foot. Baste in place with a 1/4" seam allowance, leaving a 1/2" tail hanging off either edge.

9. Cut 6" of nylon webbing for the tab. (Again, you can make a tab from fabric if you prefer by following the same directions as for the strap.) Sew a 1 1/2" piece of the male side of the velcro to one end of the webbing.
photo
10. Place the tab in the center of the RIGHT SIDE of the Bottom panel (10 1/2" from either side), velcro facing up, and pointing in towards the center of the panel. Baste in place, leaving a 1" tail hanging off the bottom edge.

11. Cut two 22"x46" rectangles out of the batting. (You can do more layers if you want the mat to be thicker, but I probably wouldn't do more than four total. Alternately, you could also purchase thicker batting by the yard instead of the pre-packaged kind.) Line up the batting on the WRONG side of the Top panel and baste in place.

12. Flip over the Top panel so that the right side is facing UP. Line up one edge (the raw one, if you finished the edges) of the fleece blanket, along the edge of the Top panel also with the right side facing UP. Baste in place.
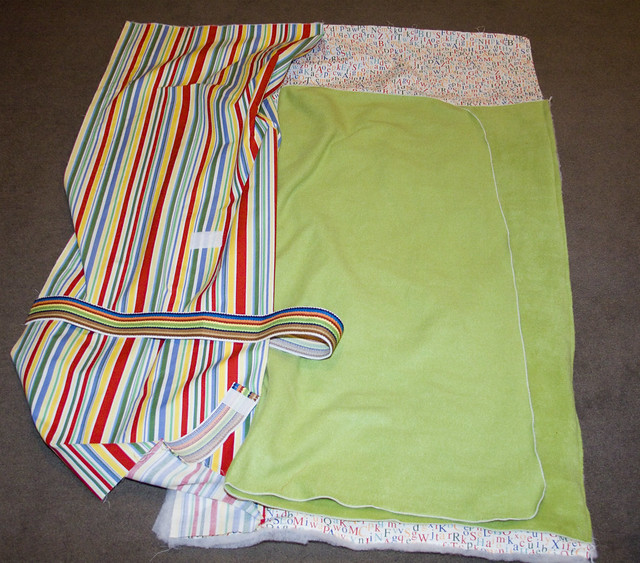
photo13. Note: you can skip all the basting if you like. I just think it helps keep everything in order. Just make sure that when you make a sandwich of your pieces, they are in this order:
A. Bottom panel (right side up)
B. Straps
C. Fleece blanket (right side down)
D. Top panel (right side down)
E. Batting

14. Starting 9" up from the bottom right corner, sew almost all the way around the edges of the nap mat, using a 1/2" seam allowance. Stop just after you turn the last corner, leaving a 6-8" opening on the side. Be sure to backstitch at either end.

15. Turn the entire nap mat, right sides out.  Stitch the opening on the side closed.  If you want the seam to be invisible, I recommend hand-stitching.  I'm lazy though and just ran it through my machine. ;)

16. Last, but not least, you need to make the detachable pillow. Cut an 18" x 25" rectangle out of whichever fabric you prefer. This will be the body of the pillow.

17. Next, cut an 11" x 9" rectangle out of either the same or the opposite fabric (again, whichever you prefer).  This will be the detachable velcro tab.  Fold it in half lengthwise, right sides together, so that you have a rectangle measuring 11" x 4 1/2".  Stitch along the short sides and turn the right sides out.


photo

18. With the right side facing down, place the tab you just made along one of the short sides, lining up the raw edges.  Fold the pillow fabric in half, wrong sides together, so that the short sides meet and you have a rectangle measuring 12 1/2" x 18".

19. Sew along the edges, leaving a 4" opening at one of the short ends. Turn the pillow right side out and stuff with polyfil.  Stitch opening closed either with machine or by hand. 

20. Sew a 9" strip of the male side of the velcro to the tab, about 1" up from the bottom.  You can adjust the placement if you want the pillow to be closer or farther from the body of the nap mat.


photo 

photo


Hope that helps someone out there! :)

Friday, August 21, 2009

Mini-bento

E recently decided to stop taking naps, so there's been a lot less time for crafting lately. So instead, I decided to have her help me try out some of my new bento goodies. I have a bunch of rice (onigiri) molds that I've been dying to try out. E has never been a big fan of rice (it almost makes me wonder how we're related), but she really enjoyed making these rice shapes the other day.
I realized after playing around with some of the mold the other night that most of them are going to make onigiri that are way too big for most kids to eat. But on a whim, I did pick up this cute set that makes little shapes.

IMG_10947 by you.

If you do a basic google search for onigiri, you'll find lots of links to recipes and how-to's. For the uninitiated, it's basically a big old ball of rice, usually vaguely triangular with something in the middle. I'm not a big fan of plain rice, or of the traditional Japanese fillings (like umeboshi), so I decided to wing it with some other stuff I had on hand. My two favorites of late? Furikake and pork sung.

I have nori furikake, which is basically bits of nori (seaweed), sesame seeds, salt & sugar. It comes in lots of flavors though, including salmon, shrimp, etc.

IMG_10948 by you.

So as I mentioned before, I don't often eat plain rice - usually I eat it with stir-fry, leftovers, or even as a super basic fried rice with just scrambled eggs, onion powder & sesame oil. But once in a while, I'll eat it with some furikake sprinkled on top. It's still rather bland that way though though, so I decided to add some pork sung too.

Again, for those that aren't familiar, pork sung is basically pork that's been dried with sugar, soy sauce and usually lard & MSG (hey, I didn't say this was healthy food!), and then ground up so it has sort of a fluffy, powdery consistency. There's also pork fu, which is similar, but a bit more stringy. I'll admit, it's not for everyone. T thinks it's weird and is not a huge fan, but I grew up eating it, usually with rice porridge, so it has a comfort food aspect that appeals to me.

It normally comes in a small tub, but since I'm a freak, I have the gigantor jar.
IMG_10949 by you.


Anyways, I mixed a bit of each with some warm white rice.
IMG_10951 by you.

Then I spooned rice into each of the molds, and E helped by pushing the rice down.
IMG_10953 by you.

Put the top on and press.
IMG_10954 by you.

IMG_10955 by you.

Then flip it over and pop out the finished rice shapes out! Voila! (Excuse the crazy background - E insisted I use this plate)

IMG_10956 by you.

IMG_10957 by you.

I was really surprised that E actually ate these since she's shown little interest in rice up until now. Although to be honest, she ate maybe 2 of the 4 shapes, and I ate the other two. I think she enjoyed making them more than eating them because she asks me every day now to make more. I'm going to work on coming up with some other fillings to mix in and hopefully these will become a regular fixture in her school lunches. Slight word of warning, these do dry out quickly if you leave them out, so either eat them right away or wrap them up and put them in your fridge for later.

IMG_10959 by you.

Sunday, July 12, 2009

Toddler pillow

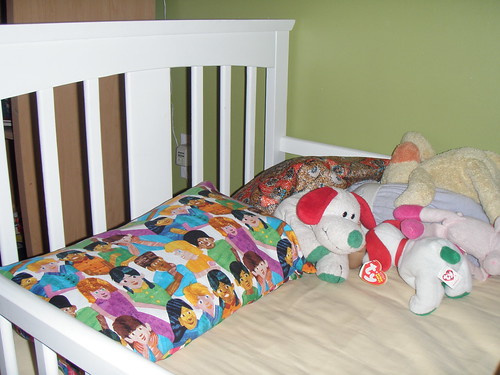
toddler pillow
I threw together a little quickie project for E while she was in her bath tonight.

Ikea ANJA pillowE loves having pillows for her "big girl bed," so we picked up this $2 pillow from Ikea a couple months back. It's the perfect size for her toddler bed. At the time, I didn't realize it was going to become her actual pillow that she uses every night. She also likes to drag it all over the house. I decided to make a little pillow case for it so it would be easier to keep clean. Also, being a cheap $2 Ikea pillow, some of the red & black dyes have bled, so it's not looking so pretty anymore.


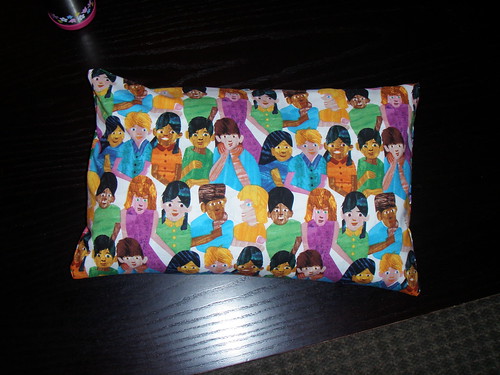
front
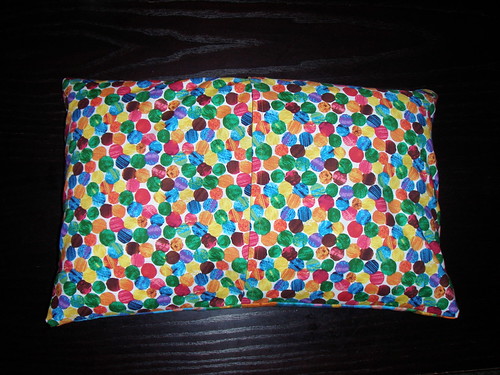
I decided to do an overlapping envelope-style for the back, just to keep the pillow from falling out too easily.

back
In case you're curious, a little backstory on the fabric I used:
Those of you with kids will probably immediately recognize the print as the children from Eric Carle's Brown Bear, Brown Bear, What Do You See? Apparently, you can buy Eric Carle fabric. E spotted a fat quarter with the children on it when we were in a fabric store last month and went crazy for it. After she dragged it all over the store and even put it in her mouth, I felt compelled to buy it. Hrmph. But she really seemed to love it and has been playing with it, using it as a doll blanket, among other things, and she refers to it as "my fabric."

I wasn't sure what I was going to do with her fabric until last week, when she spotted another Eric Carle print, this time from The Very Hungry Caterpiller (she refers to it as "the balls). I figured what the heck and bought it too.

It actually me longer to figure out the math on how I needed to cut the pieces than it did to sew the pillowcase. But for anyone interested in making one for this specific pillow, here's what I did:
I cut one 18"x12" piece for the front of the pillow.

For the back, I wanted to cut two 11"x12" pieces, but I ran into a minor problem. Fat quarters are generally around 18"x22" and once you wash them (I almost always pre-wash), you lose a bit to shrinkage. So I fudged a bit and ended up with two 10 1/2"x12" pieces instead.(*see note below)

Take one of the back pieces and on the 12" edge, turn it about 1/2 inch and press, then turn another 1/2 inch and press again. I used to be lazy and skip using an iron (I'd just finger-press), but I got tired of wonky seams and edges so I'm now an ironing-convert. Sew down the turned edge (I used a 3/8" seam because that's what I get when I line the edge of the fabric up with my presser foot). Repeat for the other back piece.

Then I laid the large front panel on my table right-side up and lined up the two back pieces on top of it, right-sides down, so that the outer edges lined up and they overlapped in the middle. Pin all around. I also put a couple pins in the middle of the overlap, just to keep it all straight.

Sew around the entire edge (again, I used a 3/8" seam, but 1/4" would be fine too). Clip the corners and turn out. I reinforced my seams with an overcast stitch, but you don't necessarily have to do that.

*Honestly, 10 1/2 inches was really cutting it close, and if you have a particularly fluffy pillow, you may end up with some gapping at the overlap. If I make another, I'll probably cut 12"x12" pieces, just to be safe. Unfortunately, that rules out using fat quarters unless you have an extra. Or alternatively, when you press down the edges, you could make the turns much smaller, like 1/4" or even 1/8".

Friday, November 21, 2008

Another random Chinese food post

I've been craving home cooking lately, so the other night I decided to make one of my all-time favorites, green onion pancakes. I guess technically, they're not really pancakes, more like flatbread, but that was what my parents always translated them as, so whatevs.

It's a pretty easy recipe. My grandma used to eyeball everything, but my mom managed to get written amounts for me. I'll list the entire ingredient list at the end. In my opinion, you really need a stand mixer to make this. You could do it by hand, but it's much much more tedious. With my KitchenAid mixer, I threw the dough together in about 10 minutes. It needs to rest for about 30, and then there's another 10-15 minutes of prep after that, so you'll want to start a good hour ahead of serving time. Or you could make it earlier in the day and just throw the dough in the fridge till you're ready to cook.


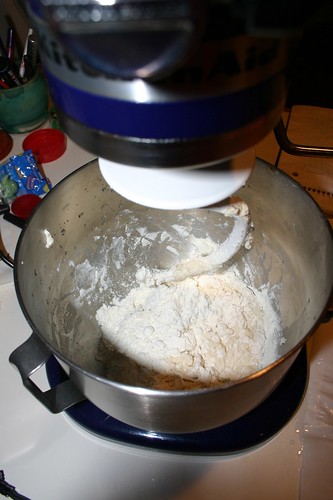
In your bowl, start with 2 cups of all-purpose flour. Stir in 1/2 tsp salt, and a pinch of sugar (optional). Add 1 cup of boiling water (I cheated and used very very hot tap water). Mix on low until it starts to come together. Then add another cup of flour. Continue to mix and slowly add 1/2 c. of cold water, stopping when it reaches the right consistency. You want it to be soft, but not sticky. If it's too sticky, you can add a handful or two more flour.
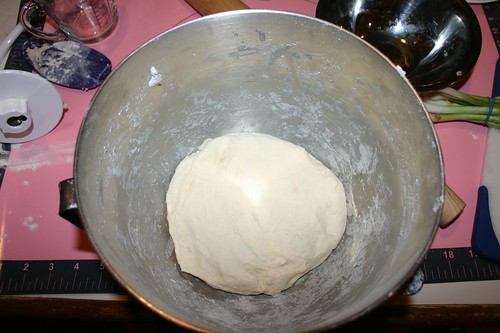
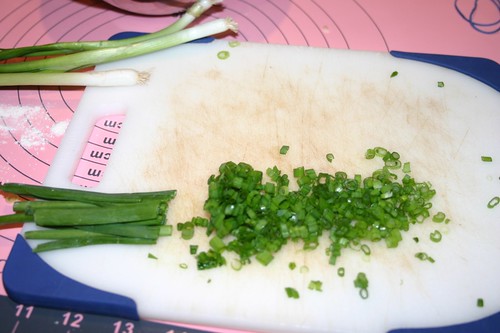
Mix the whole thing on medium speed for about 5 minutes, until the dough has a smooth texture. Roll the dough into a ball, cover, and let rest for at least 30 minutes. While the dough rests, thinly slice 1-2 bunches of green onions. The amount you'll need can vary to taste, but I usually use at least 1 cup, chopped. I use the white and a lot of the green part too.

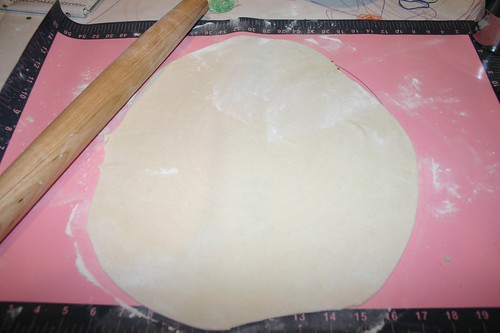
Back to the dough - divide it into 3 pieces and roll each piece into a ball. You'll want to cover the ones you're not using back up with a towel so they don't dry out. Now roll out one ball as thinly as possible.
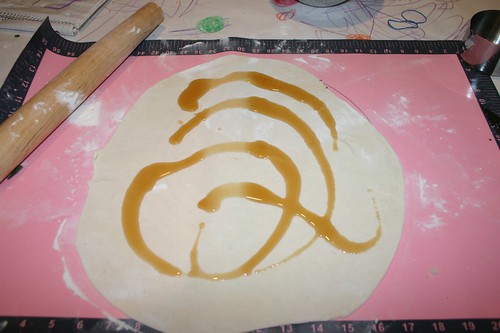
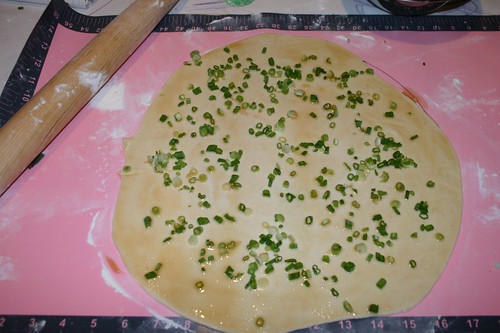
Pour a couple of tablespoons of sesame oil on the dough and spread it around the entire surface. You could use a brush, but I just use my hands. You really want to be generous with the oil.


Lightly sprinkle the surface with salt and then sprinkle on the chopped onions. Again, you can put on more or less to suit your own taste, but I think more is better. You don't want to go overboard though or the dough will be hard to roll out later.

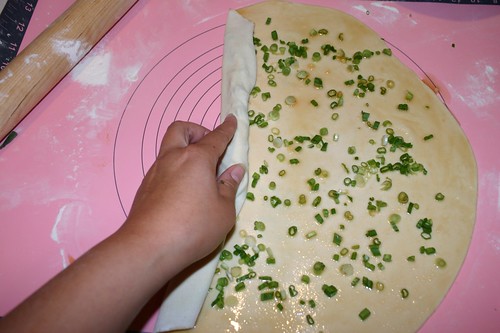
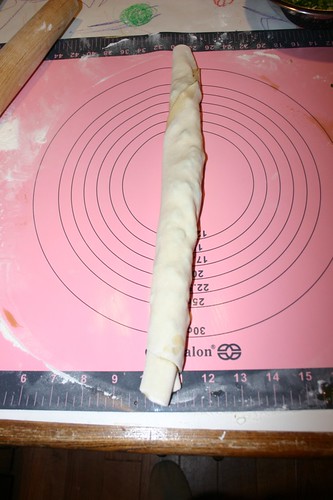
Now start at one side of the dough and roll the entire thing up, kind of like a jellyroll, so that you have a long tube.


Fold the sides in toward the center so that you have more or less a ball-shape. This rolling and folding is what is going to give you nice flaky layers when it's cooked.

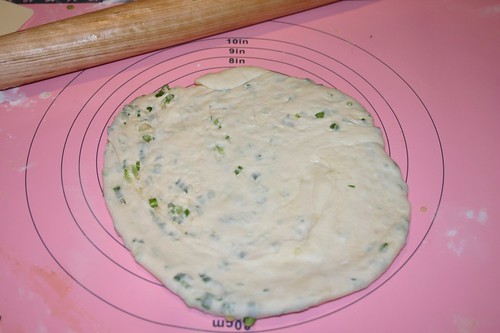
Now roll the ball back out again, this time to about 1/4-1/2 inch thick.

Heat an electric skillet to 375 degrees. You can do this in a pan on the stove too, you'll just have to keep an eye on the heat. Add 2-3 tablespoons of vegetable oil. You want to have a nice thin layer covering the entire bottom of the pan.

Now add your pancake and cook uncovered for 8-10 minutes, until the bottom starts to turn golden brown.


Flip and cook for another 5-8 minutes, until the other side is brown and cooked through.
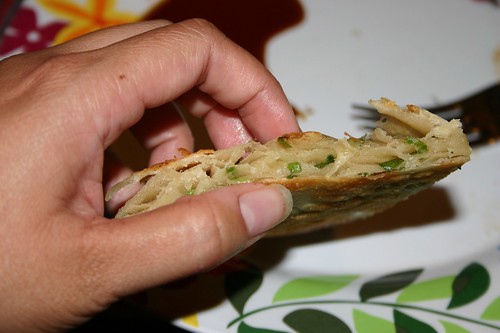
Here is the finished product, cut into wedges. Some restaurants deep-fry the dough, but I much prefer it cooked this way.


Here's a better look at the layers. Yum.

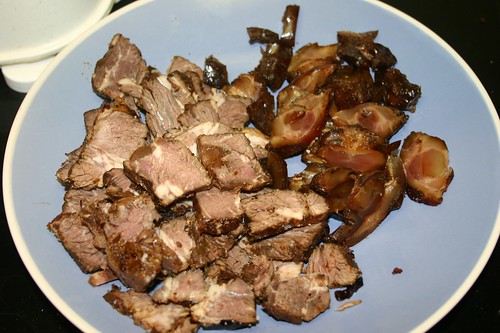
Most restaurants serve this dish as an appetizer with a soy dipping sauce. Growing up, my family often ate it as an entree with Chinese "red-braised" beef and tendon that's been cut into slices (which I made a few days before so I'll have to go into that dish more another time). I always loved peeling back the top layers of a slice and sandwiching some meat in there. T and I dubbed it the Chinese Gyro, haha!


Here is the entire recipe.

Green Onion Pancakes

Ingredients

3 c. all-purpose flour, divided

1/2 tsp. salt

pinch sugar (optional)

1 c. boiling water

1/2. c. cold water

1 bunch green onions, chopped (about a cup)

salt

sesame oil (1/2-1 cup)

vegetable oil


Add 2 c. flour, 1 c. boiling water, salt, pinch of sugar (optional) to mixer with dough hook. Mix.

Add additional 1 c. flour and mix.

Add approximately ½ c. cold water, until desired consistency. Beat on medium high 5 min.

Let dough rest at least 30 minutes, up to 3 hours.

Knead dough. Divide into 3 and roll each piece into a ball.

Using a rolling pin, roll out ball very thin. Pour a generous amount of sesame oil and spread over entire surface of dough.

Sprinkle chopped green onions and lightly salt.

Roll up dough into long tube and then roll tube back into ball shape.

Roll dough out again into a circle about 1/2 inch thick.

Heat electric skillet to 375 degrees

Add 2 tbsp veg. oil

Place pancake in skillet and cook uncovered for 8-10 minutes, until bottom turns mostly golden brown.

Flip and cook 5-8 minutes more.

Remove and cut into slices.

Serve immediately with soy dipping sauce.

Saturday, September 6, 2008

Hooray for rice!!

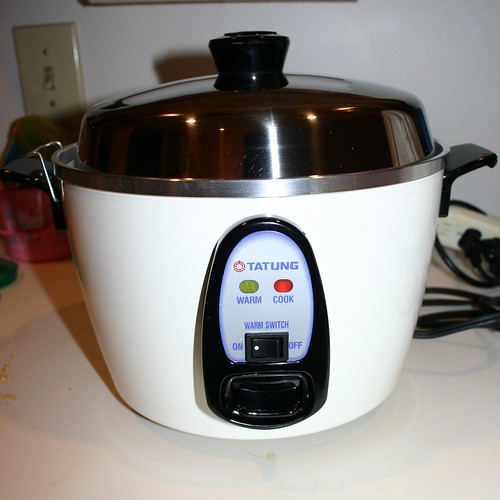
Woohoo! I finally got a new rice cooker from my brother this week! And to celebrate, I decided to make one of T's favorite meals: Stir-fried Celery Pork, or as he likes to refer to it, "CelPo" - yes, insert eye-rolling here.

A little backstory: I think my mom made this dish at least once a week when I was a kid, to the point where I got really really sick of it and never wanted to eat it again. Of course, after I grew up and moved out on my own, I totally forgot about it until a few years ago when T & I were visiting my mom and she made this. He freaked out over how good it was, so I started making it at home, and now it's part of our regular rotation.

This is actually super duper easy to make and you can make a million variations of it to suit your own personal tastes. You could easily use chicken instead of pork. A friend of mine adds ginger and fresh garlic. My mom always used to put sliced carrots in hers. I added sliced onions this time, which I didn't used to throw in there, but I like the flavor it adds.

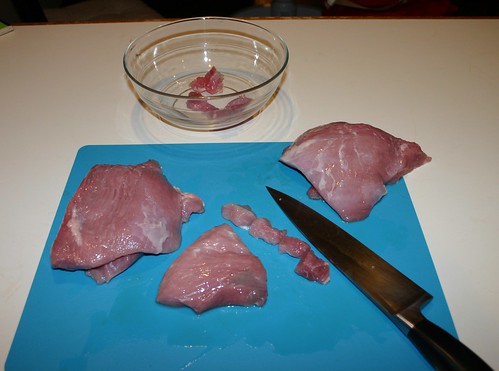
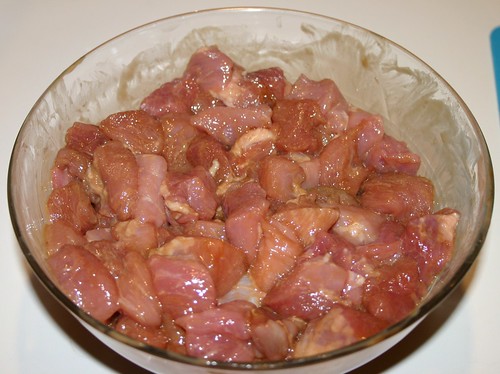
OK, so to start you need some pork. I usually use about 1 1/2 lbs. pork loin or loin chops. This time I had a bunch of pork "brisket" pieces that we got from Costco and needed to be cooked up, so I used that instead. Whatever cut you use, you want something that's going to be fairly tender since it's not going to be cooked for a long time. So take your pork and cut it into bite size chunks.


Put your cut up pork in a bowl and add soy sauce, a pinch of sugar, a sprinkle of garlic powder, and some cornstarch; mix it all up, preferably by hand. Now I usually eyeball it, but since I knew I was going to post it, I tried to measure out the amounts. I used roughly 1/8 cup of soy sauce and about 2 heaping teaspoons of corn starch. Basically, you want enough soy to coat everything without being soupy at the bottom, and not so much corn starch that the mixture seems dry. You could also use onion powder instead of or in addition to the garlic powder. This is pretty much the standard "marinade" my mom and I use for meat all our stir-frys.


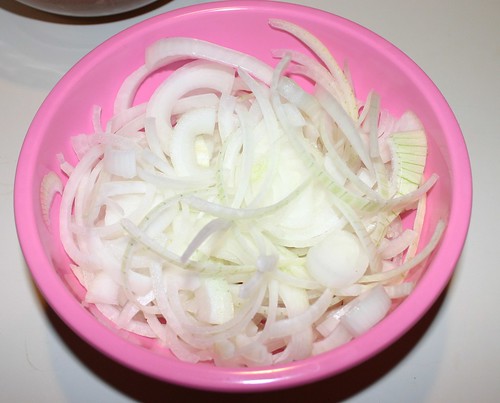
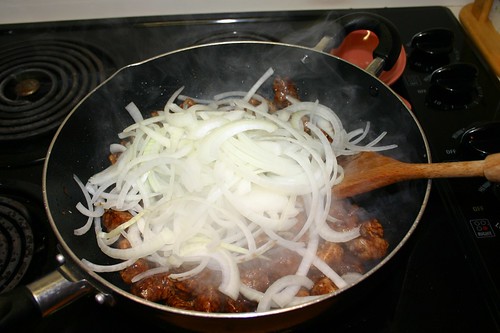
Next cut an onion in half along the stem and then slice into thin half-rings. I usually use half a medium to large onion, but I had a lot of meat this time, so I used the whole thing. Again, this is optional and you can adjust the amount to taste.


Chop up an entire head of celery - I think it comes out to around 3-4 cups?


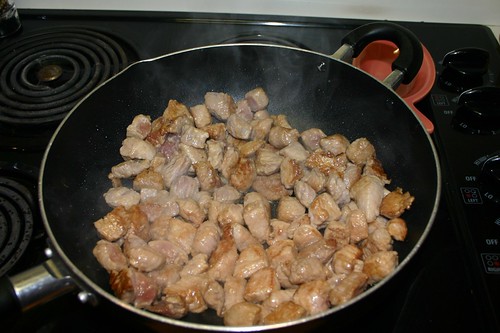
Heat a large skillet or wok on high - you want it very VERY hot, almost smoking. Then add a couple tablespoons of oil (I used canola) and add the meat. You want to get a nice brown sear on all sides of the meat, sorta like this.


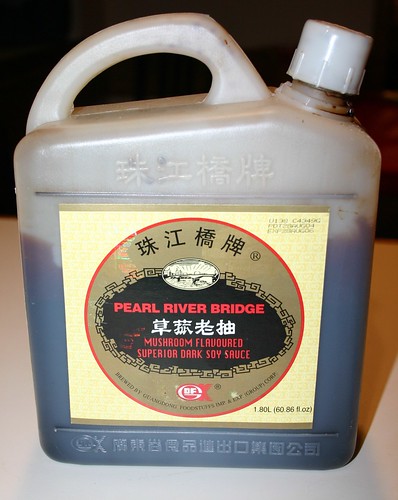
Then I add my secret ingredient. It's a dark mushroom soy sauce, which can be found at most Asian grocery stores. The dark color gives everything a richer flavor and color. Even if you don't like mushrooms, don't worry because it doesn't actually taste like mushrooms, at least not to me. And my mushroom-hating husband has never really noticed it either.

If you can't find it, no worries, just add a few tablespoons of regular soy sauce. Then add your onions, and let those cook for a few minutes.


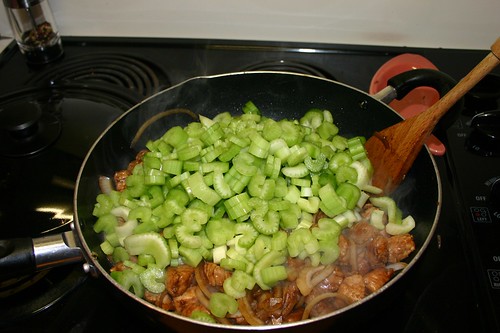
Now add the celery, give everything a good stir and then cover and let it cook for 5-6 minutes.


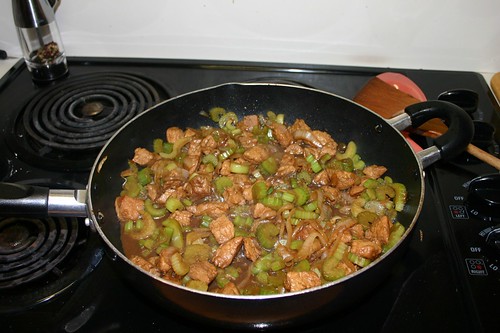
You want to the celery to be tender, but still have a bit of bite to it. This is more or less what it will look like. The best part? It makes its own sauce! Yum!


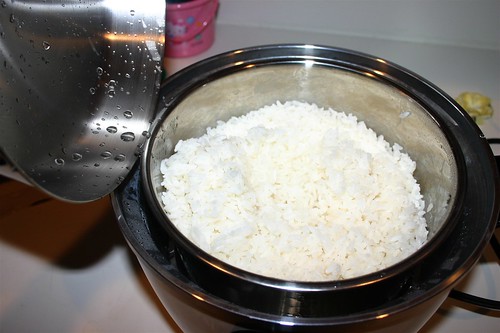
The amount of sauce you'll get depends on what veggies you have in there, but I find I get more sauce when I use onions. And now a shot of the first batch from my glorious new rice cooker.


T was so excited for this meal, he did a little "CelPo dance."


I serve this in a shallow bowl directly on top of the rice, usually with an extra spoonful or two of the sauce, and then just mix everything together and eat. Both T and I sorta made pigs of ourselves last night (no pun intended). I'm so glad to have a rice cooker back in the house. I feel like all is right in the world again.

Sunday, August 24, 2008

Potstickers - part 2

(For Part 1, click here.)

Sorry for the delay. I went to the store on Friday night, only to discover that they were out of the fresh skins. Grrr. So I had to revert to frozen, and since they were, well, frozen I couldn't make any more potstickers until Saturday.

For my second batch of potstickers, I decided to go with the more traditional pork/cabbage variety. This was pretty much the standard flavor in our family since as kids, my brother and I thought the leek chives were icky. What did we know?

This time I started out with 2 lbs. of ground pork. The Chinese grocery store near me has three kinds of ground pork: regular, lean, and fatty. I went with regular. I probably could've gotten away with lean, but again, you want a little bit of fat in there or they taste dry. Too much fat, and you're eating sausage. Bleh.

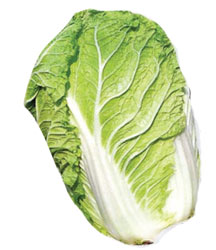
I also picked up a small head of napa cabbage. In case you're not familiar, it's oblong in shape, and has a milder flavor and crisper texture than the regular kind. I forgot to take a picture, but it looks like this. When choosing a head, I prefer ones that have nice green leaves, but I'm told that they're still good if they're mostly white. Just avoid heads with lots of little black dots on the white stalk part, near the bottom.

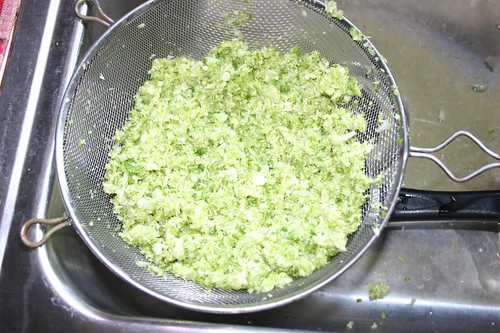
Basically, I took the whole head of cabbage, chopped it into large pieces and then threw the whole thing (or as much would fit in one batch) into my food processor and chopped it pretty fine. You don't want it to be liquefied, but you want it pretty small. Put all the chopped cabbage into a sieve or colander and sprinkle with a very generous amount of salt - like a whole tablespoon. Basically, this is going to help the cabbage release all of its excess water so that later, when you cook the potstickers, they won't go all soggy on you. I'd leave it for at least 5-10 minutes. Then rinse with water, squeeze all the excess out, and salt again - but use 1/2 as much the second time around. You don't want your filling to end up too salty.

To the ground pork, I added a couple tablespoons of rice wine, a couple tablespoons, and a about a tablespoon each of ground ginger and garlic. I'll admit, I cheated and instead of chopping fresh, I used 2 tablespoons of a chopped garlic/ginger paste that I bought at an Indian grocery store in a gigantic jar. It's very handy. Now mix everything, including the cabbage together. Your hands probably work best, but if you're squeamish about meat...well, you might not want to be making this recipe. Oh, and add salt & pepper to taste too.

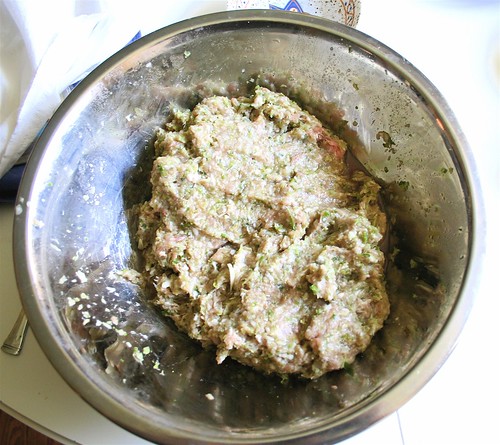
I underseasoned the last batch, so this time, I actually cooked up a tiny bit of the filling in a pan so I could taste for seasoning. But you don't have to go that far if you don't want. The dipping sauce will probably make up for any lack of salt. Here's a pic of the raw meat mixture. Again, not pretty, but it will be later.


I got into kind of a crunch and didn't get any more pictures of how to wrap them dumplings. Sorry. But I did take plenty of pictures of the cooking process. Again, the easiest way to cook these is to throw them in a pot of boiling water. But I think they are much tastier when pan-fried. I also feel compelled to mention that it drives me crazy when I order these at a restaurant and they're deep-fried. Totally wrong, bordering on travesty. But I digress.

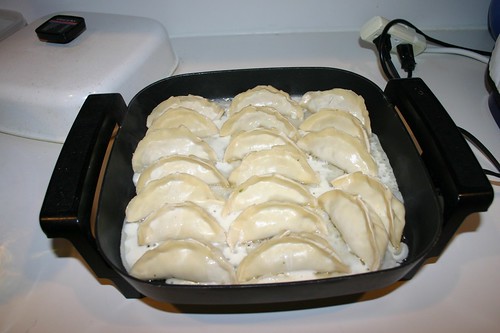
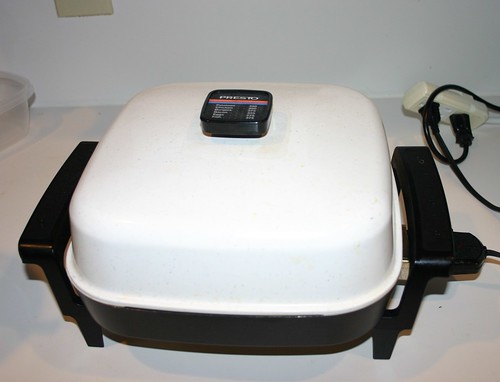
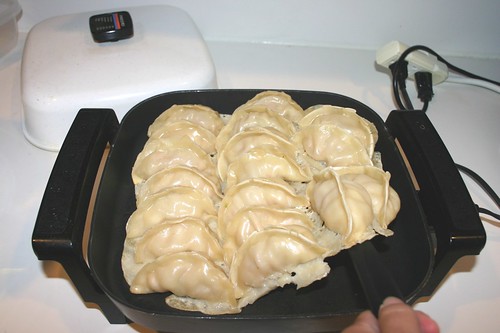
The best way to cook these is in an electric skillet. They're great because you can set the temperature and they pretty much regulate themselves. You can do these in a pan on the stove too, but it will probably require a little more monitoring and tweaking of the heat. Heat the pan to 350 degrees. Give it a while to get good and hot. Then pour in a tablespoon or two of oil and swirl it around to give the bottom a good coat. Put the dumplings in the pan. I prefer to line them up in rows. You want to make the pan pretty full too, like this:

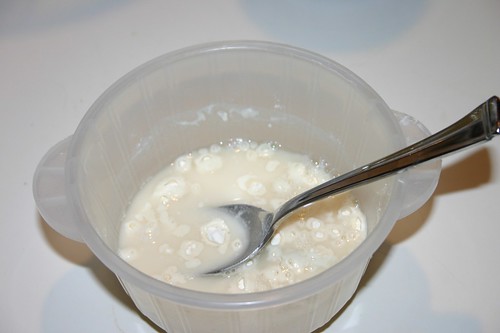
While those brown up on the bottom a bit, mix together a couple tablespoons of flour and about a half cup of cold water in a small cup or bowl. (You want it to be smoother than the lumpy mess in this picture)

Now pour the flour/water mixture into the pan, around the dumplings. You want to cover up any parts of bottom of the skillet that are showing.

Now put the cover on and leave it alone for a good 10-12 minutes. Resist the temptation to open it up and take a peek because you'll be letting all the heat out and they'll just take longer. Seriously. Don't touch.

The flour/water thing was my grandma's trick to making a nice crispy crust on the bottom of the dumplings since the water evaporates, leaving another thin layer of "dough" on the bottom. That was the real secret about these potstickers; they're really cooked more by steam than anything else, even though they're technically considered pan-fried. So you could almost convince yourself that they're not that bad for you. Almost.

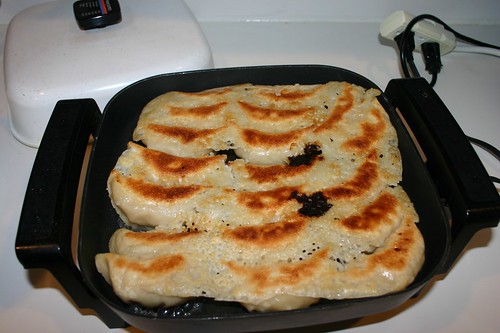
After the 10-12 minutes have passed, your dumpling should look something like this:


They should be all glued together in more or less one big piece on the bottom. Using a spatula, carefully ease up one edge and check to see if the bottom is golden brown. If not, cover again and leave it for a few more minutes.

Once the bottom is brown, you have the option of flipping the whole thing over to brown the top a little too. But you really don't have to unless you want. It should look golden brown, with a thin lacey crust on the bottom.


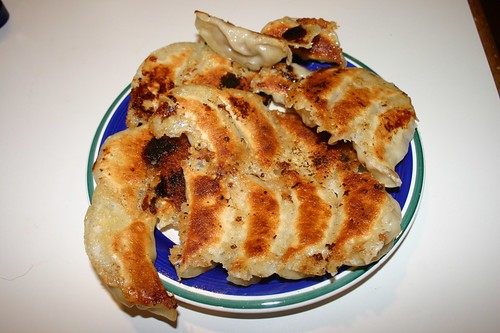
My grandma told me that they are actually supposed to be served "upside-down" this way, so you can see the golden crustiness. In our family, these were never just an appetizer. We used to eat whole plates of potstickers for dinner. Cooking them this way gives them a nice crunch on the bottom, but you still get the chewiness of the rest of the wrapper. T and I gorged ourselves last night, almost to the point of being total gluttons. They were so good though, if I do say so myself. Definitely one of my better batches.


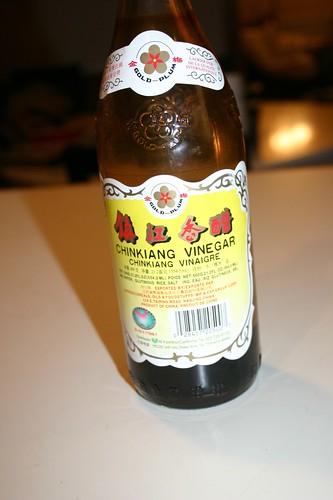
Oh, I almost forgot about the dipping sauce. Mine is pretty simple. It's more or less equal parts soy sauce and Chinese vinegar. I prefer Chinkiang, pictured at right. I don't know if it's a specific variety or what, but it doesn't taste like any other vinegar in my pantry, and it's what we've always used in my family. I also add a dollop or two of the ginger garlic paste, a splash of sesame oil, and (if I happen to have them) chopped green onions. Chili paste is also a good addition, if you like a little spice. Mix everything together and go to town.

LinkWithin

Blog Widget by LinkWithin