Showing posts with label halloween. Show all posts

Sunday, November 14, 2010

Halloween!

Apologies for the extended absence. Again.  October got pretty busy for me, what with Halloween festivities and all.  This year I took on the challenge of making not just a costume for E, but also one for her friend Sofia, and two more for a friend's daughters as well. 

E changed her mind about a half dozen times on what she wanted to be for Halloween, but she finally settled on a ladybug.  I was pretty happy, as I knew it would be fairly simple.  I used Simplicity 1726 for E's costume which was super quick and easy to make.  Outer is fleece, dots are felt, and it also has a silky black polyester lining.  I ended up whipping up a matching costume for her doll, as well.  Hee!

photo

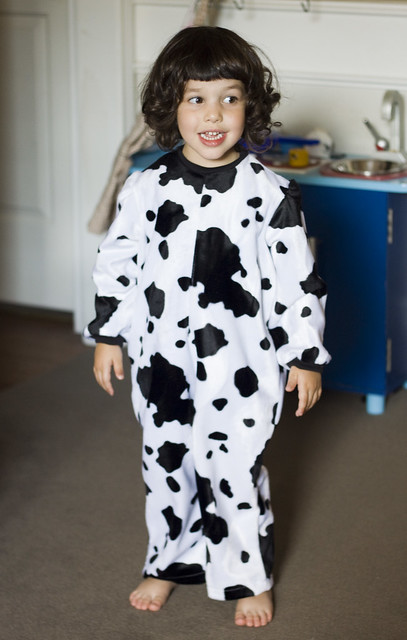
E's friend, Sofia, wanted to be a cow.  I made this jumpsuit from the same Simplicity pattern, substituting a velboa cow print for the fleecy lamb fabric.  Again, fairly straightforward to make, especially since it used velcro for the back closure.  I did sub ribbed fabric for the neck and sleeve bands, and I left the elastic off the bottom of the legs as well.
photo 

Here they are together at their school's Trunk or Treat event.  I had a bit of trouble with the hood, which turned out WAY too small, despite making it exactly according to their instructions.  Have I mentioned before that Simplicity's instructions tend to suck?  I ended up adding a flap to the bottom so that it would be long enough, and just leaving it open in front.
photo
The other two costumes were for a photographer friend of mine whose kids were doing a Wizard of Oz theme.  First up is her oldest daughter as Dorothy. Isn't she too adorable?!  It's loosely based off of McCalls 4948, but rather than have a fake bib attached to a dress bodice, I made it an apron-style dress that tied in back, and she put a simple white shirt underneath.

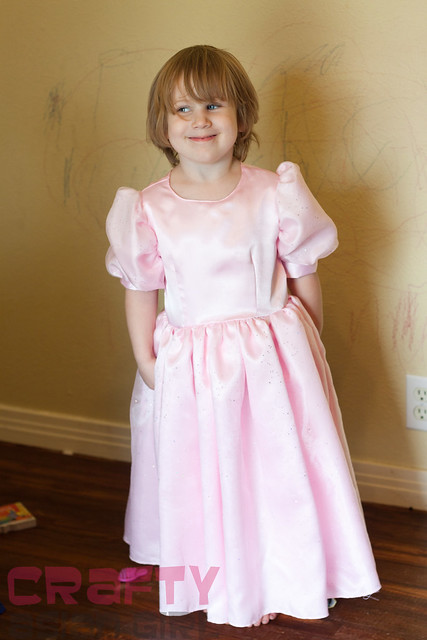
Her little sister was Glinda, the Good Witch.  This was made from the same McCall's pattern and was by far the most challenging costume of the four. It's hard to see in this picture, but the skirt and sleeves have a layer of sheer sparkly fabric overlayed on the pink satin.  This was my first time working with costume satin, and I must say, I am really NOT a fan.  If it weren't for my serger, I'm not sure if it would have been possible for me to make this costume at all!  The longer I worked with it, the more it shredded and fell apart. :P  But, I got it done with my insanity mostly intact and was pretty dang proud of myself.  I do love a good challenge. ;)
photo 

And here's the whole gang, minus one lion. ;)
 

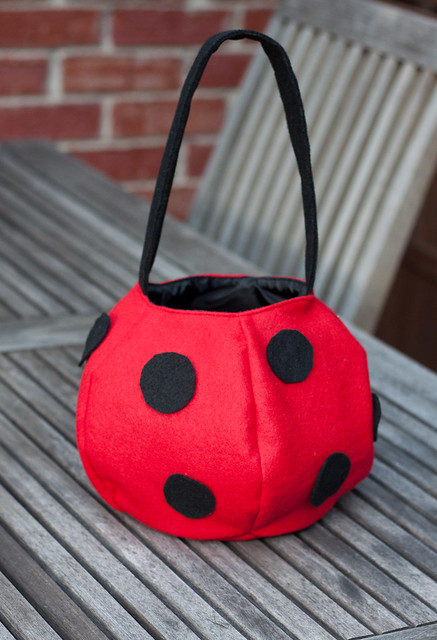
Of course, now that E has figured out that I can make things, she's started making requests.  The day before her school event, she asked me for a matching bag to go with her costume.  I've long admired the cute round ones from Pottery Barn Kids, and being a tad masochistic, I decided to try and replicate the shape for E's treat bag.  I made one from scrap first, just to get the shape right, and then used red felt for the outer and black polyester for the lining.  I'm pretty happy with how it turned out and I'm thinking I may take orders on custom ones next year, now that I have a pattern drafted.

photo

Sunday, November 1, 2009

A few FOs...

For once in my life, the lack of posts here has not meant I've been slacking! Just so busy working on so many various things that I haven't had time to finish enough to post.

Here's the lone Halloween-related item I made this year:
IMG_11755 by you.

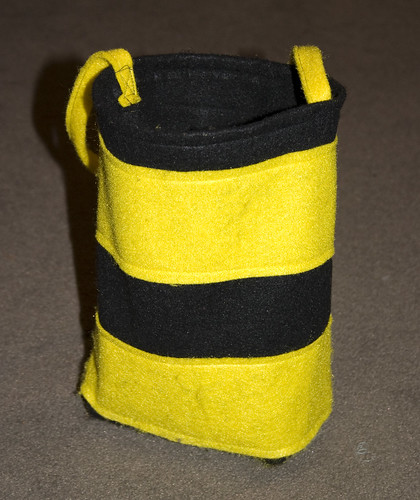
Sadly, it's not the costume, but the striped goody bag.

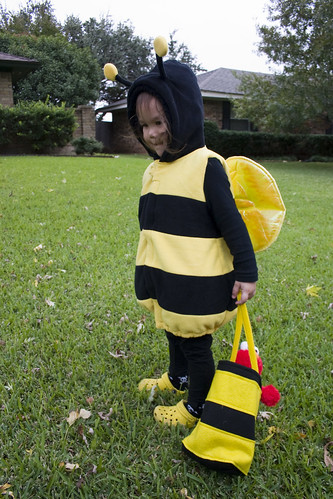
I opted not to make E's costume this year. She is notoriously moody when it comes to wearing the things I make her, and I knew that if I spent a lot of time sewing her a costume only to have her refuse to wear it, I would be crushed/furious. So instead, I bought her this simple, but cute bee costume from Old Navy. It was basically a fleece vest with wings and antenna on the hood, so not only would it be easy to get on and off, it would also be highly adaptable to any variations in weather.

True to form, as soon as I showed her the costume and asked her to try it on, she refused. This continued until literally minutes before the party we attended. I actually whipped this bag up the morning of the party after being hit by a wave of guilt that I hadn't made her costume. It's about as simple as it gets: yellow felt stripes appliqued onto black felt, then folded and sewn down two sides to make a bag. I did flatten the bottom into a gusset of sorts, but that's about as fancy as it got. I thought it made a pretty cute accompaniment to her costume, and it was WAY cheaper than the $12 Pottery Barn Kids version (although I'll concede that the PBK one is a lot cuter). If I'd had a little more time and energy, I probably would have found a way to add some wings, but oh well.

IMG_11825 by you.

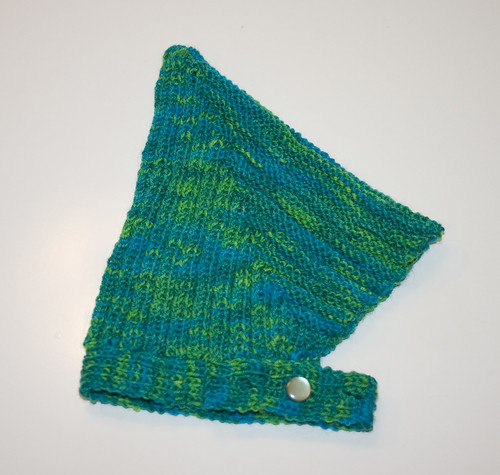
My other major accomplishment this week was finishing the Stella Pixie baby hat that a friend had commissioned for her newborn baby. I absolutely adore the Cascade Heritage yarn that I used to make it, and I'm more than a little excited that I have enough leftover to make something for E too.
IMG_11805 by you.

A couple minor warnings for anyone else making this: first of all, even knitted to gauge, it's big. Since this was for a newborn, I made this a full size smaller than the pattern originally called for and cast-on 8 sts less than the smallest size they had listed. I read this same complaint on a few other blogs, but of course, not until after I'd already started mine.

The other complaint is that the pattern I linked to on Etsy's Storque blog has an error in it (the buttonhole section towards the end), so I would recommend downloading the PDF link they have instead, which comes from the publisher. I struggled for a while with the buttonhole part, which it made no sense, before finally giving up and doing a different kind.

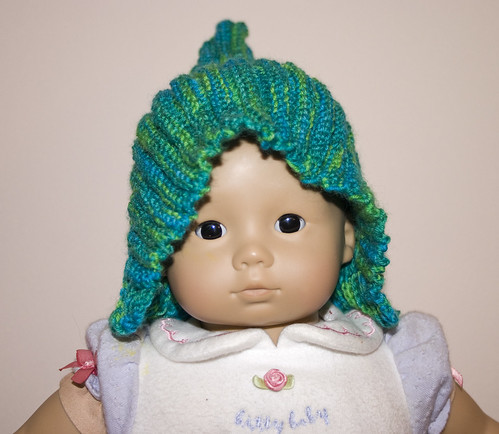
Here's a pic of it on one of E's dolls. It's missing the bottom strap portion, but you get a better idea of the pixie shape when it's on a head.
IMG_11803 by you.

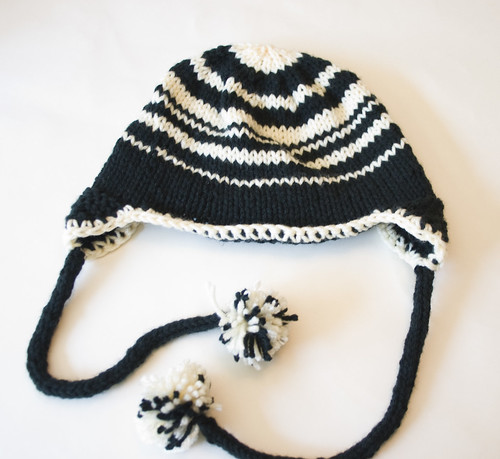
Last, and sort of least, there's this random stripey hat that I've been working on here and there for the last few weeks. I started it mostly to use up a few odds and ends that I had laying around, but I also wanted to try out an idea I'd seen where you knit the earflaps first and then incorporate them into the hat round. I hate picking up stitches almost as much as I hate seaming, and this was a nice compromise. This was also a nice chance for me to practice my "jogless jog" striping.

My original intention was to make a hat for E. Well, of course, it ended up HUGE so now I think it's going to be a hat for me, haha.
IMG_11807 by you.

Monday, October 12, 2009

I hate hot glue

I've never been big on bows. I think they look super cute on some kids, but they never seemed to go with my kid's personality. Plus, I just could never be bothered with them. However, lately my kid seems to prefer clips in her hair to ponytails, so I thought I may as well jazz them up a bit.

I recently saw this tutorial on how to make felt flowers and thought they'd make for cute hair clips. Super fast and easy and a great project to do in front of the TV. However, when it came time to glue them to the clips, I had nothing but trouble. Have I mentioned that I hate working with hot glue?

In the past, I'd covered some alligator clips with ribbon and again, had a helluva time getting the ribbon to stick properly. And even once I did get them on like I wanted, they ended up falling apart because E kept pulling them out of her hair and chewing on them. Ah, toddlers.

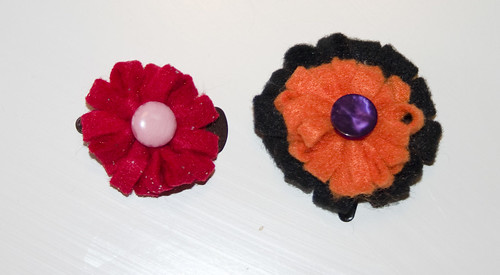
Anyways, after futzing with them for quite some time, here are two finished clips.
IMG_11540 by you.

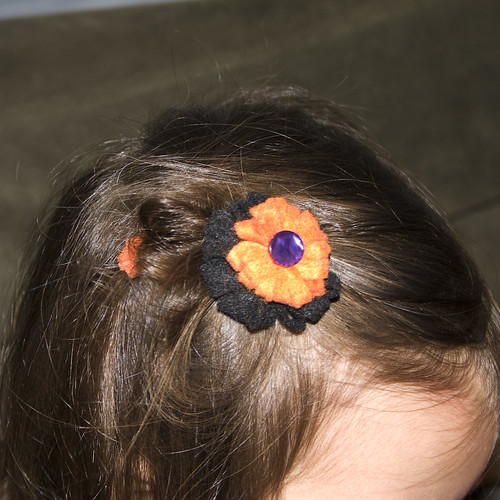
And a pic of E wearing the Halloween one.

IMG_11551 by you.

The flower promptly fell off the clip about 30 seconds after I snapped the picture. I didn't even get that far with the red one. *sigh*

A friend told me I need a high-temp glue gun (I have low-temp). And that I have to be very very generous with the glue. I'm thinking I may find some other kind of adhesive because I've had it with the stupid glue gun.

Friday, October 31, 2008

Happy Halloween!

I have to confess, I got super lazy this year. Even though I love Halloween and had big plans to paint and/or carve 3-4 pumpkins this year, I didn't end up getting to any of them. Instead, I copped out and bought the very cute Mr. Potato Head pumpkin kit, pictured above, which I sorta love.
I did manage to pull it together enough to make these little pumpkin crayons for a Halloween playdate we went to yesterday though. My original plan was to make these for E's class party, but I just ran out of time. It turned out to be relatively easy though. I broke up some crayons, melted them in a tin can double boiler, and then poured them into a candy mold that I sprayed with a little Pam, just to be safe. I'd say the most time-consuming part was cutting the labels off all the crayons with an razor blade and then breaking them up into small pieces. Oh and having the patience to wait for the crayons to melt completely. I'm very happy with how they turned out though and am definitely going to keep my eyes open for cheap candy molds now. I think these would make great little gifts or favors for a party.

And just for giggles, here's a picture of E in her costume as Rosie the Riveter.


And for reference, the poster

Tuesday, October 21, 2008

10 little pumpkins


I volunteered to supply the craft for E's "fall harvest" party at school tomorrow (they don't celebrate Halloween). It's nothing fancy, just stickers and pumpkin cut-outs. But I couldn't resist getting each kid their own little pumpkin too and decorating them with little sharpie faces. How cute are these?

I think I might have to go out and buy ten more to put on my mantle or something. I love Halloween.

Friday, November 2, 2007

Post-Halloween Withdrawal

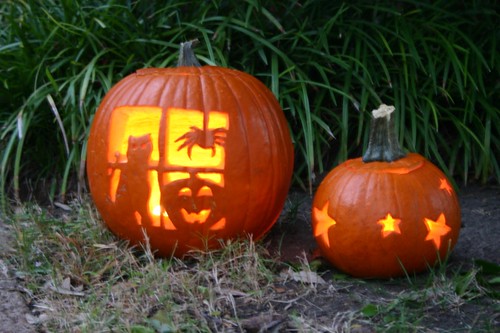
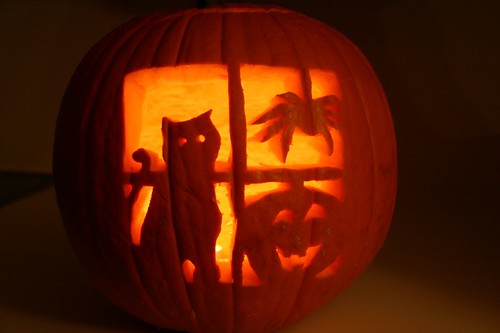
jack o'lanterns Here are both the finished products from Halloween night. Sorry the photo's a little on the blurry side, but I was too lazy to dig out my tripod. I'm really quite happy with how both pumpkins turned out, although next time, I will not wait till 9pm the night before to start carving.

We hardly had any kids come to the house for Trick or Treat the other night. I have to say, I was pretty bummed out about it because I was really looking forward to handing out candy and seeing cute kids in costumes. Not to mention that I had a mountain of candy (which of course, I'm now compelled to eat myself). At one point though, I walked out into the street and realized that most of my neighbors' houses were dark. I'm guessing that a lot of them either don't have kids or don't care to hand out candy and it probably wasn't worth it for kids to walk all the way down to our lonely little house. Oh well.

But just for giggles, here's some Halloween pictures that have nothing to do with craftiness:
<br />Baby KittyBaby Octopus

Wednesday, October 31, 2007

Happy Halloween!


I LOVE Halloween! Even so, I haven't carved a pumpkin in years. I think the last time may have been when I had a Halloween party in 1999. I've always admired the crazy picture-style jack-o'lanterns, so when I came across a set of tools and a pattern booklet for half off last week, I thought I'd give it a whirl. Of course, I always make the mistake of thinking that it's easier than it looks and chose a pattern that was three pumpkins out of four on the scale of difficulty. T thought I was completely crazy for even trying it. Still, for a first effort, I'm pretty proud of it. I also did a smaller one with just stars all over, but I want to tweak it a little before snapping some pix. Next year, I'm going to go all out and do like five of them.

LinkWithin

Blog Widget by LinkWithin