Showing posts with label bags. Show all posts

Sunday, November 14, 2010

Halloween!

Apologies for the extended absence. Again.  October got pretty busy for me, what with Halloween festivities and all.  This year I took on the challenge of making not just a costume for E, but also one for her friend Sofia, and two more for a friend's daughters as well. 

E changed her mind about a half dozen times on what she wanted to be for Halloween, but she finally settled on a ladybug.  I was pretty happy, as I knew it would be fairly simple.  I used Simplicity 1726 for E's costume which was super quick and easy to make.  Outer is fleece, dots are felt, and it also has a silky black polyester lining.  I ended up whipping up a matching costume for her doll, as well.  Hee!

photo

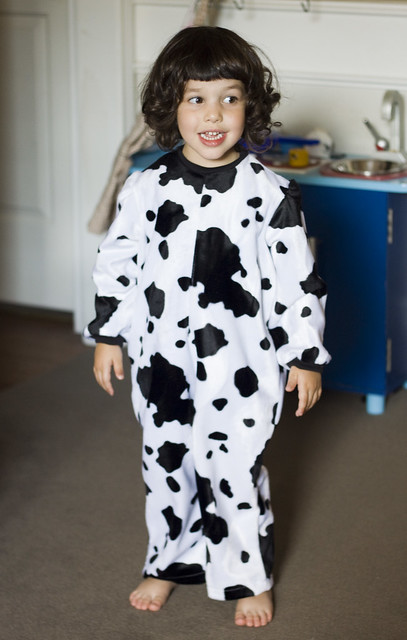
E's friend, Sofia, wanted to be a cow.  I made this jumpsuit from the same Simplicity pattern, substituting a velboa cow print for the fleecy lamb fabric.  Again, fairly straightforward to make, especially since it used velcro for the back closure.  I did sub ribbed fabric for the neck and sleeve bands, and I left the elastic off the bottom of the legs as well.
photo 

Here they are together at their school's Trunk or Treat event.  I had a bit of trouble with the hood, which turned out WAY too small, despite making it exactly according to their instructions.  Have I mentioned before that Simplicity's instructions tend to suck?  I ended up adding a flap to the bottom so that it would be long enough, and just leaving it open in front.
photo
The other two costumes were for a photographer friend of mine whose kids were doing a Wizard of Oz theme.  First up is her oldest daughter as Dorothy. Isn't she too adorable?!  It's loosely based off of McCalls 4948, but rather than have a fake bib attached to a dress bodice, I made it an apron-style dress that tied in back, and she put a simple white shirt underneath.

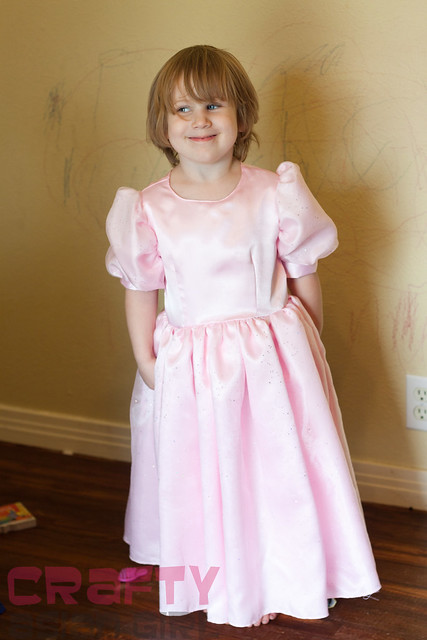
Her little sister was Glinda, the Good Witch.  This was made from the same McCall's pattern and was by far the most challenging costume of the four. It's hard to see in this picture, but the skirt and sleeves have a layer of sheer sparkly fabric overlayed on the pink satin.  This was my first time working with costume satin, and I must say, I am really NOT a fan.  If it weren't for my serger, I'm not sure if it would have been possible for me to make this costume at all!  The longer I worked with it, the more it shredded and fell apart. :P  But, I got it done with my insanity mostly intact and was pretty dang proud of myself.  I do love a good challenge. ;)
photo 

And here's the whole gang, minus one lion. ;)
 

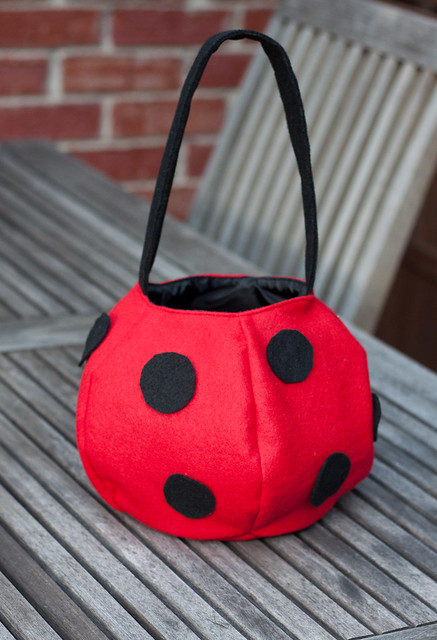
Of course, now that E has figured out that I can make things, she's started making requests.  The day before her school event, she asked me for a matching bag to go with her costume.  I've long admired the cute round ones from Pottery Barn Kids, and being a tad masochistic, I decided to try and replicate the shape for E's treat bag.  I made one from scrap first, just to get the shape right, and then used red felt for the outer and black polyester for the lining.  I'm pretty happy with how it turned out and I'm thinking I may take orders on custom ones next year, now that I have a pattern drafted.

photo

Saturday, July 18, 2009

A new "packback" for E

IMG_10555 by you.

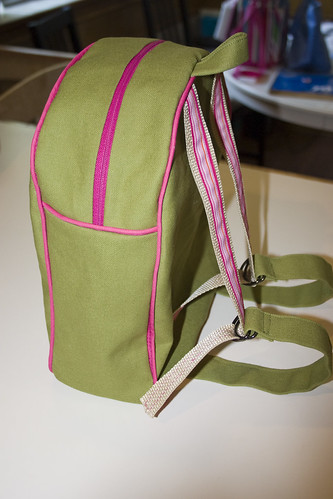
Despite saying I wasn't going to, I suddenly decided this week that I wanted to make a backpack for E after all. We're going on another trip soon, and I really wanted her to be able to carry her own books and toys. Plus, I know she loves "packbacks," as she calls them, and the monster one I made before just doesn't cut it for anything beyond home play - it really needs a velcro closure.

I've long admired the Dante Beatrix backpacks, but I couldn't ever bring myself to spend that much money on a toddler backpack, so I decided to make my own version after a friend turned me on to a pattern from Etsy. Believe it or not, except for some notions (zipper, piping, and D-rings), I bought nothing for this! All the fabric used was from my stash, as well as the nylon webbing and ribbon.

I'll be honest. This was not that easy to make. Matching the front & back panels up to the sides & bottom was difficult (especially the bottom), and I spent a fair amount of time ripping seams and re-sewing to make it fit together right. And just after I took these photos, I realized I had a big mistake at the bottom back edge and I think I'm going to have to spend a couple hours ripping the seams that I super-reinforced to fix it. *sigh*

I'm not super happy with the straps though; not sure if I misunderstood the directions or what, but I don't really get why the bottom ones are so long. I may go back and shorten them once E tries it on and I get a feel for how long they need to be. I'll also note that I have an absolute TON of this ugly nylon webbing, which is why it keeps turning up, usually sadly dressed up with some ribbon. It's hard to find webbing in fun colors, and I sort of regret being lazy and not making both straps now.

IMG_10556 by you.

I used some leftover home decor fabric from the Everything Bag. It's fairly stiff and holds its shape ok, but if I do make this again, I'm definitely going to add a layer of interfacing. I love the piping. It gives the bag a very finished, store-bought look, so even though it was a pain to deal with (I had to use a zipper foot to sew the bag together), I think it was worth it.

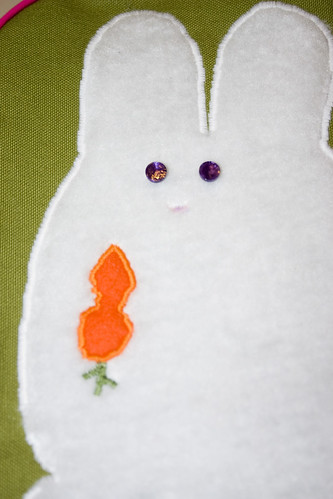
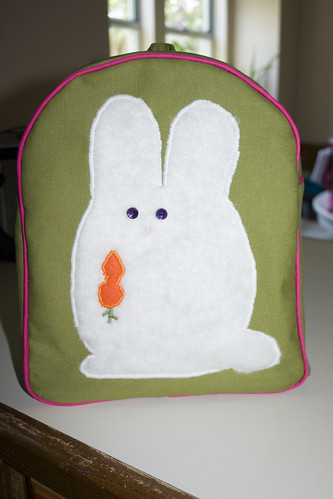
But the bag is more or les) done in plenty of time for our trip (I learned my lesson after the 4th of July top) and looks vaguely like the original that I aspired to. Here's a close-up of the bunny applique. He's made from some fuzzy furry material I had bought to "pimp" E's cozy coupe into a panda. His carrot is made of wool felt and the eyes are purple buttons. I'm debating whether to add a little pink to his ears.

IMG_10557 by you.

Thursday, May 28, 2009

Monster!


E has been talking a lot about backpacks lately (or as she calls them, "packbacks") so I thought I'd whip one up for her. I originally wanted to make either a bunny or a robot backpack since she's been obsessed with both lately, but I realized that they were going to require a bit more thought and planning. So instead, I came up with this monster backpack. The nice thing about monsters is no one cares if they look all wonky and ugly, haha! For instance, I misplaced one of the eyes I had cut, so I just snipped another out of a scrap from my pile. It doesn't get any better than that.

I made this out of fleece and felt and then stitched ribbon to some nylon webbing I had laying around for the straps. I think I may try and make a "nicer" one that'll be more finished-looking, and probably lined too.

Here's a shot of his 'mouth' with the flap up.


And E proudly wearing it with her boots.

Sunday, May 10, 2009

More weekend sewing

A friend and I ventured out to Fort Worth to check out this fabric store we'd heard about. I was a bit skeptical about taking an hour drive for fabric, but I have to say it was totally worth it! I didn't have anything particular in mind when I walked in, but one hour+ and $50+ later, I had the makings for a quilt!

Never mind that I've never made a quilt in my life. In fact, I'd previously said I'd NEVER take up quilting because I've always been intimidated by the precision required (read: cutting and sewing straight lines), not to mention all the steps to get a finished project. But of course, once I mentioned offhand to E something about making a blanket for her, she got very very excited. A little too excited - she was way too unfocused to express any kind of preference (shocking for a 2-year-old, right?), so I decided to pick on my own. Now if someone had told me before that you could buy the fabric already cut into squares, I would have been all over this years ago!! Cutting is easily my least favorite part of sewing.

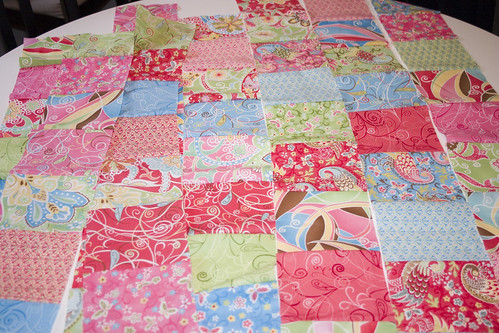
So with about 4 "charm packs" of some gorgeous Moda fabric, I managed to get all this pieced together at my mommy sewing night last night!


I'm really excited, albeit still nervous about how it's going to turn out. I had originally had the bright idea to do sashing inbetween each row, but I'm thinking now that maybe I should keep it simple. Although I did already spend the money on the fabric, so I keep going back and forth on it. *sigh*

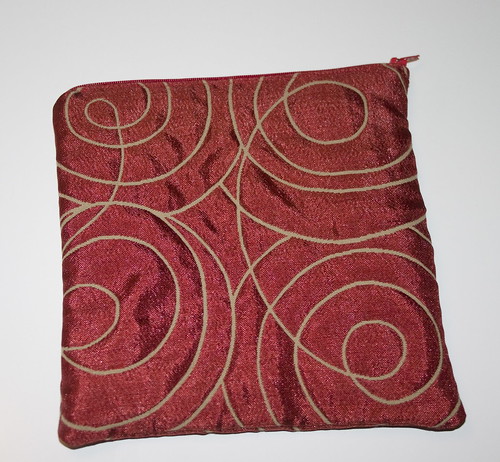
Last, but not least, I FINALLY got around to making a zipped lined pouch from this tutorial that I've been dying to try. If I'd had any idea it was going to be so easy, I would have done it ages ago! I see a lot of little makeup bag gifties in my future. Hee! This one is made with some leftover fabric to match the Amy Butler Birdie Sling I made a few weeks ago.


Sunday, April 26, 2009

Another bag


Yes, it's 2 Finished Objects in 2 weeks! Can you believe it? I have been wanting to try the Amy Butler Birdie Sling bag pattern for a while now and finally broke down and bought it last week. I didn't think I'd be up for making another bag so soon, but this pattern looked significantly easier than the Everything Bag, and a friend of mine wanted one, so I had her pick out fabric and I sewed it up.

I've come to accept that making anything but the most basic of bags is going to involve cutting lots of pieces, no matter how easy or complicated it is. Besides the fact that you just have a lot of parts of the bag to contend with (lining, exterior, pockets, straps), there's also usually some kind of interfacing involved which will double the number of pieces. And then the ironing - so. much. ironing. *sigh* It's frustrating, but a necessary evil.

In any case, I think I'm getting better at putting it all together, and I would definitely make another one of these. It was still fairly time-consuming, but fun to make. And I love the look of it. A couple friends are also making the same bag and it's very interesting to see how different it looks with different fabrics. This bag is made from home decor fabric - a kind of brocade-looking fabric for the main part of the bag, a thick woven upholstery-type fabric for the strap, and then a striped canvas-y fabric for the lining and pockets.


I was nervous that the brocade would be hard to work with, but once the interfacing was on, it was no problem at all. The strap fabric was a bit tougher. It was very heavy and hard to press and it also shed loose fibers non-stop. I ended up reinforcing all my seams with an overcast stitch because I was nervous about it falling apart with heavy use.

Other notes about the pattern:
I thought it was very clear and well-written, with good diagrams, unlike the last bag. I do think that the fabric amounts were a bit off, especially if you use home decor fabric, which is going to be wider than lightweight quilting fabric. I ended up with an absolute ton of the strap fabric leftover, so I'm probably going to make a matching pouch or something to go with the bag.

I love the shape of the bag, particularly how the pleats at the top stand out so nicely, as well as the rounded gusset at the bottom.


I'm looking forward to making one for myself, maybe later this spring, if I can decide what kind of fabric to use. I like the durability of home decor fabric, but I feel like short of spending more than $12/yd, there aren't as many fun options (I'm a total cheapskate, in case you didn't already know). I'm contemplating trying it out with some sari fabric next time I see it on sale.

Sunday, April 19, 2009

It's done! Hurrah!

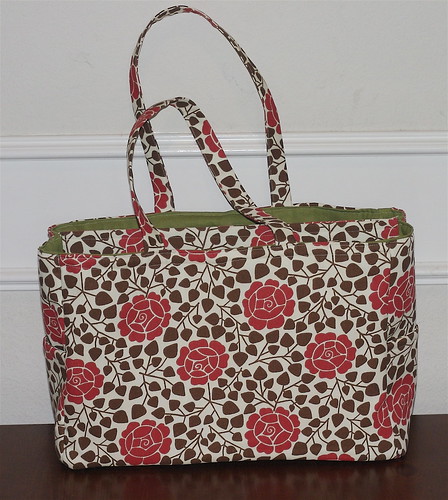
After that last post, I decided to take advantage of naptime and make the big push to get the bag done. After much grunting and griping (and I literally mean grunting as it was damn near impossible to force through my machine at times), here it is!

IMG_9529 by you.

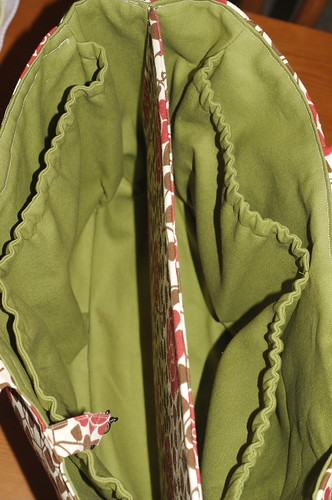
Inside:
IMG_9530 by you.

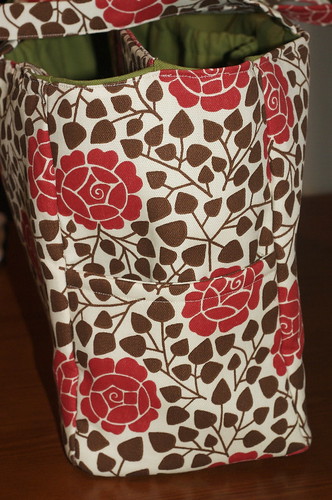
Outside side pocket (there's one on each side):
IMG_9531 by you.


So now that that's done, here's the rundown on the pattern. Keep in mind, I don't work much from patterns. I generally prefer to work out my own ideas.

The good:
It feels like a very solid bag. It's also HUGE, so while I probably won't use it for everyday, it'll be great for those days that I have a ton of crap to lug around. I also like that it has some padding to it.

The bad:
This bag is a LOT of work. As I mentioned in a previous post, there are 48 separate pieces to cut for this bag. Once you get past all the legwork of cutting and ironing, it can go together fairly quickly. The inside is definitely the trickiest part since you have to deal with the divider and pockets, with elastic.

The pattern itself could probably be written more clearly. I got stuck for a long time on making the center divider panel. There really weren't enough diagrams, and the ones they did have were confusing to me. I also wish that the book had included pictures of the inside, bottom, etc.


The ugly:
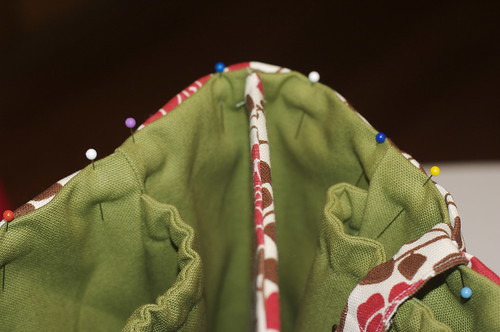
Again, as mentioned before, the center divider makes it really really difficult to stitch the bottom panel on the lining. Also, because of that divider, the way you have to attach the lining to the exterior is also pretty difficult to manage. I used about a bazillion pins, stitched very slowly, and I still ended up with uneven seams and stitching. I'm half-tempted to rip it out and do it again, but at this point, I just want to be done.

IMG_9523 by you.

Changes I made:
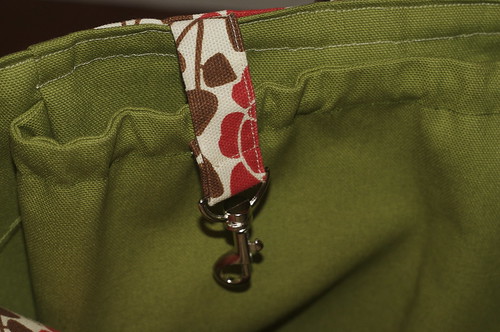
I made the straps longer by about 8 inches. I am not a small person and I knew there was no way 18" straps were going to stay comfortably on my shoulder. I also added a strap with a key clip, since the it's a pain to be carrying a kid and digging around for your keys all the time, especially in a giant bag.

IMG_9532 by you.

I also contemplated adding a wide panel at the top with a magnetic closure because I don't like how open the bag is. But I was getting really burned out on this project and just wanted it to be done, so I skipped it. But I may go back at some point and add it since I'd only have to rip the top seam. I wish I'd added a smaller pocket for my cell phone and maybe done elastic on the outside pockets too.

Tips for anyone else insane enough to want to try this pattern:
Definitely be as precise as possible when you cut your pieces. I used a cutting mat and rotary cutter and it made a huge difference. There is not a ton of room for error on this pattern. I had to really work to get the inside and outside to match up.

Also, my sewing machine has an adjustable presser foot, so I could ease the pressure. This was a huge plus when it came to sewing over the pockets and corners, where there were sometimes as many as 8 or 10 layers to sew through! If your machine doesn't have that, I'd consider using a walking foot. Oh and make sure you have a nice sharp needle.

Update on the stupid effing bag

I finally started sewing together the Amy Butler Everything Bag last week. I'd say I'm about 80% done with it. I think it was definitely way over my head in terms of skill level, but at least I'm pushing myself and learning something new, right?

The major major issue I ran into was sewing the bottom panel of the lining to the sides. It's the last piece you sew on for the lining, and because there the center divider is stiff and does not bend, it made it virtually impossible to smash down into my machine to sew on with the 1/2" seam allowance.

Here was my pathetic 1st and 2nd attempts before I gave up and just hand-stitched it.

A few other random notes for anyone attempting this project:
I went with the recommendations in the book on the interfacing and bought Thermolam Plus for the fusible fleece. Well, I come to find out it is NOT fusible fleece unless it says Thermolam Plus FUSIBLE on it. Sounds pretty obvious to most people, but I guess silly me assumed that if it that was the only one I saw at the store and it was on the fusible interfacing shelf, why wouldn't it be the right one? And I only figured this out after ironing and ironing like a moron and wondering why it wouldn't fuse, only to have a friend look at it, give it a quick feel and say, "That's not fusible. There's no glue." Grrrr. So of course, this added about 10 extra steps since I now had to baste the fleece to the exterior panels, and it doesn't lay right and I had to trim it, blah, blah, blah.

But once I got that done, by comparison, the outside was easy to put together since there were no pockets or dividers to mess with. All I have left is to match up the inside and outside and stitch them together. I'm debating on whether or not to add a tab with a magnetic closure on top, but I will likely skip it since at this point, I just want to be done. Here it is so far.


The lining is looking like it's a little bit higher than the exterior, so I think I may have to go in and rip some of that out and restitch it to get it to be the right height. And no, I can't just fold it down more because again, the stupid center divider is in my way. I am never ever making a bag with a divider in it again.

Friday, April 10, 2009

Tutus, bags and more dresses

Believe it or not, my lack of posts does not mean I've been slacking! I've actually been pretty busy rotating between a few different projects lately, and I even finished one the other day but have not had a chance to post just yet (that whole full-time mom thing has an annoying way of disrupting my craft & blog time).

Anyways, I bought the stuff to make E a tutu skirt a while back but sort of lost steam on it when I couldn't quite decide how I wanted to put it together. Well after getting annoyed with a different project I just started (more on that in a minute), I decided to come back to it. It's basically on layer of shimmery chiffon-y material, and then 3 layers of tulle. I do sort of like the look of the finished product, but next time around I'll definitely put it together differently. I screwed up the order (my punishment for not thinking it through before starting to sew) and it ended up taking me probably 3 times as long as it should have.


No action shot just yet, but only because the day that I gave it to E and let her wear it, her shirt was absolutely filthy and I couldn't bear to take or post any pictures of her looking like that.

Other projects I'm currently working on:
Another PortabelloPixie outfit, this time the "Gracie" reversible jumper. I'm not big on pockets or rick-rack, so it's going to be pretty plain. I am, however, totally perplexed by how the neck yoke is supposed to go on. I'm hoping that it'll make more sense once I get to that part. I had to temporarily put it on hold until I got a new ironing board after my old one went kaput.

I'm also making another shirred sundress, this time for the daughter of my favorite photographer. That one shouldn't take me more than a couple hours, once I get everything cut. Again, I've been waiting on getting a new ironing board. I have to say, for someone who hates to iron, I've become very reliant on my iron and ironing board. :P

I'm starting to have a love-hate relationship with my other big current project. I've never made a bag before and have always wanted to, so instead of sucking it up and springing for the Birdie Sling pattern, I decided to start with the Everything Bag from an Amy Butler book that a friend loaned me, even though it looked sort of complicated.

Well, "sort of" is a huge understatement. I've spent the better part of the last 3 or 4 evenings cutting out 48 freaking pieces from 2 different fabrics and 3 different types of interfacing. Yeesh. All I can say is, thank god for rotary cutters. I finally got a new ironing board last night, so I'm hoping that I can at least have all the pieces prepped tonight before I go to another sewing night tomorrow.

That's it for now! Hope to have some completed stuff to put up after this weekend, or at the very least some pictures of the work in progress.

LinkWithin

Blog Widget by LinkWithin