Showing posts with label gifts. Show all posts

Wednesday, January 19, 2011

Holiday Sewing

Every year, I set lofty goals about all the handmade gifts I'm going to make for Christmas.  And every year, I start waaaayyy too late to get more than one or two done in time.  This year really wasn't all that different, but I somehow managed to crank out quite a few sewn gifts this year. Fourteen, to be exact.  Most of these were not exactly what I had planned, but that's besides the point.

In a vain attempt to give me a reason to use up my giant fabric stash, I've been on a bit of a pattern-buying spree the last few months.  I decided to use some of my more recent purchases from Bit Of Whimsy to make gifts for some of E's little friends.  As a side note, I love her patterns.  They are relatively inexpensive, very straight-forward and easy enough for beginners. 

Her newest pattern line is called Wittle Whimsys and they are small stuffed animals.  Super adorable.  I bought the elephant/mouse set and decided to make most of the younger kids I know. 

photo

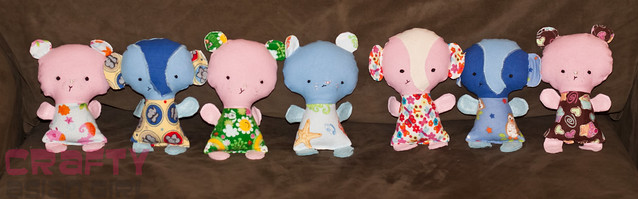
I used this as an opportunity to knock down some of my unnecessarily huge stash of flannel (from when I WAY overbought at a Black Friday sale several years ago).  Their arms and legs are made of felt.  I will say, making these tiny dolls was probably as time consuming as larger ones, mainly because there was so much cutting of tiny arms, legs, and ears involved.  I initially dreaded embroidering the faces on, and I even toyed with the idea of using buttons for the eyes instead, but then I got all paranoid about choking, plus I didn't care for how the buttons looked.  I will say though, once I got going on the embroidery, I was surprised to discover how much I enjoyed it!  It's actually making me think about taking up embroidery.  Because, you know, I don't have enough hobbies going on.  Heh.

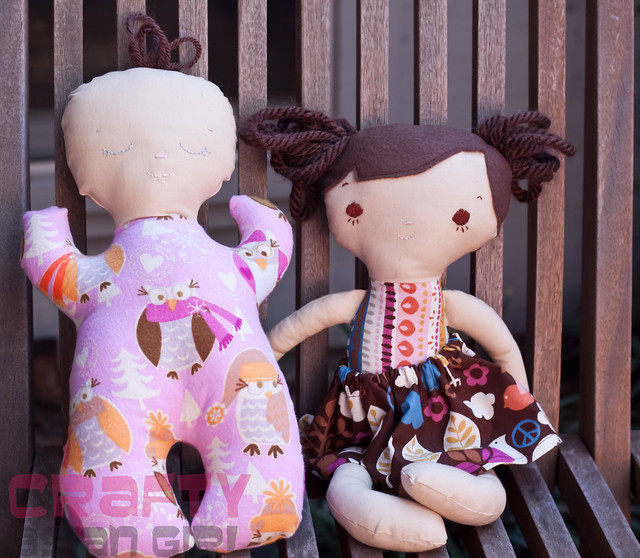
Anyways, I also decided to make bigger Whimsy dolls for my nieces, E and a few of her closer friends.  A couple of these were ones I actually started last year (had all cut out and everything) and never finished.  Oops.  Yeah, I suck.  But better late than never, right?

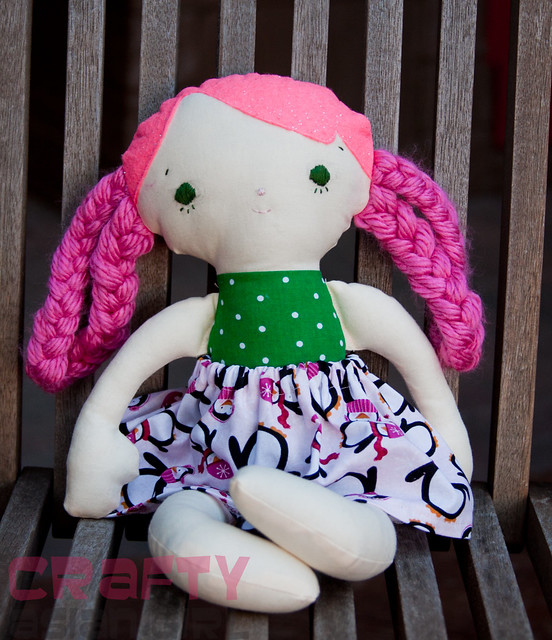
Here is a big sister/little sister set:

photo 

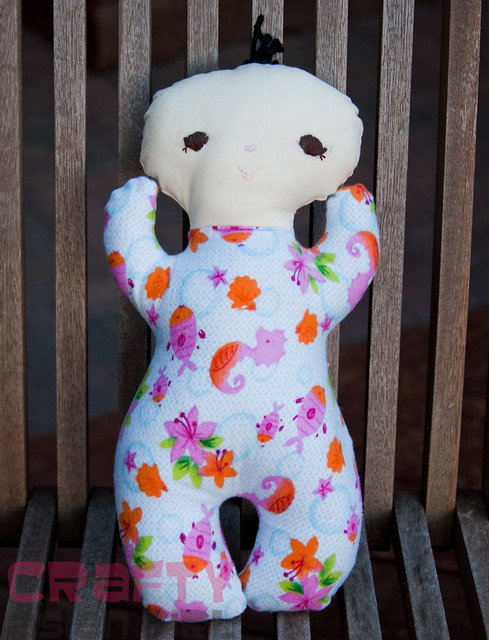
Another "Butterbean" baby doll (these were incredibly fast and easy to make - definitely going to file it away in the back of my mind for a quickie gift)
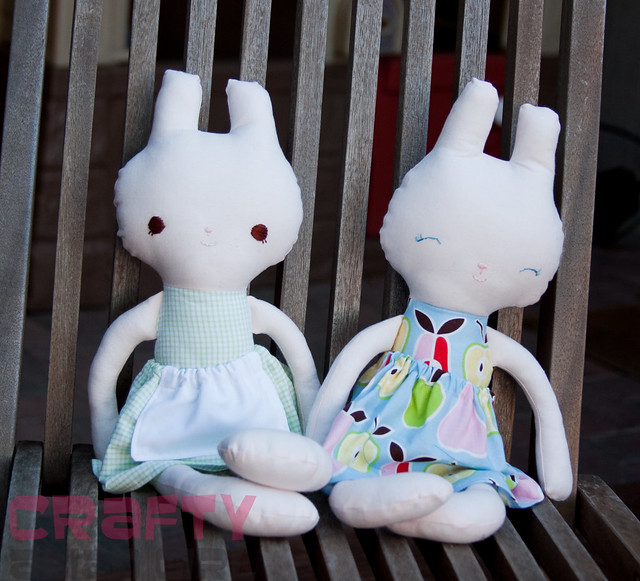
photo
Bunny dolls
photo 

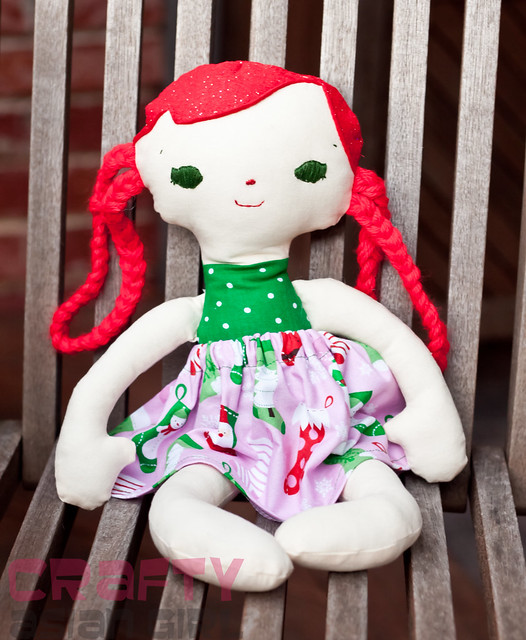
And a couple Christmas-themed dolls
photo 


photo 

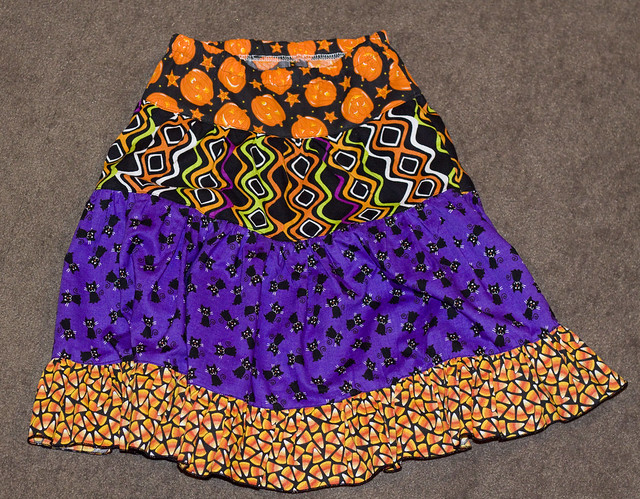
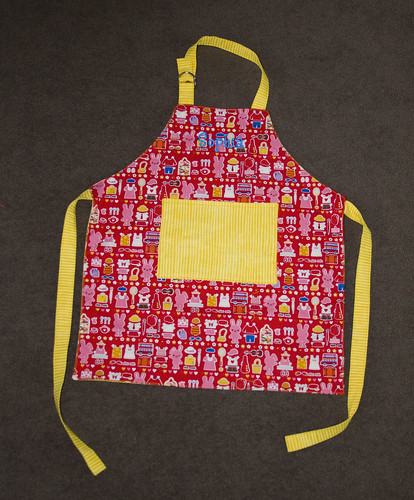
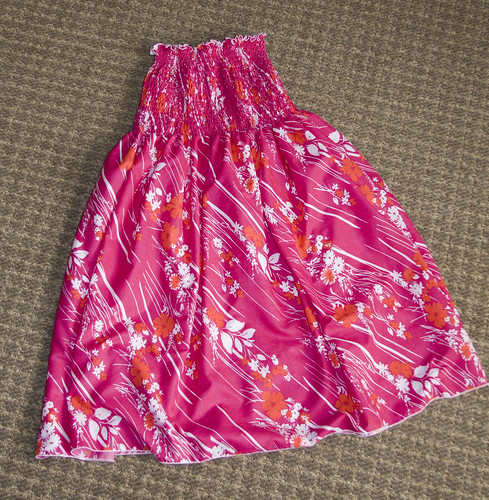
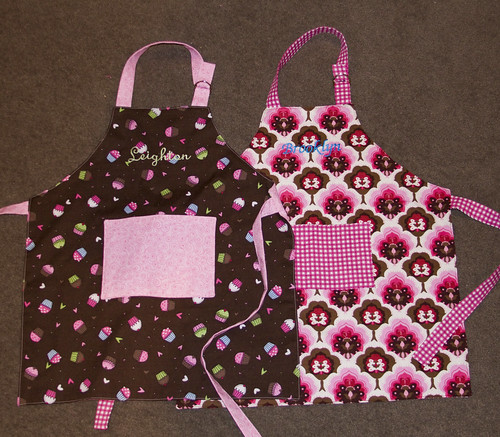
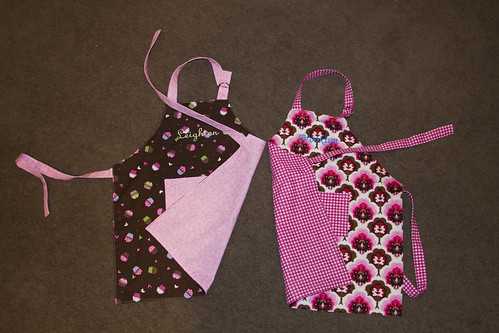
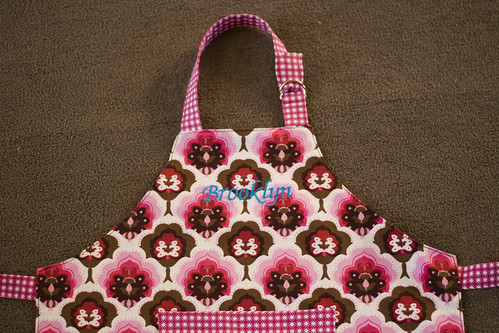
I also made a few gifts for my friends.  I originally had the brilliant idea of making hostess aprons for everyone, but I only got one done before I simply ran out of time.  I do love how this one turned out though. 
photo

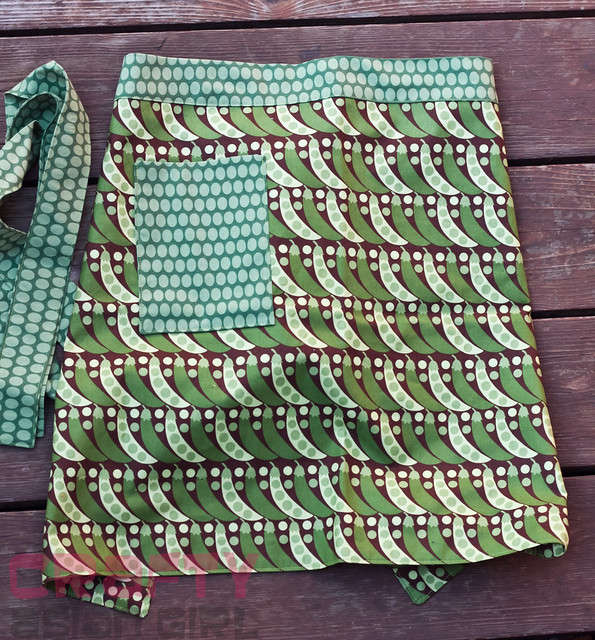
And for a few of you reading this, try to act surprised when an apron randomly shows up on your doorstep in the next month or so. ;)

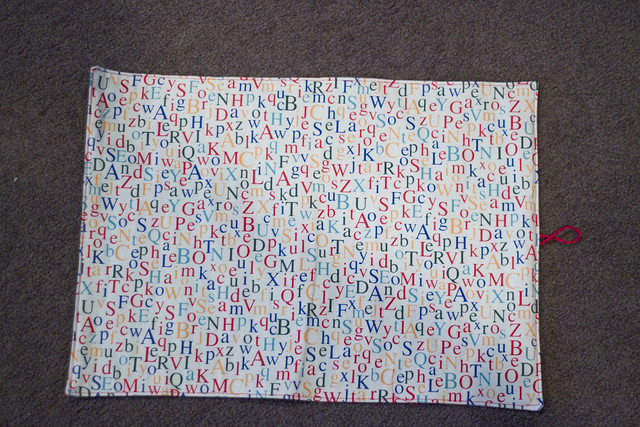
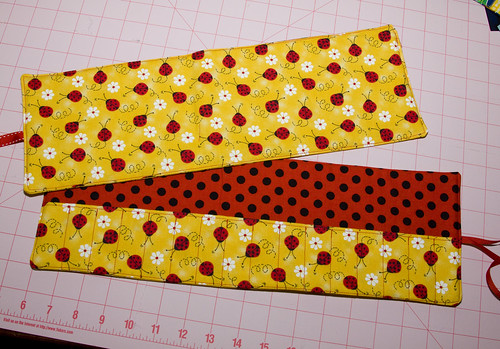
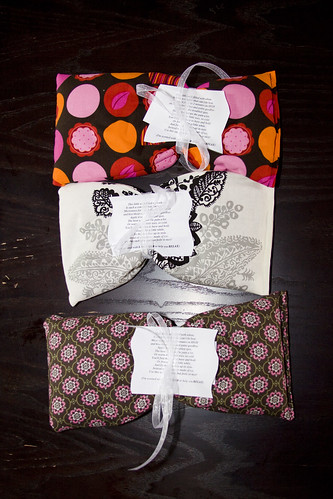
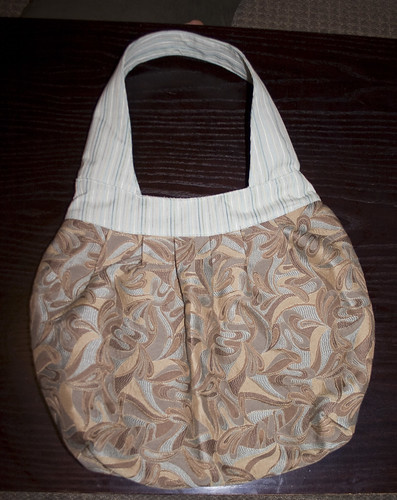
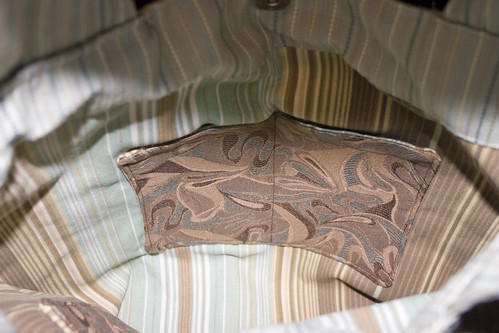
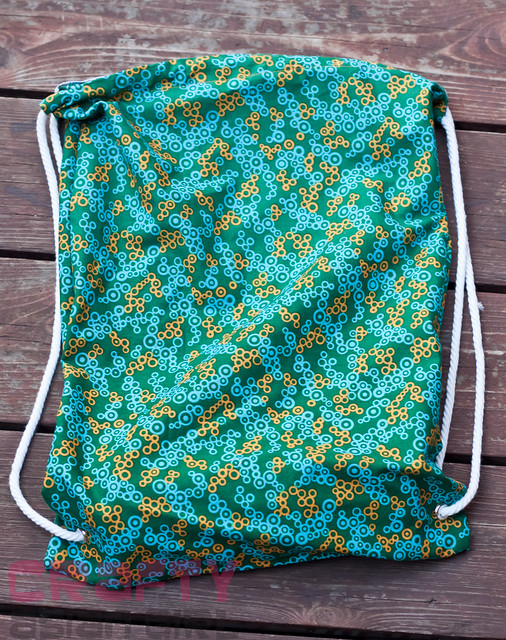
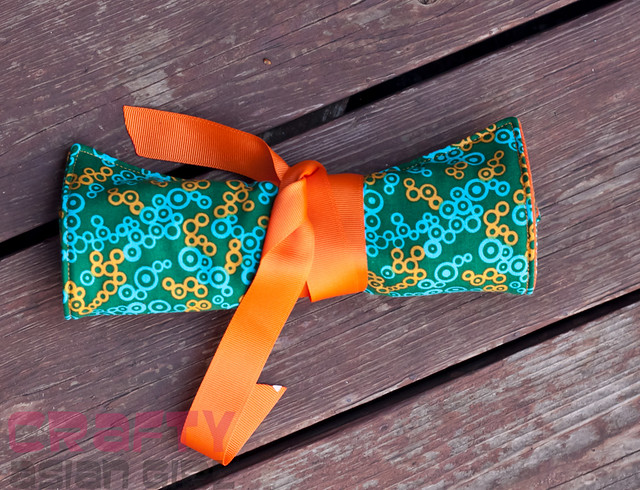
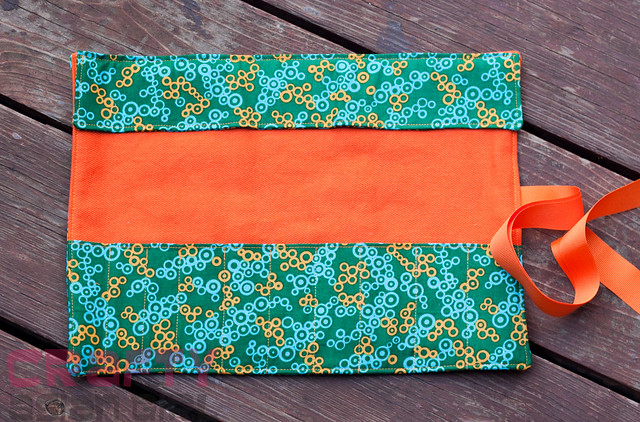
One of my friends had asked me a while back to make her a simple drawstring bag to carry her knitting around in.  I decided to add a matching knitting needle roll as a bonus.
photo 

photo 

photo 
I have to say, I'm quite proud of how many things I managed to make, and all in the span between when we returned from our Thanksgiving trip on Dec. 1, and when we left again on Dec. 18, no less.  But next year, I'm starting in July.

Monday, January 17, 2011

Burn out

I think Halloween totally burned me out on crafting, and maybe blogging too.  It's been forever since I've posted, but believe it or not, I have still been making stuff.  Just been too lazy to edit and upload pics so I could blog.  Plus we were out of town for long stretches over both Thanksgiving AND Christmas/New Year's...and well, you get the picture.  Enough with the excuses, on to the crafts!

Like I mentioned, I haven't been totally idle, but I did take a long break from sewing after making all those costumes.  Instead, I decided to get back into knitting.  A little lower stress, and bonus points for being able to do it on the couch, in front of the TV. ;)  First up, a newborn hat that I made for a friend's new baby boy.  Photo by bernadette uzcategui photography.


 The baby's father loved the hat so much that he requested a matching hat of his own, hee.  So not only did I make one for him, but I also made a headband/headwarmer in the same colorways for the mom.

Next up, a hat for myself!  I took a quick trip to Philadelphia one weekend to visit a friend, and we went to one of my favorite yarn stores there, Nangellini. The owner, Nancy, is so wonderfully friendly (and she even remembered me from my last visit, a year ago!), I highly recommend checking it out if you're ever in the area.  I couldn't resist this yummy Ushya wool yarn and knit up a 'holey' hat, stranded with some Noro yarn for texture.

photo


Of course, I also had to make a newborn hat for my new niece!  I love that this sort of looks like a candy cane.

photo 

And here she is modeling it at Thanksgiving.  :)  Forgive the blur, this was hastily snapped with my phone.
photo
I also knit up a cocoon to take pictures of her in, but sadly, she was already too big (and active) for it.
photo 


photo

Another baby hat. This time I experimented with a sort of twisted rib pattern. 
photo 

I'm not sure if I like how it turned out; I think it sort of looks like a head of lettuce, lol.  It looks slightly better when the bottom edge is turned up a bit.  Apologies for the creepy doll-model.  I don't have quick access to any tiny babies these days. 
photo 
Since the weather has finally gotten colder, I also knit up a quickie scarf for E.  She picked the yarn herself. I tried to hold back my gag reflex. I used a basic basketweave pattern, K4, P4 for 4 rows and then switch.

photo 
She got all goofy and uncooperative when I asked her to actually model the darn thing.  Ah, 3-year-olds.

photo

Next up, holiday crafting! :D

Monday, September 20, 2010

Stash game!

About 3 years ago, I joined a sewing message board, but I visited it very infrequently.  At the time, I was just beginning to sew and it was a bit overwhelming.  But my friend Jacki is a regular there and always talked about this game they do, where the goal is to reduce your fabric stash and NOT buy new fabric.  Since my fabric hoarding has been getting a bit out of hand lately, I figured it'd be good motivation to finally make all the projects I've been planning. 

Basically, the rules are that starting on September 1st, you get points per yard for anything you sew and lose points for fabric that you buy.  Anything you bought or ordered before the 1st counts as part of your current "stash," but you can't actually start cutting fabric for the item until then either.  So anything you started before the 1st counts as an "Unfinished Object."  I spent the entire week beforehand planning and tracing patterns that I wanted to use.  I also might have gone on a fabric-buying spree.  I know, defeats the purpose of reducing the stash, but I couldn't help myself.

Anyways, here are the first few batches of things I made.  Nothing major yet, but I knew I'd have more costumes to make, so I wanted to start off slow.

First up, a Halloween skirt for E!  She's been very into twirling lately, so I wanted to make her a nice, full twirly skirt.  I used the PortabelloPixie Gracie pattern for this, but either I cut it wrong or there's something wonky with it because the top tier and the waistband didn't seem to match up quite right.

photo

Here she is, giving it a test twirl. I think it met with her approval.  :)

photo 

I also whipped up an absolute TON of key fobs to sell and give as gifts.  These are actually pretty fast and fun to make.  I enlisted T to put the rings on so we had a little assembly line going.  This is actually only about half of them.

photo 

Last, and sort of least, I made a quick little placemat for E to use at school.  Nothing really fancy, just two rectangles (and interfacing) that I sewed right sides together, then turned and top-stitched. I used the same fabrics as on her nap mat, and I also added a piece of elastic to hold it closed when rolled up.

photo

More to come...

Thursday, June 10, 2010

Summertime and the living is...busy!

Ack!  How is it that it's been more than a month since my last post?  Well, needless to say, I've been busy both with life in general, and with crafting. 

First up is a whole mess o' crayon rolls.  Most of these were ordered by friends, but then I decided that while I was at it, I may as well to make extra to keep on hand.  I won't bore you with pics of every single one, just the cute ones. ;)


IMG_1784 by you. 


IMG_1782 by you. 


IMG_1780 by you.


Next is yes, you guessed it, another apron!  I have to say, I thought I'd get really sick of these, but I haven't.  I just love seeing how the different fabric combos turn out.  I think the embroidery on this one really makes it pop too.
IMG_1843 by you.


Hm, what else....Oh for teacher appreciation week, I took a page out of my friend Nicole's blog and made up some therapy sacks for E's preschool teachers.  I used wheat berries scented with a little lavender oil and tied them up with a little ribbon and the same poem that Nicole used.  I have to say, I was a bit shocked at how much wheat I needed.  I bought 5 lbs and and used all of it to make these three sacks!  Yikes!  But I must say, these were very quick little gifties and I will definitely be making more in the future, especially around Christmastime.


IMG_1656 by you. 


Oh and for the first time ever, I've also been making some stuff for myself!  :) I'll save that for a separate post though.  More to come...

Friday, March 12, 2010

More aprons, plus a little sewing tip

IMG_1077 by you.


As I said before, March is birthday madness around here!  Here are two more aprons I made as birthday gifts, this time for a couple of sweet boys.  Just like with the last set, they are reversible, with the backside using the same fabric as the straps & pockets.  I love how these turned out!  It's cool to see how something so simple can have so many different looks just based on fabric choices.  Although I have to say, I never realized just how hard it is to find boy-ish looking fabrics!  Kudos to all you sewing mommas of boys!  I don't know how you do it!  I'm feeling pretty lucky to have a little girl right now. ;)

Now onto the tip:
So topstitching was something I always absolutely hated doing.  I used to just skip it, but it really does make things look more professional and finished, so I felt compelled to keep trying.  I'm a bit OCD though, and I felt like I could never really get an even, straight line, so I spent a lot of time ripping and re-stitching.  Super sucky. :P

But when I bought my new machine last year, it came with a "new owner's lesson" which provided tons of super-useful tips.  One of them was how to topstitch using the blind hem foot that came with my machine, which worked great, but only if I had to stitch to the left side, not the right.  But then I happened to get a stitch-in-the-ditch foot as part of a quilting set, and I now have perfect topstitching every time!  

So I figured it's about time I passed it on: get yourself a stitch-in-the-ditch foot.  It's usually used for quilting and looks like this:
That little ridge in the center is normally used to keep your needle lined up with the seam or "ditch" as you quilt.  But if you put the edge of your item against one side of the guide and then move your needle to the same side (assuming your machine has this capability), you can stitch extremely close to the edge and never worry about veering off in one direction or the other because the guide in the center keeps you sewing in a perfectly straight line.  It's like magic!

Thursday, February 25, 2010

Beach dress

IMG_0706 by you.


My best friend was in town for a visit last weekend, and I took her with me to a local fabric outlet, Golden D'or.  I'm a bit of a cheapskate, and it's one of my favorite places to browse for bargains.  Oh and also to pick up dirt-cheap notions like elastic, velcro and zippers.  She found this very pretty thin cotton fabric on the clearance table and asked me to make a shirred beach dress/swim coverup for her to wear this summer. 

This fabric seemed a bit dingy and flimsy under the fluorescent lighting in the store, but I must say, it looked much prettier after we got it home.  It also washed up beautifully soft, and I think the thinness will be perfect for a hot day at the beach.

It's been a while since I've done a shirred dress, and this was my first attempt at an adult-sized one.  It's hard to tell from the pic, but it's about knee length, maybe a little bit longer.  I've definitely come a long way though since the very first one I made for E, almost 2 years ago!  Thanks to my serger, I did rolled hems with wooly nylon on the top and bottom.  I love the contrast of the white against the hot pink.  Then I just did a quick serged seam to make it a tube and started shirring away!  It goes so much faster when you have someone else to wind the elastic on the bobbins for you. ;)

I love how this turned out, so much so that I may go back and buy some of the same fabric in blue for myself.  I'm dropping it in the mail today and hoping my friend will take a pic of herself wearing the dress and let me post it. *hint hint*

Wednesday, February 24, 2010

Aprons!

March is the month of birthdays in our house: my daughter, my mother-in-law, my best friend and myself!  Plus a ton of E's little friends have birthdays this time of year too.  I guess that's what I get for befriending people with kids so close in age to my own kiddo!  I usually try to stock up on gifts throughout the year so that I'm not making a mad scramble at the last minute, but lately I've been really into homemade gifts.  Not that it necessarily saves me money, but it gives me an excuse to buy fabric and work on new projects. ;)

I decided to make an apron for one special little girl who is currently into cooking.  I decided to draft my own pattern and make it reversible, partly because I like having all the strap ends hidden, but also because I hate having to make and sew binding.  Store-bought never comes in the right colors and it's never on sale!
I thought it'd be a nice touch to have her name embroidered on it, so I called on my friend Chrystyna of Kenzie Kouture.  We ended up doing a little bit of an exchange, as she needed an apron as a gift for one of her daughter's friends as well.  I really love how the embroidery looks.  I think it really adds a special touch to a gift.  In fact, I'm starting to get spoiled by the convenience of knowing someone who can do custom embroidery!

Here are the finished aprons.
IMG_0681 by you. 
I loved using coordinating fabric for the backside, instead of just plain solid.
IMG_0680 by you.

And here is a close-up of the embroidery on one.  Chrystyna suggested using blue for the lettering and I think it pops really nicely.
IMG_0672 by you. 

With the right fabrics, I think these would make good boy gifts too.  I'm also thinking it might be cute to do one with a more plain fabric and some kind of applique, like an initial or even an animal face. 

All-in-all, I'm very pleased with how these turned out, on the first try no less, and I will probably be adding them to my Etsy shop at some point in the near future.   If you're interested in ordering one, email me at craftyasiangirl@gmail.com. :)

Tuesday, December 22, 2009

Hot pads tutorial

IMG_12187 by you.


I know there are only a few days left before Christmas, but there's still a little time left to whip up a few quick gifties.  So I figured why not go ahead and put up my very first tute?

I love to bake, but I hate oven mitts and find most other potholders bulky to use.  I've always wanted something that I could use to quickly grab a cookie sheet out of the oven or a hot plate out of the microwave.  I remembered seeing this blog post a while back about making little round pads that had pockets for your fingers.  I wanted something slightly different, so I thought I'd give it my own spin.  This is a great way to use up scraps and other odds and ends from your stash.  I actually had all the supplies necessary to make these already on hand - ah, the benefits of being a fabric hoarder.

Saturday, December 12, 2009

Doll quilt

I had a bunch of extra squares leftover from my Christmas quilt project that I realized would be perfect for a doll quilt for one of E's Christmas gifts. She is very very into playing with her animals and baby dolls lately, and spends a lot of time making elaborate beds for them out of couch cushions, blankets from her own bed, and bits of fabric from my scrap bag. It's actually pretty hilarious to see her "sleepover" set up all over the living room floor.

The doll quilt also was the perfect opportunity for me to get some practice with free-motion quilting, which I'd never done before but have been wanting to try. I have to say, it was a bit difficult, but I really enjoyed it! I think I still have a long ways to go before I really get the hang of it, but I'm fairly sure I'm going to go ahead and use this technique on my big Christmas quilt.

Here's the finished doll quilt, front:

IMG_12048 by you.

And back:
IMG_12052 by you.

And an "action shot" where you can see the quilting in a bit more detail:
IMG_12051 by you.

I cheated on the finishing and instead of making binding, I left a 1 1/4" border all around of the backing fabric, which I then folded over twice, pressed, and stitched down. WAY easier than dealing with binding. I'm actually pretty happy with it overall. Not bad for using up odds and ends I had laying around!

The only thing I have left to do now is wash it, which I'm actually sort of terrified to do. Normally, I prewash and dry all my fabric, but since I used the layer cake, that wasn't an option. The ladies at the quilt shop told me that it was better to keep it all the same, so wash everything or nothing. I'm really nervous about how badly the red fabric is going to bleed, especially since I have pure white squares in the mix. I think I'm going to do a trial run with one of those 'color catcher' sheets and see how it turns out. I keep telling myself, "it's only for a doll, it's only for a doll..." But if it does bleed, I guess that means that the full-size version will never be washed. *sigh* Keep your fingers crossed on that one.

Of course, now that I've made this little doll accessory, I feel compelled to make some little clothes for E's dolls and animals as well. She's actually been asking me to do this for a while, and I think I'm finally going to suck it up and make a few outfits for her stocking stuffers.

Friday, December 11, 2009

Way way behind

I've been sick on and off (but mostly on) for the better part of the last month. It's been really frustrating to not feel 100%, but even more than that, it's been driving me crazy how far behind I've fallen with my holiday crafting. I swear, my list just keeps getting longer and longer as I see more and more cute ideas for gifts and such.

The only project I've managed to finish recently is the tree skirt I started over a month ago for E's little Christmas tree. She's so excited about Christmas this year that we thought it'd be cool for her to have her own little (fake) tree in her room that she could decorate herself. I decided to make a little tree skirt for it, loosely based on this tute. Obviously I made hers a lot smaller, 26" diameter, and because of that, I also opted to only use 6 pieces instead of 8. I won't go into boring details, but if anyone's interested in how I did that, just post in the comments. ;)

IMG_12025 by you.

I actually am extremely unhappy with how the tree skirt turned out, mainly because I screwed up the binding pretty badly. It's extra sloppy (and don't even get me started about how the backside looks), so sorry, no close-up shots.

IMG_12027 by you.

IMG_12028 by you.

So since I lamely have nothing else to show for the past few weeks of sickies, I thought I'd post about some WIPs and a few links to cool projects that I'd like to attempt to have done in time for Christmas. Some are decorations, some are toys, most are holiday-oriented.

I have a couple commissions I'm almost done with, one knit and one sewn, and I'm also trying to concurrently work on some handmade Christmas gifts for friends and family. I really want to post a tutorial for the gifties, but I also don't want to ruin the surprise...decisions, decisions.

I'm also still hopeful that I might be able to finish the Christmas quilt before Christmas. I have, however, given up on hand-quilting. Partly because I just didn't like the look of it, but mostly because I regained my sanity and realized that it would take me about 10 years to finish it by hand. Now I'm thinking I may give free-motion quilting a go.

This weekend's big project is baking! I'm hosting a cookie exchange next week and I have LOTS of baking to do. I still haven't entirely decided on what kind of cookies I'm going to make for the exchange, but being the overambitious nerd that I am, I also want to make decorated cookies for everyone. Going to be a busy busy weekend.


In a perfect world, I'd also have time to make some of this stuff:
Felt circle garland
Origami star
Paper evergreens
Salt-dough ornaments
Crochet snowflakes
Snowman decoration

Sunday, October 11, 2009

Another birdie sling

IMG_11545 by you.

A friend commissioned me to make another Amy Butler birdie sling bag for her to give as a gift. She picked out all the fabric (and did a fantastic job, as I adore the colorways) and I finally got it all sewn up the other day. These bags definitely get easier to make the second time around. I'm hoping it'll be even easier the third time, as I actually have all the fabric to make one for myself; I just haven't gotten to it yet. I think it's because I can't stand cutting & ironing all the fabric and interfacing, so I keep putting it off.

Here's a pic of the inside. I added a magnetic snap closure, which I meant to do last time but then forgot. Oops. I also used some of the leftover fabric from the exterior to make the interior pocket since I prefer a little contrast.

IMG_11547 by you.

I'll also reiterate my complaint that the pattern calls for WAY too much fabric for the bands and handles, especially is you use 60" wide home decor fabric. I think I got 3/4 yard instead of the 1 1/4 called for, and I still had a ton leftover. Next time I may take it down to a 1/2 yard and see if that works better.

Monday, September 28, 2009

Birdie kimono set

IMG_11350 by you.

I'm ashamed to admit, I have had this outfit 75% done for the last 2 months, only to get stuck on the binding and put it aside in frustration. Well, the pregnant friend that this was for had her baby last week, which lit a fire under my behind to get it done.

It's the Kimono PJ Set from Amy Butler's Little Stitches for Little Ones book, generously loaned to me by the above no-longer-pregnant friend. I had the bright idea to do it in flannel instead of cotton, thinking it'd be cozier. This actually worked out fine for the most part, except for the binding, which I foolishly also tried to do in flannel. Here's a tip for anyone trying to make tiny flannel bias tape: don't do it. Trying to get 1/2" flannel single-fold binding to hold a sharp crease was next to impossible. And then folding it over and pinning the now 1/4" on each side? Infuriating.

So instead, I went and bought some double-fold bias tape from the store and sewed it on the "wrong" way (meaning, I just jammed the raw edges into the fold instead of opening it up, sewing along the crease, then folding and sewing again). I also opted to put binding along the cuffs of the sleeves too. I think it added a nice finished-looking touch.

IMG_11346 by you.


Like other Amy Butler patterns I've tried, this was not a difficult project, but there were a lot of steps and the directions can be confusing at times. I think I read them about 20 times before I started, just to be safe. My main complaint though is that the pattern instructions were a bit lacking in common sense.

First off, folding 1/2" hems on the bottom of the pants and the bottom of the kimono top looks totally absurd on a tiny size 0-3 month outfit. I was unhappy enough with how it looked that I ripped it out and sewed a 1/4" hem with an additional row of topstitching along the edge.

IMG_11348 by you.

IMG_11349 by you.

Second, how the heck they expect you to be able to sew the hems on the sleeves is totally beyond me. I ended up ripping open the side seams so that I could open it up flat, sew on the binding, and then sew it back up. If I ever make another one of these, I'm going to be sure to do my hemming BEFORE I stitch everything up and overcast the edges.

A last note about working with the flannel instead of regular cotton: because the weave is a little looser, it is not as forgiving when you make mistakes and have to rip out seams. If you look closely at the pic above of the pants, you can still see all the holes from where the original hem was. Also, the edges tended to fray more easily and the fabric is overall less stiff, so it was a little trickier to keep it pinned into the bias tape. But like I said, it all worked out fine in the end, so don't be afraid to try it. I'm pretty happy with how this outfit turned out, and I'll likely make more in the future.

Saturday, September 26, 2009

Birthday cupcake


I whipped up a quick little cupcake last week for a sweet girl turning 2 years old. Unfortunately, me throwing my back out and the subsequent appointments that followed interfered with me being able to give it to her on her birthday. But I thought I'd go ahead and post it here, just for giggles. I'm not entirely happy with how the cherry on top turned out, so I may take it off and do it over.

Wednesday, July 15, 2009

Sheeeeeep!


Woohoo for an FO!

Since I couldn't bring my sewing machine on my recent vacation, I was forced to limit myself to buying fabric and crocheting. Despite having about a 101 unfinished projects already, I decided to go ahead and start a new one. Today I finally finished it: an amigurumi sheep from
this pattern for one of E's little friends who happens to be obsessed with sheep. He ended up a bit bigger than I had anticipated, and I'm not 100% happy with how I did his face (I think white on black may have been a mistake), but overall I think he's pretty cute.

In case you're wondering, I used one strand of regular old acrylic yarn and one strand of nylon eyelash yarn (some Lion Brand "Tiffany" that I found in a clearance bin for $1!) to make him fuzzy.

LinkWithin

Blog Widget by LinkWithin