Showing posts with label birthday. Show all posts
Monday, March 26, 2012
Rainbow Birthday Outfit
It's become something of a tradition for me to make E a special outfit each year for her birthday. Two years ago, I made her a butterfly skirt and had a friend embroider a "3" on a tee to match. Last year, I threw together a Foofa shirt and easy tutu.
This year, I decided to go back to the number shirt thing, but since I didn't know anyone local who could do the embroidery, I had to dust off the cobwebs on my machine applique skills and put the "5" on myself (I used this method, which I first learned several years ago). I think I did pretty well, especially considering my printer was broken, so I had to freehand my backwards 5! For the skirt, I decided to try a double-layer ruffle skirt, from this tutorial.
I loved the way this skirt turned out! I added some topstitching above each layer of ruffles since I think it gives the skirt a more finished look. I will say though, even though the dimensions on the tutorial say they're for a size 5 or 6, the skirt was a bit smaller than I expected on my tall, skinny girl. I would put it at more of a size 4T/5T. Next time, I will add an inch to the width on the top band, and at least a couple inches in length to each of the ruffle layers, as well as do a rolled hem on the serger. I felt like the turned hem looked bulky.
Tuesday, March 13, 2012
Rainbow-licious
Holy cow, I can't believe I haven't posted here in over a year! Quite a lot has changed in the last 15 months. For starters, last spring, I decided to devote less time to crafty stuff and more time to starting a photography business, focusing on kids' parties. Shortly after that, we decided to get our house ready to put on the market, which meant my craft room had to be dismantled and packed up. And then, the biggest change, the hubby got a job in Seattle, so we moved across the country! Crazy.
Believe it or not, I have still been making stuff, just not as often. I noticed recently that I'm still getting a decent amount of traffic here, thanks in large part to the hot pads tutorial, and thought maybe it was a sign to revive this blog now that my photo biz is on hold. So with the exception of last year's Yo Gabba Gabba party, I'm going to skip playing catch-up and just dive in to my latest project, E's 5th birthday party!
Sunday, March 13, 2011
Yo Gabba Gabba Party!
E likes to pick out her themes early. She picked Yo Gabba Gabba roughly 3 months after her 3rd birthday party and even though I kept telling her that we should wait and see till it got closer to her birthday, I have to give her credit, she stuck to her guns. I think by the time her 4th birthday rolled around, E wasn't even really watching YGG anymore, but she was still very insistent on this being the theme of her party.
In an effort to avoid my usual last minute scramble, I started making stuff for this party two months in advance. I had a brainstorm early on and decided I wanted to make a bunting out of felt with the Gabba faces on it. Believe it or not, I actually got about 20 feet of bunting made before January was out! I also ended up using the leftover felt (there was a TON) to make party hats too. [At some point, I may try and put together a tutorial for the bunting, but it might be a while.] Sadly, this momentum did not carry on for all of February.
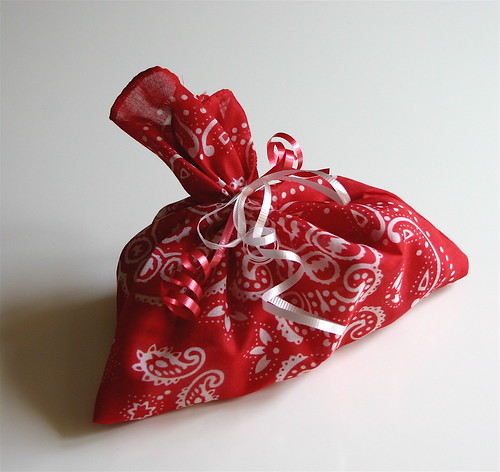
I was also going to make favor bags with faces on them, but in the end, I couldn't resist these favor boxes from Birthday Express, which is apparently the only company that sells YGG party supplies. I also ended up buying a pack of cardboard DJ Lance glasses that they had, with the idea that the kids or adults could wear them during the party, if they felt so inclined. This led me to my second brilliant idea, which was to have Troy and I dress up as DJ Lance. Ok, maybe not the whole outfit, but at least the shirts, which I ended up making with t-shirts from Hobby Lobby, felt, and fabric glue. I tried like crazy to find DJ Lance hats that didn't come with a full costume, or even orange fun fur, but no dice.
I toyed with the idea of also ordering the official licensed character cupcake toppers, but eventually opted to order custom digital files from Etsy instead. I had them printed out on cardstock at one of the big-box office supply stores and then used a scallopped 2-inch punch to cut them out.
I had originally planned on making a bunch of other things as well, including a bean bag toss game with Brobee and various food-shaped bean bags (Party in My Tummy!) but my plans were derailed when, about 2 weeks before the party, my sick grandmother took a turn for the worse, and I had to abruptly leave town to see her before she passed away.
By the time I got home, just days before the party, I was emotionally drained but managed to throw together E's Foofa outfit, which was pretty straightforward; felt eyes, nose & mouth fabric glued to a pink shirt. I lucked into a flower-shaped button to sew to the top, and the tutu was of the quickie tulle-strips-tied-around-elastic variety. I may or may not have conscripted the hubby into making the tutu.
Overall, the party was a big hit! We played the two YGG soundtracks on repeat during most of the party, and the kids worked off their post-cupcake sugar rush with a dancey-dance party. Fun was had by all!
Friday, March 12, 2010
More aprons, plus a little sewing tip

As I said before, March is birthday madness around here! Here are two more aprons I made as birthday gifts, this time for a couple of sweet boys. Just like with the last set, they are reversible, with the backside using the same fabric as the straps & pockets. I love how these turned out! It's cool to see how something so simple can have so many different looks just based on fabric choices. Although I have to say, I never realized just how hard it is to find boy-ish looking fabrics! Kudos to all you sewing mommas of boys! I don't know how you do it! I'm feeling pretty lucky to have a little girl right now. ;)
Now onto the tip:
So topstitching was something I always absolutely hated doing. I used to just skip it, but it really does make things look more professional and finished, so I felt compelled to keep trying. I'm a bit OCD though, and I felt like I could never really get an even, straight line, so I spent a lot of time ripping and re-stitching. Super sucky. :P
But when I bought my new machine last year, it came with a "new owner's lesson" which provided tons of super-useful tips. One of them was how to topstitch using the blind hem foot that came with my machine, which worked great, but only if I had to stitch to the left side, not the right. But then I happened to get a stitch-in-the-ditch foot as part of a quilting set, and I now have perfect topstitching every time!
So I figured it's about time I passed it on: get yourself a stitch-in-the-ditch foot. It's usually used for quilting and looks like this:
That little ridge in the center is normally used to keep your needle lined up with the seam or "ditch" as you quilt. But if you put the edge of your item against one side of the guide and then move your needle to the same side (assuming your machine has this capability), you can stitch extremely close to the edge and never worry about veering off in one direction or the other because the guide in the center keeps you sewing in a perfectly straight line. It's like magic!
Saturday, March 7, 2009
Partytime!
Most of my crafting these last few weeks has revolved around stuff for E's 2nd birthday party. I decided on a farm/barnyard theme, partly because she loves farm animals, but also because it was relatively generic and easy to find/make stuff to go with it. I've already posted the cardboard animals in various states, but here are the finished products. Forgive the crappy quality of the pictures. I was a bit frazzled this morning trying to snap them before everyone arrived.
Sheep (that wouldn't stay stuck to the wall)

Cow (I actually made two, the other is the same, just mirror-imaged)
Pig (whose tail I forgot to put on, poor guy)

Chicken

And duck (see below). Oh, I only made the bigger duck though. The little ones were pre-made wood cutouts from Michael's.
I also got a roll of red paper from a teacher-supply store and made a very generic barn to go on the wall. Black construction paper for the roof "shingles" and long strips of white paper for the barn doors and windows. I used the rest of the red paper to cover my coffee table and pushed it up against the barn to make a coloring station for the kids.

I attempted to make a 3-dimensional barn cake to go along with the paper barn. Of course, I procrastinated on starting it until last night, so it's not quite as nice and polished-looking as I would have liked. Still, I think it's pretty cute. And luckily, 2-year-olds don't really know the difference.
Here's a rather crappy picture from an odd angle:

And a better picture with T holding up E while she blows out her candle:

I have to say, even though I was dead tired while icing this at 1am last night, I realized how much I've missed working on cakes and pastries. I think I'm definitely going to have to get back in practice, even if only for fun. I had actually also wanted to make a silo out of stacked cookies to go with the barn, as well as animal cupcakes, but I simply ran out of time. I ended up ordering the cupcakes from a local place instead, which I was not super juiced about, especially after I got them and they were sort of crappy. I think I could have made better ones myself, but oh well, what's done is done. The kids ate the cupcakes and were happy, so that's all that matters.
Last, but not least, were the little goody bags I made out of bandannas. Nothing super special or complicated, just bandanas that I cut in half, folded and stitched up two sides. Throw in a bunch of favors from Oriental Trading Company, tie with ribbon and voila! Homemade goody bag! (Although I do have to give some credit to my cousin to stuffed and tied all the bags. Gotta love slave labor!)
Sheep (that wouldn't stay stuck to the wall)

Cow (I actually made two, the other is the same, just mirror-imaged)


Chicken

And duck (see below). Oh, I only made the bigger duck though. The little ones were pre-made wood cutouts from Michael's.
I also got a roll of red paper from a teacher-supply store and made a very generic barn to go on the wall. Black construction paper for the roof "shingles" and long strips of white paper for the barn doors and windows. I used the rest of the red paper to cover my coffee table and pushed it up against the barn to make a coloring station for the kids.

I attempted to make a 3-dimensional barn cake to go along with the paper barn. Of course, I procrastinated on starting it until last night, so it's not quite as nice and polished-looking as I would have liked. Still, I think it's pretty cute. And luckily, 2-year-olds don't really know the difference.
Here's a rather crappy picture from an odd angle:

And a better picture with T holding up E while she blows out her candle:
I have to say, even though I was dead tired while icing this at 1am last night, I realized how much I've missed working on cakes and pastries. I think I'm definitely going to have to get back in practice, even if only for fun. I had actually also wanted to make a silo out of stacked cookies to go with the barn, as well as animal cupcakes, but I simply ran out of time. I ended up ordering the cupcakes from a local place instead, which I was not super juiced about, especially after I got them and they were sort of crappy. I think I could have made better ones myself, but oh well, what's done is done. The kids ate the cupcakes and were happy, so that's all that matters.
Last, but not least, were the little goody bags I made out of bandannas. Nothing super special or complicated, just bandanas that I cut in half, folded and stitched up two sides. Throw in a bunch of favors from Oriental Trading Company, tie with ribbon and voila! Homemade goody bag! (Although I do have to give some credit to my cousin to stuffed and tied all the bags. Gotta love slave labor!)

Friday, February 27, 2009
Finally, some pics!
Tuesday, February 24, 2009
quickie weekend update
Just so you all don't think I'm still slacking....
I did start a new knitting project on Saturday night. It's actually this exact hat kit, which my sister-in-law gave me several years ago as a Christmas gift. Yes, I know that I still suck for admitting that I've had it sitting around untouched for that long. In any case, I didn't get nearly as far as I would have liked (too much chatting, not enough knitting), and it's actually a far more complicated pattern than I initially realized, so I think it's going to take me a while to finish.
However, I did also work on some stuff on Sunday. T actually joined me for a rare joint "crafternoon," helping me out with prep for E's birthday party in a couple weeks. We're doing a farm/barnyard theme and since we had all these large cardboard boxes in the garage, I had the idea to make some large cutouts of farm animals.
Figuring out how to cut the cardboard into recognizable shapes took some thought since there was no way scissors would work on something so thick, and a box cutter would have made it hard to get clean curves. I toyed with the idea of using my electric carving knife (which is almost like a mini-saw), but then T solved the problem by finding a jigsaw attachment for his dremel tool. It worked like a charm!
I also got a base coat of white paint on everything, so now I mostly just need to fill in details. Lucky for me, I picked mainly white animals, haha!
Sorry, still no pics just yet, but I plan on working on them more tomorrow, so soon...
Subscribe to:
Posts (Atom)