
About 3 years ago, I joined a sewing message board, but I visited it very infrequently. At the time, I was just beginning to sew and it was a bit overwhelming. But my friend Jacki is a regular there and always talked about this game they do, where the goal is to reduce your fabric stash and NOT buy new fabric. Since my fabric hoarding has been getting a bit out of hand lately, I figured it'd be good motivation to finally make all the projects I've been planning.
Basically, the rules are that starting on September 1st, you get points per yard for anything you sew and lose points for fabric that you buy. Anything you bought or ordered before the 1st counts as part of your current "stash," but you can't actually start cutting fabric for the item until then either. So anything you started before the 1st counts as an "Unfinished Object." I spent the entire week beforehand planning and tracing patterns that I wanted to use. I also might have gone on a fabric-buying spree. I know, defeats the purpose of reducing the stash, but I couldn't help myself.
Anyways, here are the first few batches of things I made. Nothing major yet, but I knew I'd have more costumes to make, so I wanted to start off slow.
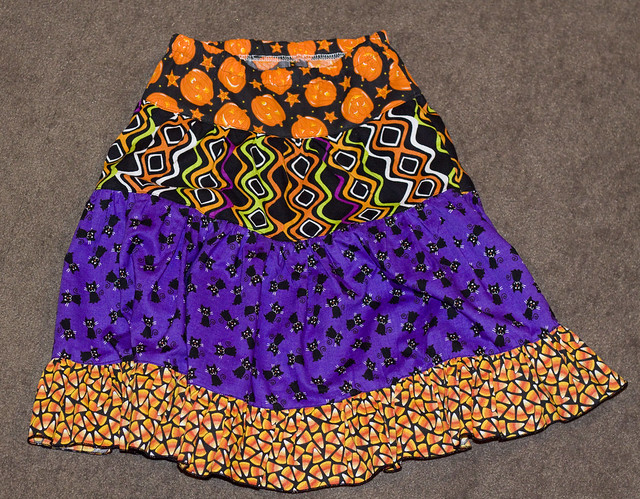
First up, a Halloween skirt for E! She's been very into twirling lately, so I wanted to make her a nice, full twirly skirt. I used the PortabelloPixie Gracie pattern for this, but either I cut it wrong or there's something wonky with it because the top tier and the waistband didn't seem to match up quite right.
Here she is, giving it a test twirl. I think it met with her approval. :)

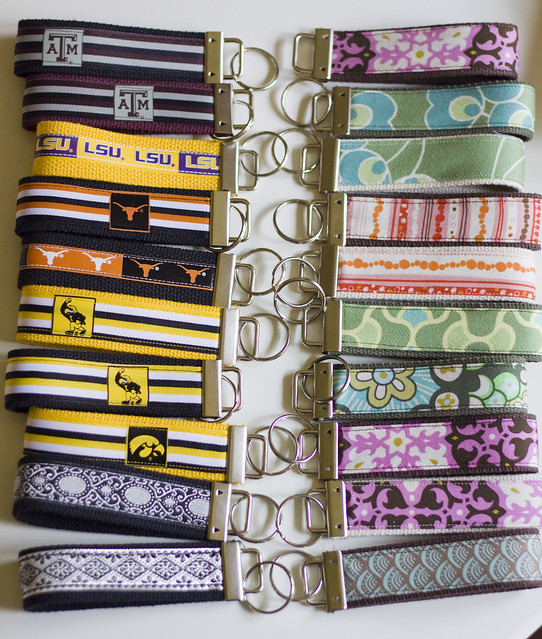
I also whipped up an absolute TON of key fobs to sell and give as gifts. These are actually pretty fast and fun to make. I enlisted T to put the rings on so we had a little assembly line going. This is actually only about half of them.
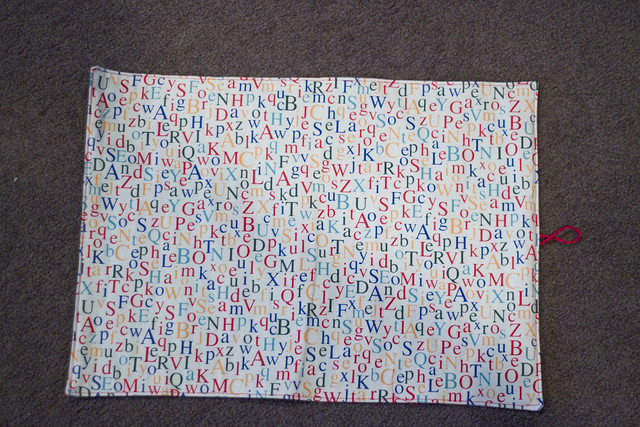
Last, and sort of least, I made a quick little placemat for E to use at school. Nothing really fancy, just two rectangles (and interfacing) that I sewed right sides together, then turned and top-stitched. I used the same fabrics as on her nap mat, and I also added a piece of elastic to hold it closed when rolled up.
More to come...
No comments:
Post a Comment