Sunday, April 11, 2010

And even more aprons

Ok, these are the last two aprons for a while, I promise!

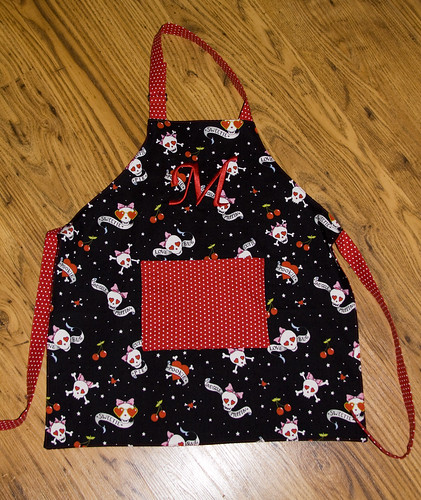
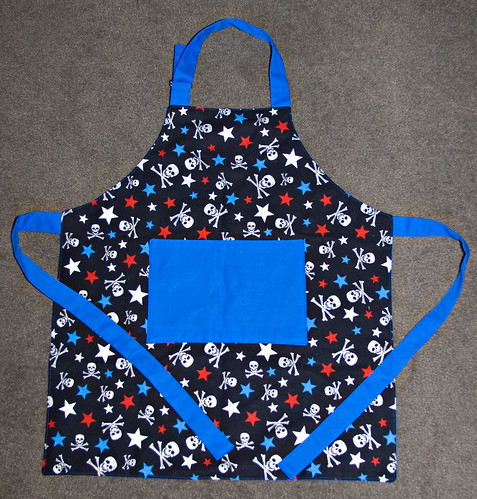
Both of these were for little boys.  This first one was finished a couple weeks ago and the fabric was specifically requested by his mom.  I love the combo of the skulls and stars.

IMG_1285 by you.

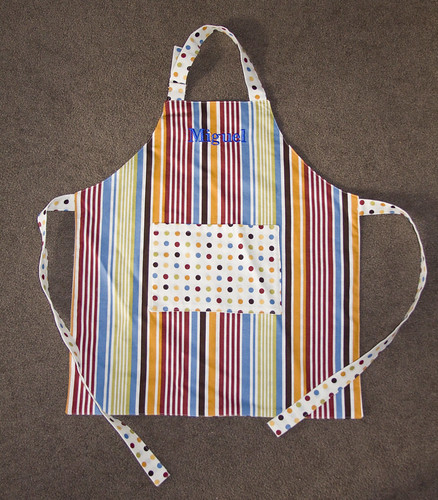
I had a harder time finding the right fabric for this second one since his mom did not want a specific theme, like cars, trains, etc.  Have I mentioned how hard it is to find good boyish fabric?  I'm very happy with this combination of stripes and dots though.  I think it's nicely all-purpose and could be used for a boy or a girl.

IMG_1367 by you.

I'm currently sewing as fast as I can to finish up a couple dresses and a few baby gifties before I head out of town next week.

Tuesday, March 30, 2010

Skirt-o-rama

About a month ago, I started making a bunch of skirts for E with the hopes that spring would soon be here, and that we could finally make a serious effort to start potty-training.  Well hurrah, hooray!  Both have finally come! 

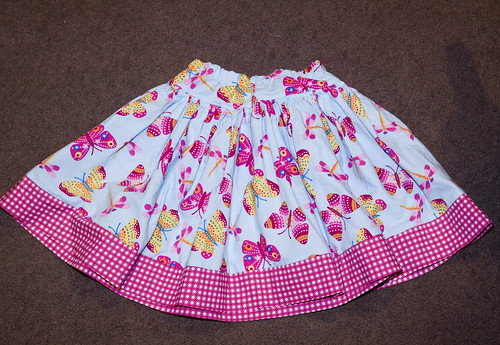
Here are a few of the skirts I've made.  These whipped up very quickly, especially with my ruffler foot. ;)

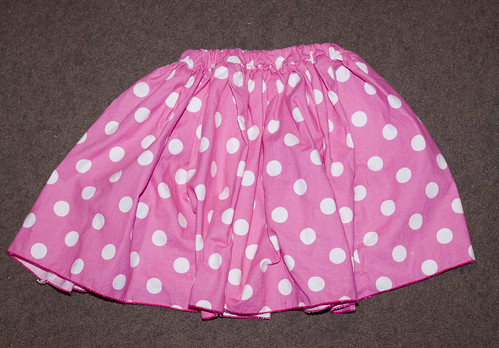
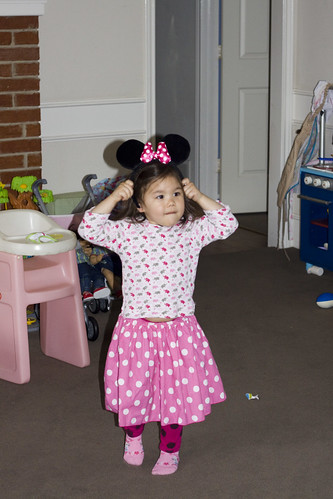
Here is E's favorite, mostly because it looks like the one that her plush Minnie Mouse wears.  It was the quickest and easiest to make, mostly because I just did a quick rolled hem on the bottom and a wide band for elastic casing at the top.
Minnie skirt
This is not an uncommon look nowadays:
IMG_1238 by you.

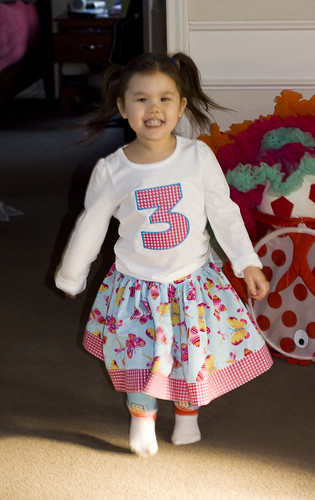
This skirt was supposed to be part of her birthday outfit, and I even had a matching "3" applique shirt embroidered by Kenzie Kouture, but of course, when the actual day came, E insisted on wearing the Minnie skirt. *sigh*
IMG_1191 by you.

I did, however, manage to get her to wear the complete outfit to school one day, so here's a pic I managed to snap as she tore around the house like a maniac.  Sorry for the slight blur.  She's fast.

IMG_0824 by you.

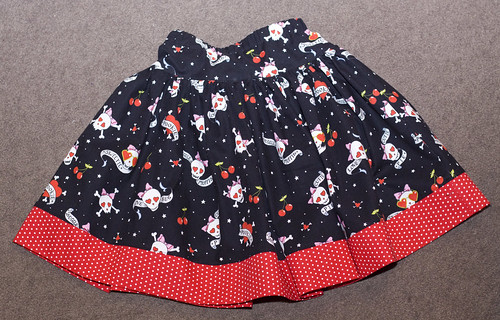
This is probably my favorite skirt so far.  I love the skull fabric!  I think I also realized after making this one that I prefer the drop-waist style.
IMG_1189 by you. 

I actually made this skirt specifically for E's 3-year-old photo shoot in Deep Ellum with our favorite photographer.  I also commissioned another embroidered shirt from Kenzie Kouture to match, this time with heart & crossbones.  Here is my big girl, in her "model" pose. ;)
DSC_6093 2 by Chera25. 

And I can't resist including this shot of T and I, with our monkey:
DSC_6073 2 by Chera25. 

Now that we are potty-training full force, I'm anticipating a lot more skirts and dresses for spring and summer!

Sunday, March 28, 2010

Are you sick of aprons yet?

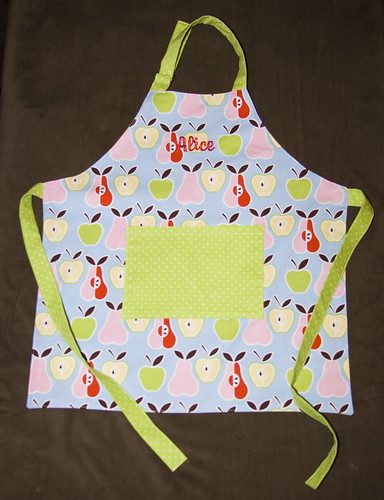
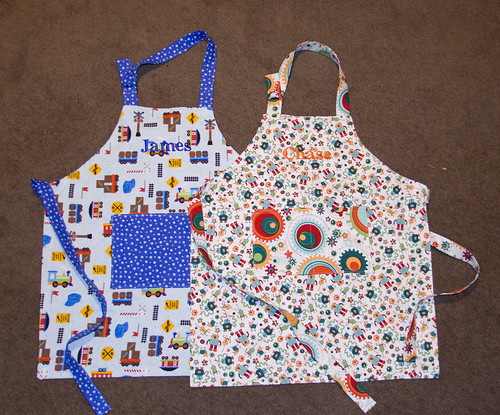
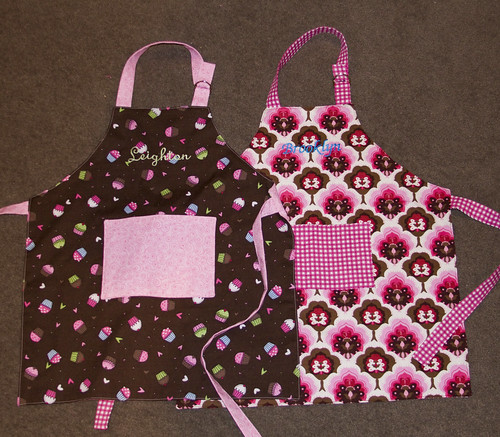
I hope not, because here are two more, and I've got at least four more to make!  These were both commissions by friends and I'm absolutely in love with how they turned out, especially since these are two of my absolute favorite fabrics.  As before, the embroidery was done by my friend Chrystyna, of Kenzie Kouture.  She's done a number of aprons and appliqued shirts for me, and they have all turned out absolutely gorgeous!

IMG_1273 by you. 

IMG_1248 by you. 


If you're interested in ordering an apron, please email me at craftyasiangirl@gmail.com. :)

Friday, March 12, 2010

More aprons, plus a little sewing tip

IMG_1077 by you.


As I said before, March is birthday madness around here!  Here are two more aprons I made as birthday gifts, this time for a couple of sweet boys.  Just like with the last set, they are reversible, with the backside using the same fabric as the straps & pockets.  I love how these turned out!  It's cool to see how something so simple can have so many different looks just based on fabric choices.  Although I have to say, I never realized just how hard it is to find boy-ish looking fabrics!  Kudos to all you sewing mommas of boys!  I don't know how you do it!  I'm feeling pretty lucky to have a little girl right now. ;)

Now onto the tip:
So topstitching was something I always absolutely hated doing.  I used to just skip it, but it really does make things look more professional and finished, so I felt compelled to keep trying.  I'm a bit OCD though, and I felt like I could never really get an even, straight line, so I spent a lot of time ripping and re-stitching.  Super sucky. :P

But when I bought my new machine last year, it came with a "new owner's lesson" which provided tons of super-useful tips.  One of them was how to topstitch using the blind hem foot that came with my machine, which worked great, but only if I had to stitch to the left side, not the right.  But then I happened to get a stitch-in-the-ditch foot as part of a quilting set, and I now have perfect topstitching every time!  

So I figured it's about time I passed it on: get yourself a stitch-in-the-ditch foot.  It's usually used for quilting and looks like this:
That little ridge in the center is normally used to keep your needle lined up with the seam or "ditch" as you quilt.  But if you put the edge of your item against one side of the guide and then move your needle to the same side (assuming your machine has this capability), you can stitch extremely close to the edge and never worry about veering off in one direction or the other because the guide in the center keeps you sewing in a perfectly straight line.  It's like magic!

Thursday, February 25, 2010

Beach dress

IMG_0706 by you.


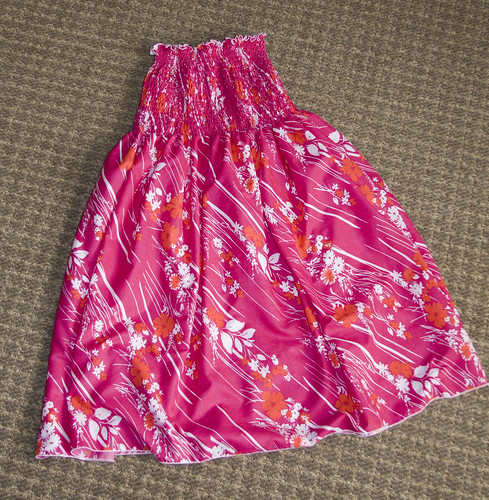
My best friend was in town for a visit last weekend, and I took her with me to a local fabric outlet, Golden D'or.  I'm a bit of a cheapskate, and it's one of my favorite places to browse for bargains.  Oh and also to pick up dirt-cheap notions like elastic, velcro and zippers.  She found this very pretty thin cotton fabric on the clearance table and asked me to make a shirred beach dress/swim coverup for her to wear this summer. 

This fabric seemed a bit dingy and flimsy under the fluorescent lighting in the store, but I must say, it looked much prettier after we got it home.  It also washed up beautifully soft, and I think the thinness will be perfect for a hot day at the beach.

It's been a while since I've done a shirred dress, and this was my first attempt at an adult-sized one.  It's hard to tell from the pic, but it's about knee length, maybe a little bit longer.  I've definitely come a long way though since the very first one I made for E, almost 2 years ago!  Thanks to my serger, I did rolled hems with wooly nylon on the top and bottom.  I love the contrast of the white against the hot pink.  Then I just did a quick serged seam to make it a tube and started shirring away!  It goes so much faster when you have someone else to wind the elastic on the bobbins for you. ;)

I love how this turned out, so much so that I may go back and buy some of the same fabric in blue for myself.  I'm dropping it in the mail today and hoping my friend will take a pic of herself wearing the dress and let me post it. *hint hint*

Wednesday, February 24, 2010

Aprons!

March is the month of birthdays in our house: my daughter, my mother-in-law, my best friend and myself!  Plus a ton of E's little friends have birthdays this time of year too.  I guess that's what I get for befriending people with kids so close in age to my own kiddo!  I usually try to stock up on gifts throughout the year so that I'm not making a mad scramble at the last minute, but lately I've been really into homemade gifts.  Not that it necessarily saves me money, but it gives me an excuse to buy fabric and work on new projects. ;)

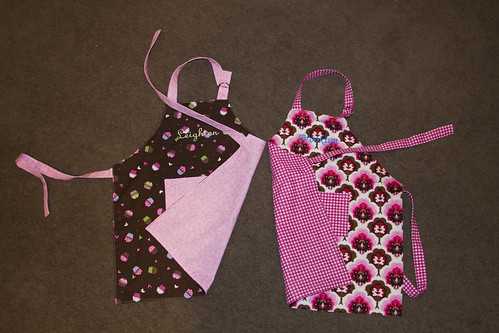
I decided to make an apron for one special little girl who is currently into cooking.  I decided to draft my own pattern and make it reversible, partly because I like having all the strap ends hidden, but also because I hate having to make and sew binding.  Store-bought never comes in the right colors and it's never on sale!
I thought it'd be a nice touch to have her name embroidered on it, so I called on my friend Chrystyna of Kenzie Kouture.  We ended up doing a little bit of an exchange, as she needed an apron as a gift for one of her daughter's friends as well.  I really love how the embroidery looks.  I think it really adds a special touch to a gift.  In fact, I'm starting to get spoiled by the convenience of knowing someone who can do custom embroidery!

Here are the finished aprons.
IMG_0681 by you. 
I loved using coordinating fabric for the backside, instead of just plain solid.
IMG_0680 by you.

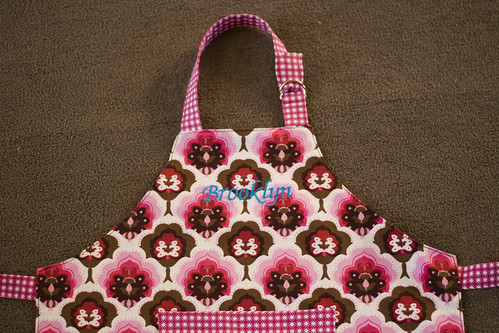
And here is a close-up of the embroidery on one.  Chrystyna suggested using blue for the lettering and I think it pops really nicely.
IMG_0672 by you. 

With the right fabrics, I think these would make good boy gifts too.  I'm also thinking it might be cute to do one with a more plain fabric and some kind of applique, like an initial or even an animal face. 

All-in-all, I'm very pleased with how these turned out, on the first try no less, and I will probably be adding them to my Etsy shop at some point in the near future.   If you're interested in ordering one, email me at craftyasiangirl@gmail.com. :)

Monday, February 15, 2010

Serge-a-licious!

IMG_0576 by you.

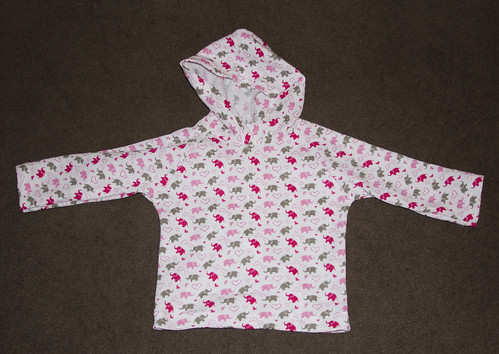
Yesterday, with the aid of my handy new serger, I managed to whip up this little hoodie in just a couple hours!  It's the raglan tee pattern from Kwik Sew for Toddlers, an awesome pattern book that my brilliant friend, Jacki, turned me on to (it's also mentioned in this post).  If you're interested in learning to make clothes for your kid, I highly recommend it.  Don't be scared off by the horrifyingly dated outifts on the cover.  It's got very solid, basic garments that are easily adapted to your own style.

For this shirt, I traced and cut the raglan tee/sweatshirt pattern in 3T.  I didn't want to do cuffs or a waistband and my daughter has a long torso, so I lengthened the sleeves and bottom hem by a bit.  I also added a hood, partly because she is obsessed with hoodies, and also so I wouldn't have to make a neckband. ;)  For the hems, I serged the edges, turned them other and then top-stitched with a twin needle.  Easy peasy!

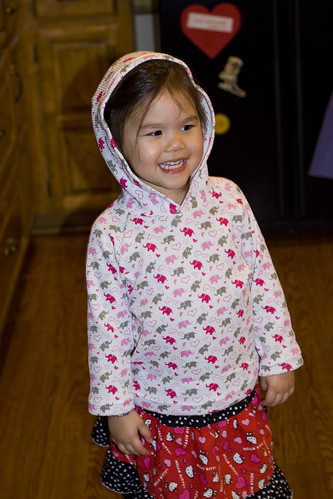
As you can see, she loved it and wanted to wear it immediately. 
IMG_0570 by you.

It's a bit boxy, so I may try making it a bit more fitted next time. I may even go down a size in the body and adjust the hem & sleeves accordingly.  I think the sleeves here are a little bit short, so I may end up adding a cuff there after all.  Also, the hood isn't nearly deep enough, so I'll definitely lengthen that next time too.  Not bad for a first try though! And it was way easier to make than I anticipated, so much so that I'm kicking myself for not trying it sooner!  I'll definitely be making more of these in the near future - next up is a zipped hoodie sweatshirt.  Then maybe some short-sleeved hoodies for spring, maybe even a dress or two.  Hoodie-mania!

LinkWithin

Blog Widget by LinkWithin