

I love Christmas and all the hoopla that surrounds it. I'm especially excited this year because not only are we not traveling for a change, but my daughter is finally old enough that she really 'gets it' when it comes to holidays. It's really fun to see everything through her eyes for the first time again.
 That being said, she has already started driving me nuts asking me, "Is it Christmas yet?" So I thought an advent calendar would help her count down the days. I remembered seeing this calendar in the Pottery Barn Kids catalog a while back. But even if I did want to shell out major $$ for it, it's no longer available. Of course, crazy person that I am, I figured I could make a reasonable facsimile.
I decided to take advantage of the Black Friday deals at Jo-Ann's last weekend and picked up a yard or two of felt in several different colors (I figured whatever I didn't use I could save for other kid-crafts).
I wanted to stick with a tree, like the PBK one, but seeing as how I waited to start this till November 29, I knew I couldn't do anything too complicated, so elaborate embroidery or applique were out. Instead, I decided to make a felt ornament pocket for each day.
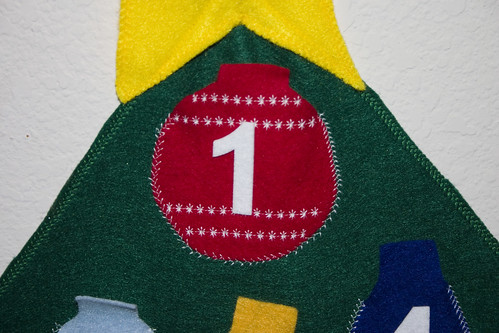
Starting with a yard of green felt, I cut out two large tree shapes (one top piece, one bottom). Then I made a couple ornament stencils on cardboard and cut out 25 in various colors. The balls are just under 4 inches in diameter, and the bulbs are about 5 inches long and 3 inches wide. I wanted them to be big enough that I could stick a little gifty inside instead of candy, if I felt so inclined.
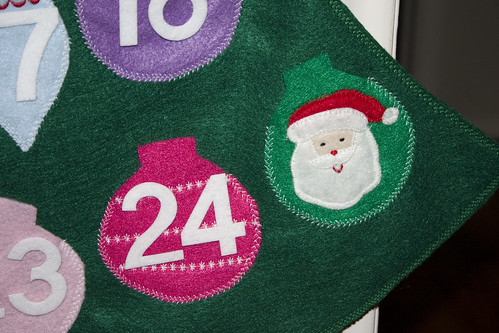
I also decided to embellish some of the ornaments with some of the fancy decorative stitches on my sewing machine. Even though a lot of the stitching ended up obscured by the numbers, I think it adds a nice touch. I did sort of wish I had more stitches to choose from, but oh well. This was the first (and probably last) time I used almost every one of them.
Oh, I almost forgot. The Santa face on the 25th day is from a small felt stocking I found at the dollar store. I just cut him out and stitched him to an ornament shape. Again, I had originally planned to make on myself from scratch, but when I found one already made, of course I opted for the short cut. ;)
I stitched each ornament to the top tree piece using contrasting thread, and leaving the top open to make a pocket. I used one of the blanket stitches on my machine, but a straight or zigzag would have worked just as well. I cut two rectangles of brown felt for the trunk and two stars out of yellow for the topper and then stitched each of these together. Again, I used the blanket stitch, but you don't have to. That's the nice thing about felt, you don't have to worry about finishing edges or turning and topstitching.
Next I put the top tree piece on top of the bottom piece, sandwiching the trunk in between at the bottom. Pinned and stitched all the way around and then I stitched the star to the top. Really, you could probably skip this step, but
Last, but not least, I let E help me put the numbers on each ornament. I originally thought I was going to have to either cut out numbers from felt on my own, but then I lucked out at found sticky felt cutouts at Jo-Ann. I had to buy two packages to have enough numbers, but I managed to use coupons for both so that I only ended up spending an extra $5.
Actually, when all is said and done, this really was not a very difficult or expensive project at all. You could even hand-stitch this if you don't own a machine. Definitely could be made in a weekend - it took me the better part of 3 evenings to complete it. One to cut everything out, one to embellish the ornaments and figure out what order I wanted them all to be in, and then one to sew everything together. Even with the "splurge" on pre-cut numbers, this whole project cost me less than $10. Take that, Pottery Barn!
Edited 12/11/09 to add:
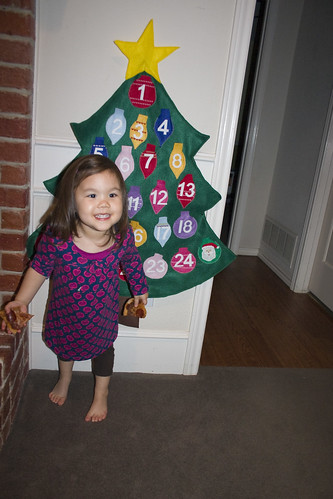
Here are a couple close-ups, as well a shot of E standing in front of it, so you can get a better sense of scale.
1 comment:
way to go!!! I had JUST saved a pic for that PB advent calendar for inspiration for next year. I have too much on my plate to try to get it done this year...besides, I just made all of those stockings.
Yours looks great!! I hope Evy's enjoying it!
Post a Comment