
I threw together a little quickie project for E while she was in her bath tonight.
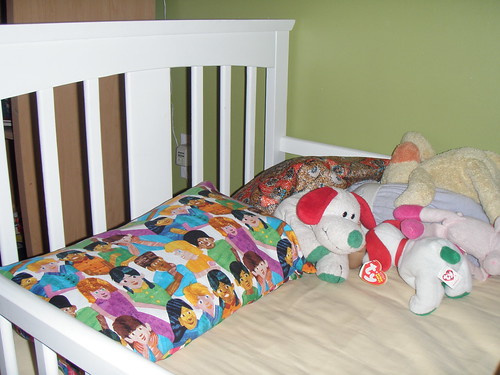
 E loves having pillows for her "big girl bed," so we picked up this $2 pillow from Ikea a couple months back. It's the perfect size for her toddler bed. At the time, I didn't realize it was going to become her actual pillow that she uses every night. She also likes to drag it all over the house. I decided to make a little pillow case for it so it would be easier to keep clean. Also, being a cheap $2 Ikea pillow, some of the red & black dyes have bled, so it's not looking so pretty anymore.
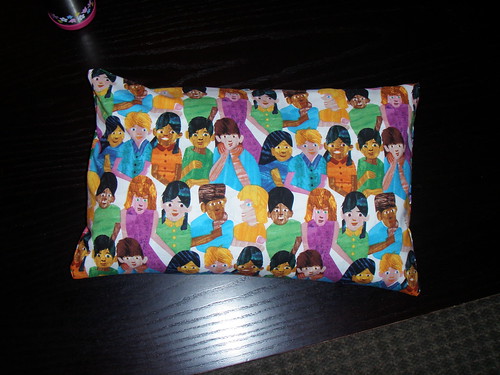
I decided to do an overlapping envelope-style for the back, just to keep the pillow from falling out too easily.
In case you're curious, a little backstory on the fabric I used:
Those of you with kids will probably immediately recognize the print as the children from Eric Carle's Brown Bear, Brown Bear, What Do You See? Apparently, you can buy Eric Carle fabric. E spotted a fat quarter with the children on it when we were in a fabric store last month and went crazy for it. After she dragged it all over the store and even put it in her mouth, I felt compelled to buy it. Hrmph. But she really seemed to love it and has been playing with it, using it as a doll blanket, among other things, and she refers to it as "my fabric."
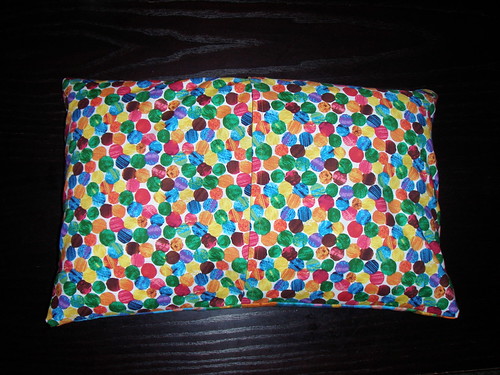
I wasn't sure what I was going to do with her fabric until last week, when she spotted another Eric Carle print, this time from The Very Hungry Caterpiller (she refers to it as "the balls). I figured what the heck and bought it too.
It actually me longer to figure out the math on how I needed to cut the pieces than it did to sew the pillowcase. But for anyone interested in making one for this specific pillow, here's what I did:
I cut one 18"x12" piece for the front of the pillow.
For the back, I wanted to cut two 11"x12" pieces, but I ran into a minor problem. Fat quarters are generally around 18"x22" and once you wash them (I almost always pre-wash), you lose a bit to shrinkage. So I fudged a bit and ended up with two 10 1/2"x12" pieces instead.(*see note below)
Take one of the back pieces and on the 12" edge, turn it about 1/2 inch and press, then turn another 1/2 inch and press again. I used to be lazy and skip using an iron (I'd just finger-press), but I got tired of wonky seams and edges so I'm now an ironing-convert. Sew down the turned edge (I used a 3/8" seam because that's what I get when I line the edge of the fabric up with my presser foot). Repeat for the other back piece.
Then I laid the large front panel on my table right-side up and lined up the two back pieces on top of it, right-sides down, so that the outer edges lined up and they overlapped in the middle. Pin all around. I also put a couple pins in the middle of the overlap, just to keep it all straight.
Sew around the entire edge (again, I used a 3/8" seam, but 1/4" would be fine too). Clip the corners and turn out. I reinforced my seams with an overcast stitch, but you don't necessarily have to do that.
*Honestly, 10 1/2 inches was really cutting it close, and if you have a particularly fluffy pillow, you may end up with some gapping at the overlap. If I make another, I'll probably cut 12"x12" pieces, just to be safe. Unfortunately, that rules out using fat quarters unless you have an extra. Or alternatively, when you press down the edges, you could make the turns much smaller, like 1/4" or even 1/8".
1 comment:
Oh yeah, I saw that fabric at Thomas' Sewing in Mesquite. They have three or four fabrics all from the book... one with the animals too! The pillow looks great!
Post a Comment