Showing posts with label clothes. Show all posts

Monday, March 26, 2012

Rainbow Birthday Outfit

IMG_8056

It's become something of a tradition for me to make E a special outfit each year for her birthday. Two years ago, I made her a butterfly skirt and had a friend embroider a "3" on a tee to match. Last year, I threw together a Foofa shirt and easy tutu.

This year, I decided to go back to the number shirt thing, but since I didn't know anyone local who could do the embroidery, I had to dust off the cobwebs on my machine applique skills and put the "5" on myself (I used this method, which I first learned several years ago).  I think I did pretty well, especially considering my printer was broken, so I had to freehand my backwards 5!  For the skirt, I decided to try a double-layer ruffle skirt, from this tutorial.

I loved the way this skirt turned out! I added some topstitching above each layer of ruffles since I think it gives the skirt a more finished look.  I will say though, even though the dimensions on the tutorial say they're for a size 5 or 6, the skirt was a bit smaller than I expected on my tall, skinny girl.  I would put it at more of a size 4T/5T.  Next time, I will add an inch to the width on the top band, and at least a couple inches in length to each of the ruffle layers, as well as do a rolled hem on the serger.  I felt like the turned hem looked bulky. 


IMG_7933

Saturday, January 29, 2011

Valentine's Day stuff

For the first time ever, I'm on top of my crafting more than a week before the actual holiday!  Amazing!

I bought the Farbenmix Redondo skirt pattern a couple months ago and have been dying to try it out.  I'd originally planned on making E another broomstick-style Valentine's skirt, but then I figured why not give the new pattern a try?

Here it is, spread out in all its twirly glory:
photo

I have to say, I have totally fallen in love with this pattern and cannot wait to make more. It's one of those patterns that looks like it was super complicated to make when actually it was quite simple.  I did make a couple small deviations from the original pattern though.  The original calls for you to cut out 5 panels.  Well, I wanted to alternate two different fabrics and did not want to have two of the same next to one another, so I decided to add one more panel. To try and compensate for the width of the extra panel, I left out the seam allowance (which was not included anyways) when I cut all the pieces.  I will say, cutting the spirals was a bit of a pain - easily the most difficult part - because you cannot fold your fabric over and cut two at a time.  I also ended up extending the waistband piece to accommodate the extra panel.  It's probably a tad big in the waist, but I figure no one will see that part anyway since it will be hidden under a shirt.

Wednesday, September 22, 2010

Costumes

My friend Heather asked me to make some more costume pieces for her fall show, Little Women.  At first she wanted me to make 5 or 6 corsets, but after doing some research on them, I realized that those might be beyond my skill level - or at least that many in the time frame given would be - and bust her budget as well.  Anyways instead, I sewed up a bunch of old-timey pantaloons/drawers/bloomers or whatever you want to call them. 

photo 

I used Simplicity "Historical" pattern 9769, but realized after I started sewing that historical meant that they were wide open in the crotch, pretty much from front to back.  So I had to make a few alterations, which on the one hand, made them quicker to sew, but on the other hand, gave them less flexibility in the waist.  Lucky for me, the girls can to shimmy into them and once on, they won't have to change out of them during the show.  Here are a couple of the girls, modeling them.  (Sorry for the extreme blur, it was dark and I didn't realize how out-of-focus it was till I got home.)
 
photo 

I also made some old-timey aprons for the girls to wear over their dresses.  Again, sorry for the crappiness of the pics, but I was in a mad rush to get them done and delivered so I only had a quick minute to snap a couple pictures.  I'm hoping for better ones from the actual show.

photo 

photo

Here's a better shot of my favorite one, which I added a cute little ruffle to on the sides.
photo 

I have to say, despite the tight deadlines, making this stuff is actually pretty fun.  I really enjoy the challenge of making things that I would otherwise never make in a million years, and because they're for the stage, they don't have to be super perfect since no one will be really up close to see mistakes. ;)  Also thank god for my serger - it would easily take me twice as long to sew these up without it since I'd have to turn and topstitch all the raw edges.

Oops, almost forgot. I also whipped up a bunch of little drawstring purses for the show too.  Two are in a fancy brocade, the rest are from leftover scraps from the aprons or other fabric I had laying around.  These were made in the most generic way possible - serged together and then a piece of scrap sewn to the inside to make a casing for the drawstring.  Again, lucky for me they don't have to look nice up close, just from far away. 


photo

Monday, September 20, 2010

Stash game!

About 3 years ago, I joined a sewing message board, but I visited it very infrequently.  At the time, I was just beginning to sew and it was a bit overwhelming.  But my friend Jacki is a regular there and always talked about this game they do, where the goal is to reduce your fabric stash and NOT buy new fabric.  Since my fabric hoarding has been getting a bit out of hand lately, I figured it'd be good motivation to finally make all the projects I've been planning. 

Basically, the rules are that starting on September 1st, you get points per yard for anything you sew and lose points for fabric that you buy.  Anything you bought or ordered before the 1st counts as part of your current "stash," but you can't actually start cutting fabric for the item until then either.  So anything you started before the 1st counts as an "Unfinished Object."  I spent the entire week beforehand planning and tracing patterns that I wanted to use.  I also might have gone on a fabric-buying spree.  I know, defeats the purpose of reducing the stash, but I couldn't help myself.

Anyways, here are the first few batches of things I made.  Nothing major yet, but I knew I'd have more costumes to make, so I wanted to start off slow.

First up, a Halloween skirt for E!  She's been very into twirling lately, so I wanted to make her a nice, full twirly skirt.  I used the PortabelloPixie Gracie pattern for this, but either I cut it wrong or there's something wonky with it because the top tier and the waistband didn't seem to match up quite right.

photo

Here she is, giving it a test twirl. I think it met with her approval.  :)

photo 

I also whipped up an absolute TON of key fobs to sell and give as gifts.  These are actually pretty fast and fun to make.  I enlisted T to put the rings on so we had a little assembly line going.  This is actually only about half of them.

photo 

Last, and sort of least, I made a quick little placemat for E to use at school.  Nothing really fancy, just two rectangles (and interfacing) that I sewed right sides together, then turned and top-stitched. I used the same fabrics as on her nap mat, and I also added a piece of elastic to hold it closed when rolled up.

photo

More to come...

Wednesday, September 1, 2010

Fall Sewing

"Fall" sewing is probably a bit of a misnomer considering that temperatures are still regularly in the mid-90s here in Texas.  It'll probably be close to November before we get even close to what I consider to be fall temperatures, but I digress.  It's hard to believe it's been more than 2 months since my last post.  We took a long vacation for most of July and I've been playing catch-up ever since.  I also am STILL tweaking my long-promised nap mat tutorial (my punishment for being OCD), but I promise to get it up one of these days, probably when no one will really need it anymore.  :P

In any case, I did make not one, but two nap mats this year; one for E and one for her bff.  They are actually attending the same school this year, so they'll get to spend a lot more time together. 

photo
I made the initial mistake of cutting both mats to the same dimensions as E's old one, not accounting for the fact that the kids have grown quite a bit in the last year.  Doh.   To compensate, I ended up adding a separate, detachable pillow, which I think actually worked out rather well.

photo

photo

I also had a couple commissions recently for new items, one for a friend's son, and the other for another mommy.  First up was a cheerleader costume for a woman who was looking for something more authentic-looking (and modest) than the standard "sexy cheereleader" costumes you find in most shops.  I had never made anything like this before, but I rather enjoyed the challenge. I used a pattern I picked up at Jo-Ann for pretty cheap, with very few modifications other than to add a few inches to the hemlines and some short sleeves to the shell.

photo
I wish I'd had a chance to take a picture of her trying it on.  It looks much better on than it does laying on my floor.  I love that style of pleated skirt and I'm thinking about making a miniature version for E now.

Next up is my first boys' clothing item and first button-down shirt.  I absolutely adore this airplane fabric, so I was super excited when a friend of mine requested I make her son a shirt out of it.

photo

Sewing the collar on took me forever to get right, as the pattern directions were horrendous, but after my friend, Jacki, pointed me toward this tutorial with a video, I finally figured it out. 

After all that, I decided to sew something just for fun.  I settled on a simple little tunic/dress out of a Japanese sewing book (Pochee Natural and Layered Style) that my cousin picked up for me in Japantown.  It's pretty much just a front, a back, and an elasticized pocket, with pintucks and binding. Except for having to make the binding, it was a pretty quick little project. I think it turned out super cute!

photo

I had a pretty large scrap of fabric leftover after making this, so I decided to make one for E's baby doll too.  I scaled down the pattern pretty much just by eyeballing it, so it's not quite right (too big around the neck), but I don't think she'll complain. ;)

photo 

Here they are together, hee!  In the book, it's worn as a tunic, layered over a sleeved top and some leggings, but E wore it as a short dress.

photo

Tuesday, June 22, 2010

Me, Myself and I

Since I started sewing a little over 3 years ago, I have rarely, if ever, made anything for myself.  I've made tons of clothes for E and her little friends, but for some reason, I've always been too intimidated to make clothes for myself.  It's actually a bit silly when you think about it.  I'm not a petite woman by any stretch, and I have a difficult time finding clothes that fit me properly, especially across my bust, so you would think that the first thing I'd make would be my own clothes!  I finally decided that it was about time I got over this particular hangup and set out to make myself a summer wardrobe.

I started out with some simple A-line skirts.  Using the guidelines from Sew What! Skirts (a fabulous resource - I highly recommend it), I drafted a simple pattern and made 2 skirts with side zippers.  The first one is a bottomweight cotton print.

IMG_1905 by you.

[I normally despise posting pictures of myself, but I realized that it's hard to get a sense of how these items look unless they are on, so bear with me and excuse the filthy bathroom mirror. :p]

IMG_1816 by you.

Have I mentioned that this was also my first time putting a zipper in a garment?  It was way easier that I expected!  I don't know what I've been waiting for.  The second one is similar, but not quite done yet, so I'll post it when I get around to finishing it up.
 
It's impossible to get through a Texas summer without spending a lot of time at the pool or sprayground (for all you Northerners, it's basically a park or playground with water features for the kids to play in).  And even with a generous coat of sunblock, it's hard to keep from getting burned.  So inspired by a caftan my friend Valerie picked up while in Miami, I decided to try and make my own caftan-style swim cover-up.  It's basically a giant rectangle of printed cotton gauze that I sewed into an oversize "T" shape and then added a casing and ribbon drawstring.  I rolled all the edges too, mostly out of laziness. ;)


IMG_1904 by you.  

I do wish that the shape of it was a little more flattering on my body, but it serves its purpose well.  The bonus of using gauze is that it's super lightweight, so even if it gets wet, it dries very quickly.

IMG_1820 by you. 

Last, but not least, I made my very first top!  It's Kwik Sew 3610, in case you're wondering.  I always used to see tops like this in the store, but could never find one that fit me properly, particularly over the bustline. 

IMG_1908 by you.

IMG_1910 by you. 

This was also my first time working with this kind of shiny, silky fabric, and I have to say, I did not enjoy that part at all.  It was extremely difficult to keep lined up while sewing (even with a billion pins), and it also did not hold pressed creases very well, if at all.  The pattern was otherwise super easy to make though, and I think I may try it again with a super lightweight cotton woven or knit instead.

Monday, June 21, 2010

Shirring mania

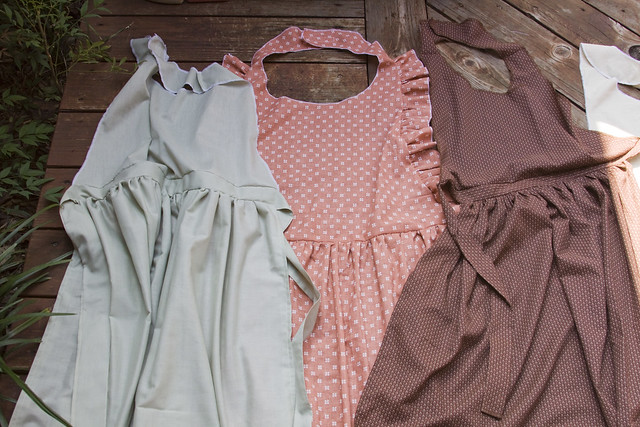
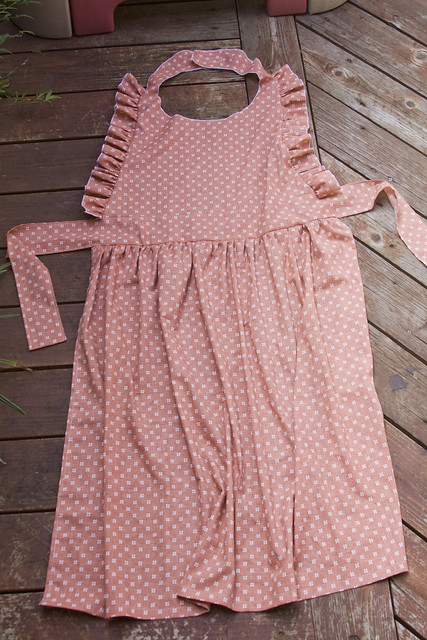
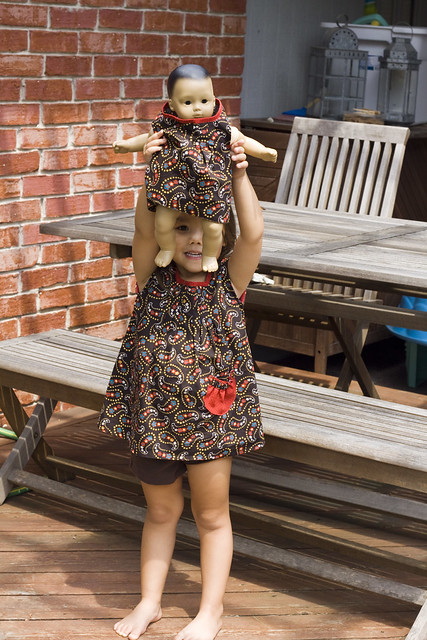
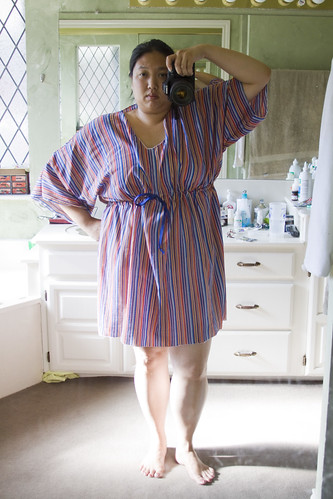
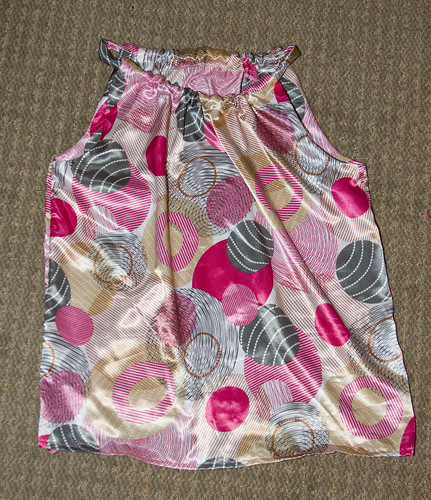
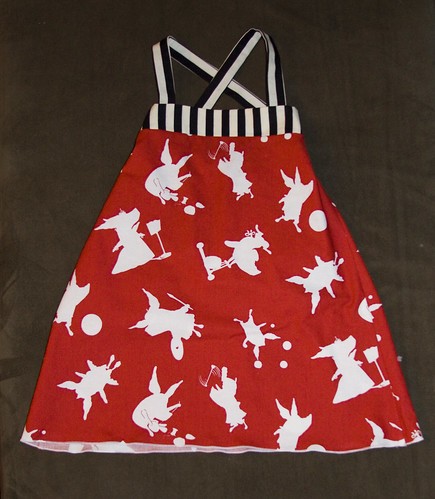
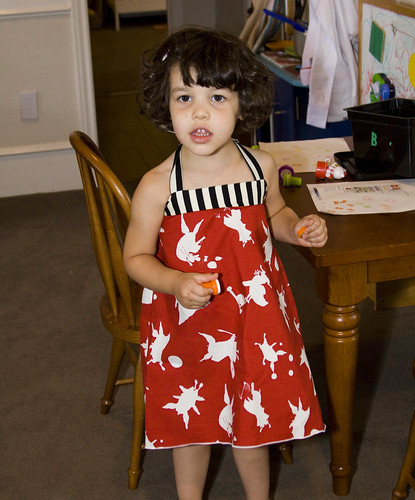
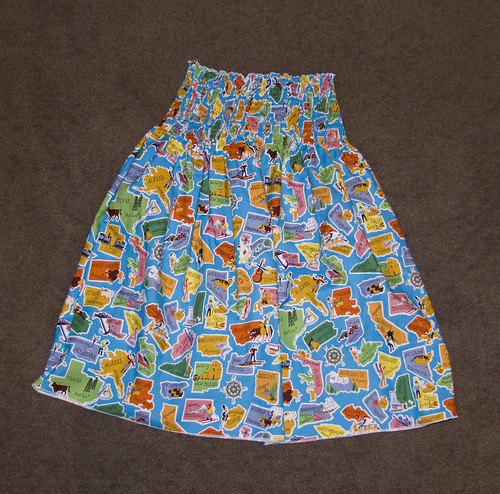
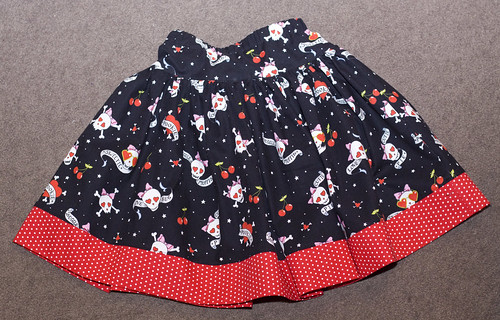
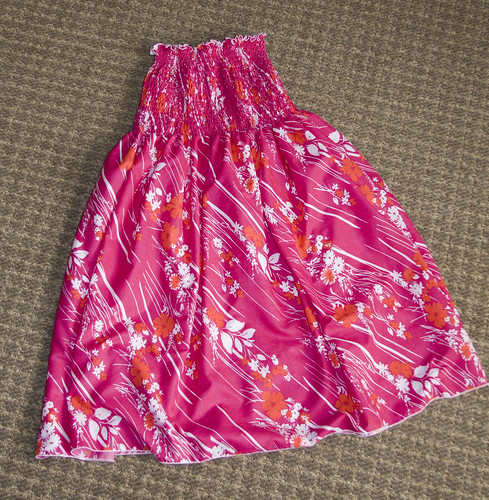
I know a lot of people hate shirring, but I've always loved it.  It feels sort of like magic to take a boring old tube of fabric, sew a bunch of lines through it, and voila! It's a dress!  I've made a decent number of shirred dresses at this point, but I recently discovered something that I've never seen mentioned before: all elastic thread is not created equal.  I had previously always bought the same kind of elastic thread at the same store, but last time I was there, they were no longer carrying it.  They had Guterman elastic thread, but a friend had warned me that the Guterman didn't work very well.  So instead I bought a different kind somewhere else. 

Well, the other day, I finally ran out of the spool I was using (I'm not 100% sure what kind it was since I threw away the packaging long ago) and went to wind a new bobbin from the new package only to realize that this elastic thread looked and felt totally different.  Not only was it not as stretchy, it was also much thinner.  This did not bode well. 

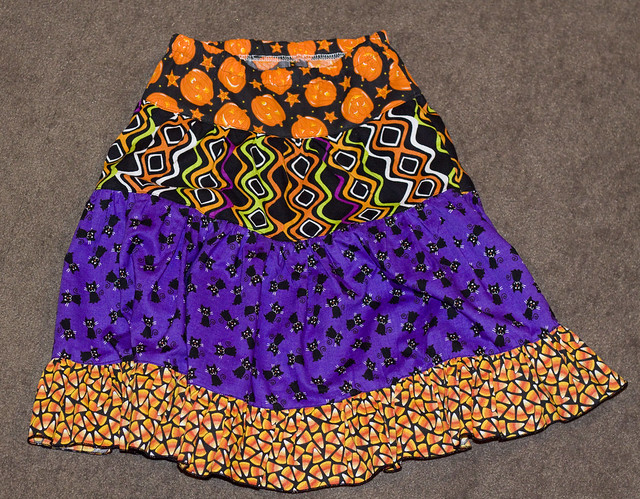
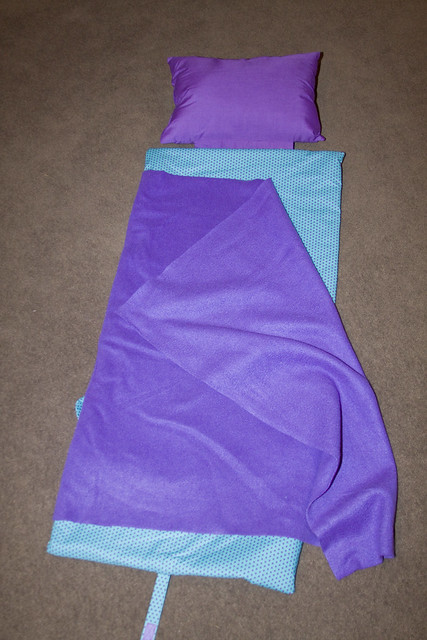
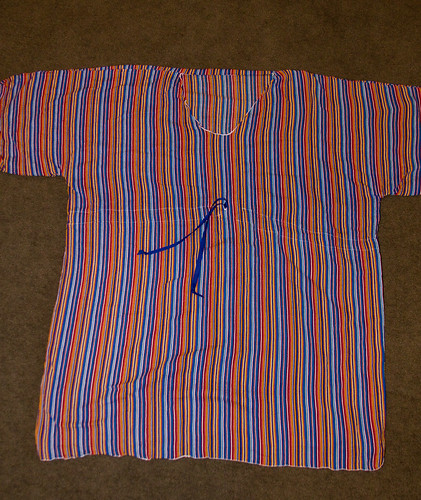
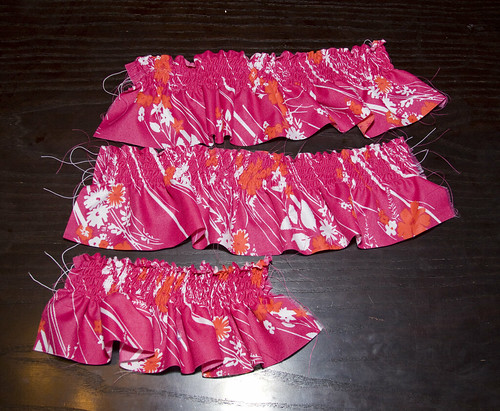
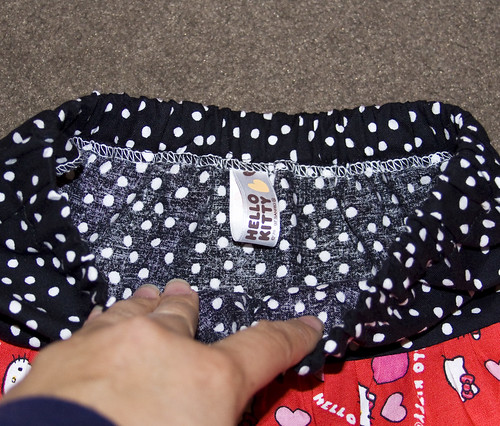
Rather than risk messing up a dress I was only halfway done with, I decided to go and hunt for different thread.  I came back with two more spools from two different stores and did test runs of all three on 5" x 25" strips of lightweight woven fabric (same as the dress I'm currently making).  I hand-wound a bobbin with each of the three different kinds of thread and then shirred 5 rows on each strip; tension: 6, stitch length: 4, each row approximately 3/8" apart.

IMG_1915 by you.
Strip #1 (Top)
Designer's Choice Elastic Sewing Thread
bought at Hancock Fabrics
64% Polyester, 36% Rubber
Finished length: 13"
After steaming: 9 1/2"

Strip #2 (Middle)
Dritz Elastic Thread
bought at Jo-Ann Fabrics
28% Polyester 72% Rubber
Finished length: 15"
After steaming: 11" 

Strip #3 (Bottom)
Stretchrite Elastic Sewing Thread
bought at Hobby Lobby
42% Polyester, 58% Rubber
Finished length: 9"
After steaming: 8" 


As it turns out, the brand and/or rubber content makes a huge difference!  The Designer's Choice was the the thinnest and felt the least stretchy, so I was surprised to see that it actually shirred up tighter than the Dritz, which had the highest rubber content.  The Stretchrite was far and away the most effective, and I suspect that it's what I had previously.  I'll also note that it was the cheapest, although I think that Hobby Lobby's notions are generally cheaper than Hancock and Jo-Ann.  Each spool has 30 yards, so one usually goes pretty far.  I don't think I've had to buy more than one a year.  Even so, I think next time I'm there, I may stock up, just in case.

Oh, and just for kicks, I also tried machine-winding bobbins for the Dritz and Designer's Choice threads and sewing 5 rows on shorter strips of fabric.  I was hoping that the tighter, more uniform wind would make them gather more when sewn.  I was shocked and disappointed to see that they both actually seemed to perform slightly worse.  So I guess I'm stuck with hand-winding.  Bah.

[Edited to add:
I forgot to see how much more these would shrink up after applying some steam to them from the iron.  Each strip did gather up a bit more and I've added it to the stats above. (Thanks, Jacki, for reminding me!)]

Olivia dresses

A friend requested that I make a dress out of Olivia fabric for her daughter.  She originally requested a simple A-line dress with criss-cross straps, so I loosely traced one of E's dresses to make a simple little pattern and then sewed a couple tubes to make the straps.  I rolled the bottom hem on my serger to keep as much of the length as possible.  I originally left the straps un-tacked down in the back so that I could customize them to the right length, but then we decided to leave them that way and make it into a halter dress.

IMG_1856 by you. 

IMG_1892 by you.

IMG_1893 by you.

Of course, once E saw her friend's dress, she insisted that I make a matching one for her too.  I made the top band a bit bigger to try and get more length out of it for my tall girl, but I realize now I should have adjusted the width too. 
Here's the promised pic (excuse the weird face, she was not being very cooperative).

IMG_1914 by you.

Monday, May 3, 2010

Playing catch-up!

Whew, has this month been busy!  After a trip to Chicago and a resolution to a minor health issue that left me too exhausted to work, I'm back to sewing like a fiend and catching up on my mountainous back-log of orders.

First up, some oven mitts and matching hanging dishtowels, made from super adorable matroyshka-themed fabric, which the customer special-ordered and had sent to me.  It was a heavier weight fabric, almost like a canvas, and by the time I was done making these, I'd really fallen in love with it.

IMG_1640 by you.

I had actually finished the oven mitts quite some time ago, but had a bunch of fabric leftover, so she requested some dishtowels with a piece added so you could hang them over an oven handle or the like.  I drafted the towel pattern myself and I'm really happy with how it turned out.  Definitely going to be making more of these.

Next is an apron knot dress, based on the Portabellopixie pattern, made from the same skull fabric I used for one of E's skirts. 


Last, but certainly not least, is a strapless shirred dress for the daughter of my favorite photographer, who also happened to take the pic of the little girl in the apron dress above.  Her daughter is really into maps, so this fabric was perfect for her!

 IMG_1647 by you.

Tuesday, March 30, 2010

Skirt-o-rama

About a month ago, I started making a bunch of skirts for E with the hopes that spring would soon be here, and that we could finally make a serious effort to start potty-training.  Well hurrah, hooray!  Both have finally come! 

Here are a few of the skirts I've made.  These whipped up very quickly, especially with my ruffler foot. ;)

Here is E's favorite, mostly because it looks like the one that her plush Minnie Mouse wears.  It was the quickest and easiest to make, mostly because I just did a quick rolled hem on the bottom and a wide band for elastic casing at the top.
Minnie skirt
This is not an uncommon look nowadays:
IMG_1238 by you.

This skirt was supposed to be part of her birthday outfit, and I even had a matching "3" applique shirt embroidered by Kenzie Kouture, but of course, when the actual day came, E insisted on wearing the Minnie skirt. *sigh*
IMG_1191 by you.

I did, however, manage to get her to wear the complete outfit to school one day, so here's a pic I managed to snap as she tore around the house like a maniac.  Sorry for the slight blur.  She's fast.

IMG_0824 by you.

This is probably my favorite skirt so far.  I love the skull fabric!  I think I also realized after making this one that I prefer the drop-waist style.
IMG_1189 by you. 

I actually made this skirt specifically for E's 3-year-old photo shoot in Deep Ellum with our favorite photographer.  I also commissioned another embroidered shirt from Kenzie Kouture to match, this time with heart & crossbones.  Here is my big girl, in her "model" pose. ;)
DSC_6093 2 by Chera25. 

And I can't resist including this shot of T and I, with our monkey:
DSC_6073 2 by Chera25. 

Now that we are potty-training full force, I'm anticipating a lot more skirts and dresses for spring and summer!

Thursday, February 25, 2010

Beach dress

IMG_0706 by you.


My best friend was in town for a visit last weekend, and I took her with me to a local fabric outlet, Golden D'or.  I'm a bit of a cheapskate, and it's one of my favorite places to browse for bargains.  Oh and also to pick up dirt-cheap notions like elastic, velcro and zippers.  She found this very pretty thin cotton fabric on the clearance table and asked me to make a shirred beach dress/swim coverup for her to wear this summer. 

This fabric seemed a bit dingy and flimsy under the fluorescent lighting in the store, but I must say, it looked much prettier after we got it home.  It also washed up beautifully soft, and I think the thinness will be perfect for a hot day at the beach.

It's been a while since I've done a shirred dress, and this was my first attempt at an adult-sized one.  It's hard to tell from the pic, but it's about knee length, maybe a little bit longer.  I've definitely come a long way though since the very first one I made for E, almost 2 years ago!  Thanks to my serger, I did rolled hems with wooly nylon on the top and bottom.  I love the contrast of the white against the hot pink.  Then I just did a quick serged seam to make it a tube and started shirring away!  It goes so much faster when you have someone else to wind the elastic on the bobbins for you. ;)

I love how this turned out, so much so that I may go back and buy some of the same fabric in blue for myself.  I'm dropping it in the mail today and hoping my friend will take a pic of herself wearing the dress and let me post it. *hint hint*

Monday, February 15, 2010

Serge-a-licious!

IMG_0576 by you.

Yesterday, with the aid of my handy new serger, I managed to whip up this little hoodie in just a couple hours!  It's the raglan tee pattern from Kwik Sew for Toddlers, an awesome pattern book that my brilliant friend, Jacki, turned me on to (it's also mentioned in this post).  If you're interested in learning to make clothes for your kid, I highly recommend it.  Don't be scared off by the horrifyingly dated outifts on the cover.  It's got very solid, basic garments that are easily adapted to your own style.

For this shirt, I traced and cut the raglan tee/sweatshirt pattern in 3T.  I didn't want to do cuffs or a waistband and my daughter has a long torso, so I lengthened the sleeves and bottom hem by a bit.  I also added a hood, partly because she is obsessed with hoodies, and also so I wouldn't have to make a neckband. ;)  For the hems, I serged the edges, turned them other and then top-stitched with a twin needle.  Easy peasy!

As you can see, she loved it and wanted to wear it immediately. 
IMG_0570 by you.

It's a bit boxy, so I may try making it a bit more fitted next time. I may even go down a size in the body and adjust the hem & sleeves accordingly.  I think the sleeves here are a little bit short, so I may end up adding a cuff there after all.  Also, the hood isn't nearly deep enough, so I'll definitely lengthen that next time too.  Not bad for a first try though! And it was way easier to make than I anticipated, so much so that I'm kicking myself for not trying it sooner!  I'll definitely be making more of these in the near future - next up is a zipped hoodie sweatshirt.  Then maybe some short-sleeved hoodies for spring, maybe even a dress or two.  Hoodie-mania!

Thursday, February 11, 2010

Valentine's outfit

IMG_0452 by you.

About a month ago, I bought some heart-themed Hello Kitty fabric with the idea of making E a special Valentine's outfit.  I had originally planned on a pillowcase dress or the like, but when I saw my friend, Chrystyna of Kenzie Kouture, making these adorable embroidered heart shirts for Valentine's Day, I couldn't resist ordering one for E.  Instead of a dress, I made a tiered ruffle skirt to match.  I absolutely love how this turned out!

This was also a great opportunity to use my new serger! I know, you're thinking "wait a second, didn't you already have a serger?"  Well, long story short, I sold the old serger because I never used it (and it sort of scared the crap out of me).  Then I realized I desperately needed one for the Great Ruffle Project, so I ended up getting a new one.  Thanks to some hand-holding by now I'm totally over my serger fear and LOVING it!

I was especially excited to try out a rolled hem with wooly nylon, although I had a bit of trouble with it and the bottom tier ended up being a bit shorter than I intended, especially on one side.  Oops.  I had originally intended to use the serger to gather the tiers too, but it didn't quite work out the way I wanted, so I ended up using the ruffler foot on my regular sewing machine instead.  I have to say, I absolutely love that thing!  It made sewing this skirt so quick & easy, and I ended up with pretty much perfect gathers for each tier.  I'm definitely going to make more of these in the future.

Here's a shot of just the skirt.
IMG_0442 by you.

I usually put some kind of ribbon tag in the waistband to distinguish the front from the back. I couldn't resist using some Hello Kitty ribbon that my cousin gave me.
IMG_0443 by you.

My love for HK has definitely rubbed off on my daughter.  E was very excited to wear this outfit to her school Valentine party today!  She also wore Hello Kitty socks and rain boots - she's very into matching too, haha!
IMG_0454 by you.

I ended up whipping up another skirt or one of E's little friends too.  I'm thinking that with spring around the corner, snow notwithstanding, I may start selling these!
IMG_0484 by you.

LinkWithin

Blog Widget by LinkWithin