Friday, April 6, 2012

Cellphone Holder


I waste more time than I care to admit on Pinterest.  Like most people, I think I mostly pin things that I never have any intention of buying, cooking, making, etc.  I've decided to change that and I'm going to try and start picking one thing each week to actually make.  Last week, I made this holder from an empty lotion bottle for my phone to sit in while it charges.  This will come in super handy during those times when it seems like there's no place to set your phone down while it charges, especially while traveling.


Directions to make your own can be found on this site.  It was super quick & easy to make, especially since I already had all the materials I needed in the house. I think it took me longer to empty the last of the lotion into another bottle and wash it out than anything else. Probably less than an hour from start to finish.  The only thing I would recommend would be to maybe make the back portion a bit taller so that there is a little more space between the plug and the top of my phone, but of course that will vary depending on the size of your phone.  Also, I didn't care for the feel of the fabric after coating it with the mod podge, so I may give it a spray of acrylic sealer at some point.

Monday, March 26, 2012

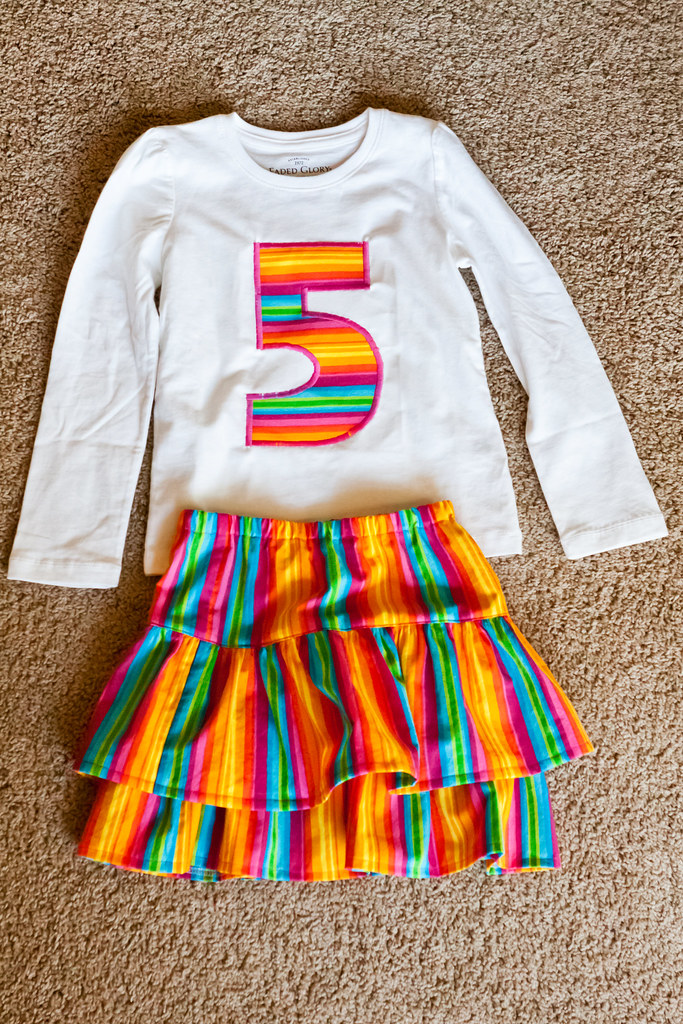
Rainbow Birthday Outfit

IMG_8056

It's become something of a tradition for me to make E a special outfit each year for her birthday. Two years ago, I made her a butterfly skirt and had a friend embroider a "3" on a tee to match. Last year, I threw together a Foofa shirt and easy tutu.

This year, I decided to go back to the number shirt thing, but since I didn't know anyone local who could do the embroidery, I had to dust off the cobwebs on my machine applique skills and put the "5" on myself (I used this method, which I first learned several years ago).  I think I did pretty well, especially considering my printer was broken, so I had to freehand my backwards 5!  For the skirt, I decided to try a double-layer ruffle skirt, from this tutorial.

I loved the way this skirt turned out! I added some topstitching above each layer of ruffles since I think it gives the skirt a more finished look.  I will say though, even though the dimensions on the tutorial say they're for a size 5 or 6, the skirt was a bit smaller than I expected on my tall, skinny girl.  I would put it at more of a size 4T/5T.  Next time, I will add an inch to the width on the top band, and at least a couple inches in length to each of the ruffle layers, as well as do a rolled hem on the serger.  I felt like the turned hem looked bulky. 


IMG_7933

Tuesday, March 13, 2012

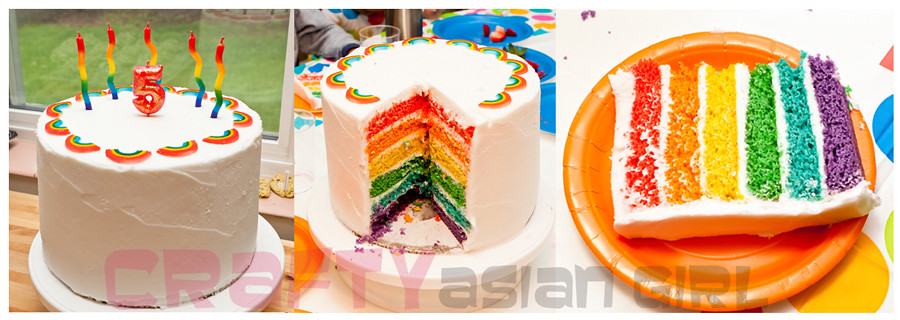
Rainbow-licious

rainbow-cake_wm

Holy cow, I can't believe I haven't posted here in over a year!  Quite a lot has changed in the last 15 months.  For starters, last spring, I decided to devote less time to crafty stuff and more time to starting a photography business, focusing on kids' parties.  Shortly after that, we decided to get our house ready to put on the market, which meant my craft room had to be dismantled and packed up.  And then, the biggest change, the hubby got a job in Seattle, so we moved across the country!  Crazy.

Believe it or not, I have still been making stuff, just not as often. I noticed recently that I'm still getting a decent amount of traffic here, thanks in large part to the hot pads tutorial, and thought maybe it was a sign to revive this blog now that my photo biz is on hold.  So with the exception of last year's Yo Gabba Gabba party, I'm going to skip playing catch-up and just dive in to my latest project, E's 5th birthday party!