Tuesday, December 22, 2009

Hot pads tutorial

IMG_12187 by you.


I know there are only a few days left before Christmas, but there's still a little time left to whip up a few quick gifties.  So I figured why not go ahead and put up my very first tute?

I love to bake, but I hate oven mitts and find most other potholders bulky to use.  I've always wanted something that I could use to quickly grab a cookie sheet out of the oven or a hot plate out of the microwave.  I remembered seeing this blog post a while back about making little round pads that had pockets for your fingers.  I wanted something slightly different, so I thought I'd give it my own spin.  This is a great way to use up scraps and other odds and ends from your stash.  I actually had all the supplies necessary to make these already on hand - ah, the benefits of being a fabric hoarder.

Saturday, December 12, 2009

Doll quilt

I had a bunch of extra squares leftover from my Christmas quilt project that I realized would be perfect for a doll quilt for one of E's Christmas gifts. She is very very into playing with her animals and baby dolls lately, and spends a lot of time making elaborate beds for them out of couch cushions, blankets from her own bed, and bits of fabric from my scrap bag. It's actually pretty hilarious to see her "sleepover" set up all over the living room floor.

The doll quilt also was the perfect opportunity for me to get some practice with free-motion quilting, which I'd never done before but have been wanting to try. I have to say, it was a bit difficult, but I really enjoyed it! I think I still have a long ways to go before I really get the hang of it, but I'm fairly sure I'm going to go ahead and use this technique on my big Christmas quilt.

Here's the finished doll quilt, front:

IMG_12048 by you.

And back:
IMG_12052 by you.

And an "action shot" where you can see the quilting in a bit more detail:
IMG_12051 by you.

I cheated on the finishing and instead of making binding, I left a 1 1/4" border all around of the backing fabric, which I then folded over twice, pressed, and stitched down. WAY easier than dealing with binding. I'm actually pretty happy with it overall. Not bad for using up odds and ends I had laying around!

The only thing I have left to do now is wash it, which I'm actually sort of terrified to do. Normally, I prewash and dry all my fabric, but since I used the layer cake, that wasn't an option. The ladies at the quilt shop told me that it was better to keep it all the same, so wash everything or nothing. I'm really nervous about how badly the red fabric is going to bleed, especially since I have pure white squares in the mix. I think I'm going to do a trial run with one of those 'color catcher' sheets and see how it turns out. I keep telling myself, "it's only for a doll, it's only for a doll..." But if it does bleed, I guess that means that the full-size version will never be washed. *sigh* Keep your fingers crossed on that one.

Of course, now that I've made this little doll accessory, I feel compelled to make some little clothes for E's dolls and animals as well. She's actually been asking me to do this for a while, and I think I'm finally going to suck it up and make a few outfits for her stocking stuffers.

Friday, December 11, 2009

Way way behind

I've been sick on and off (but mostly on) for the better part of the last month. It's been really frustrating to not feel 100%, but even more than that, it's been driving me crazy how far behind I've fallen with my holiday crafting. I swear, my list just keeps getting longer and longer as I see more and more cute ideas for gifts and such.

The only project I've managed to finish recently is the tree skirt I started over a month ago for E's little Christmas tree. She's so excited about Christmas this year that we thought it'd be cool for her to have her own little (fake) tree in her room that she could decorate herself. I decided to make a little tree skirt for it, loosely based on this tute. Obviously I made hers a lot smaller, 26" diameter, and because of that, I also opted to only use 6 pieces instead of 8. I won't go into boring details, but if anyone's interested in how I did that, just post in the comments. ;)

IMG_12025 by you.

I actually am extremely unhappy with how the tree skirt turned out, mainly because I screwed up the binding pretty badly. It's extra sloppy (and don't even get me started about how the backside looks), so sorry, no close-up shots.

IMG_12027 by you.

IMG_12028 by you.

So since I lamely have nothing else to show for the past few weeks of sickies, I thought I'd post about some WIPs and a few links to cool projects that I'd like to attempt to have done in time for Christmas. Some are decorations, some are toys, most are holiday-oriented.

I have a couple commissions I'm almost done with, one knit and one sewn, and I'm also trying to concurrently work on some handmade Christmas gifts for friends and family. I really want to post a tutorial for the gifties, but I also don't want to ruin the surprise...decisions, decisions.

I'm also still hopeful that I might be able to finish the Christmas quilt before Christmas. I have, however, given up on hand-quilting. Partly because I just didn't like the look of it, but mostly because I regained my sanity and realized that it would take me about 10 years to finish it by hand. Now I'm thinking I may give free-motion quilting a go.

This weekend's big project is baking! I'm hosting a cookie exchange next week and I have LOTS of baking to do. I still haven't entirely decided on what kind of cookies I'm going to make for the exchange, but being the overambitious nerd that I am, I also want to make decorated cookies for everyone. Going to be a busy busy weekend.


In a perfect world, I'd also have time to make some of this stuff:
Felt circle garland
Origami star
Paper evergreens
Salt-dough ornaments
Crochet snowflakes
Snowman decoration

Thursday, December 3, 2009

Christmastime is here!

IMG_12020 by you.

I love Christmas and all the hoopla that surrounds it. I'm especially excited this year because not only are we not traveling for a change, but my daughter is finally old enough that she really 'gets it' when it comes to holidays. It's really fun to see everything through her eyes for the first time again.

PBK Advent treeThat being said, she has already started driving me nuts asking me, "Is it Christmas yet?" So I thought an advent calendar would help her count down the days. I remembered seeing this calendar in the Pottery Barn Kids catalog a while back. But even if I did want to shell out major $$ for it, it's no longer available. Of course, crazy person that I am, I figured I could make a reasonable facsimile.

I decided to take advantage of the Black Friday deals at Jo-Ann's last weekend and picked up a yard or two of felt in several different colors (I figured whatever I didn't use I could save for other kid-crafts).

I wanted to stick with a tree, like the PBK one, but seeing as how I waited to start this till November 29, I knew I couldn't do anything too complicated, so elaborate embroidery or applique were out. Instead, I decided to make a felt ornament pocket for each day.

Starting with a yard of green felt, I cut out two large tree shapes (one top piece, one bottom). Then I made a couple ornament stencils on cardboard and cut out 25 in various colors. The balls are just under 4 inches in diameter, and the bulbs are about 5 inches long and 3 inches wide. I wanted them to be big enough that I could stick a little gifty inside instead of candy, if I felt so inclined.

I also decided to embellish some of the ornaments with some of the fancy decorative stitches on my sewing machine. Even though a lot of the stitching ended up obscured by the numbers, I think it adds a nice touch. I did sort of wish I had more stitches to choose from, but oh well. This was the first (and probably last) time I used almost every one of them.


Oh, I almost forgot. The Santa face on the 25th day is from a small felt stocking I found at the dollar store. I just cut him out and stitched him to an ornament shape. Again, I had originally planned to make on myself from scratch, but when I found one already made, of course I opted for the short cut. ;)

I stitched each ornament to the top tree piece using contrasting thread, and leaving the top open to make a pocket. I used one of the blanket stitches on my machine, but a straight or zigzag would have worked just as well. I cut two rectangles of brown felt for the trunk and two stars out of yellow for the topper and then stitched each of these together. Again, I used the blanket stitch, but you don't have to. That's the nice thing about felt, you don't have to worry about finishing edges or turning and topstitching.

Next I put the top tree piece on top of the bottom piece, sandwiching the trunk in between at the bottom. Pinned and stitched all the way around and then I stitched the star to the top. Really, you could probably skip this step, but

Last, but not least, I let E help me put the numbers on each ornament. I originally thought I was going to have to either cut out numbers from felt on my own, but then I lucked out at found sticky felt cutouts at Jo-Ann. I had to buy two packages to have enough numbers, but I managed to use coupons for both so that I only ended up spending an extra $5.

Actually, when all is said and done, this really was not a very difficult or expensive project at all. You could even hand-stitch this if you don't own a machine. Definitely could be made in a weekend - it took me the better part of 3 evenings to complete it. One to cut everything out, one to embellish the ornaments and figure out what order I wanted them all to be in, and then one to sew everything together.
Even with the "splurge" on pre-cut numbers, this whole project cost me less than $10. Take that, Pottery Barn!

Edited 12/11/09 to add:
Here are a couple close-ups, as well a shot of E standing in front of it, so you can get a better sense of scale.

IMG_12030 by you.

IMG_12031 by you.

IMG_12029 by you.

Wednesday, November 18, 2009

Slowdown

Sorry as usual for the lack of posts, but life has gotten in the way of crafting. I recently found out that our beloved dog has renal failure, so I've been too busy worrying and tending to her to be very productive. Here's a pic of my sweet girl in her prime, back when we lived in Chicago.

I have, however, still managed to finish a few items in the last couple weeks, mostly commissions for friends.

Black and white pompom hat for a toddler. I don't usually make hats with the squared-off top like that, but I think I may start. With the pompoms, it's super cute!
IMG_11858 by you.

And this one is one of my new favorites - owl hat!
IMG_11912 by you.

My friend's son is obsessed with owls and she asked if I could make an owl hat for him with some extra soft yarn since he's been having issues with hats being scratchy. I was really excited to find some yummy wool/cashmere yarn (Debbie Bliss Como) at my LYS in what I think are perfectly owl-y colors. I came up with the pattern on my own, and I'm pretty happy with how it turned out. His eyes and beak are 100% wool felt, and stitched on by hand.

E was also very excited about the owl hat, so I of course now I'm making her one too. But being the cheapskate I am, hers is made from Lion Brand's Wool-ease Thick & Chunky, which I got on sale not too long ago.

Currently, I'm working on another commission (a football themed hat in yummy wool/bamboo yarn), and I'm also making slow but sure progress on the Christmas quilt. I'm determined to have that thing done by Christmas, come hell or high water! However, in a bout of insanity, I decided I wanted to hand-quilt it. Let's just say it's not going so well right now. There may be a total about-face in the near future.

Here's some pics of the finished quilt-top and the back.
IMG_11868 by you.

IMG_11864 by you.

Sunday, November 1, 2009

Biggest project yet (WIP)

And I mean that quite literally. I think I mentioned at the beginning of the summer that I had bought a "layer cake" of Christmas fabrics (moda's ultra-yummy Figgy Pudding line) with the intention of making a big quilt. Well, only about 4 months later, I finally got started. It's odd. I never in a million years thought that I would take up quilting, but after making one for E's toddler bed, I've totally been bitten by the bug. Something about the excuse to buy so many different yummy fabrics is irresistible to my fabric-hoarding self.

As usual, I got a bit overambitious with this one. I decided that instead of doing straight squares like last time, I'd try to get a bit more fancy and do a pattern. After googling around and reading up on the basics and such that I'd skipped last time around, I settled on what's called a "disappearing nine-patch" pattern. I was drawn to it partly because it looks way more complicated than it is, but also because it can be done in so many variations, each with its own distinctive look (one of my favorite was this one, which used almost all black and white fabrics, with a splash of red in the center of each 9-patch).

Basically, what I ended up doing was cutting each of my 10" layer cake squares into four 5" squares. Then I sewed those into 9-square patches. Here's all the 9-patches, laid out together.

IMG_11623 by you.

After all the work involved in sewing & squaring off these patches, I was sorely tempted to just leave it like this. But I decided to push on and, holding my breath, cut each 9-patch into quarters, like so:
IMG_11626 by you.

This felt like it took FOREVER, especially squaring everything off, but I finally ended up with 64 squares. Then I spent a while arranging them on the floor until they were "random." After all that, sewing them together was a snap, although as usual, there was a lot of ironing involved.

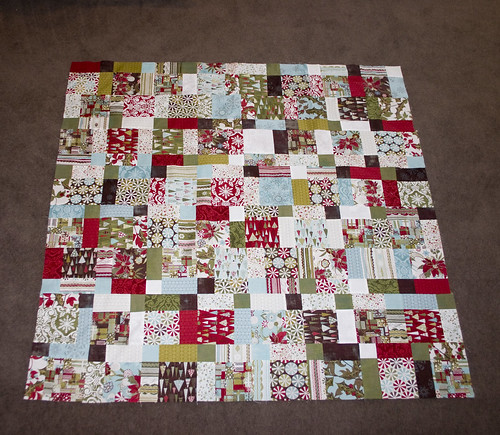
Here's the quilt top so far. I'm pretty happy with it.
IMG_11741 by you.

I had held off on ordering any yardage for the backing, binding etc. because there are so many colorways and I wanted to see exactly how the pattern was going to look before settling on coordinating fabrics. The big disadvantage to waiting was that a lot of this line is now sold out. I did manage to find a few different fabrics that I'm going to piece together for the border, backing and binding, so I'm hoping it'll all work out.

I'm on a bit of a knitting kick of late, so it may be a while before I get back to this quilt, but I WILL have it done by Christmas!!

A few FOs...

For once in my life, the lack of posts here has not meant I've been slacking! Just so busy working on so many various things that I haven't had time to finish enough to post.

Here's the lone Halloween-related item I made this year:
IMG_11755 by you.

Sadly, it's not the costume, but the striped goody bag.

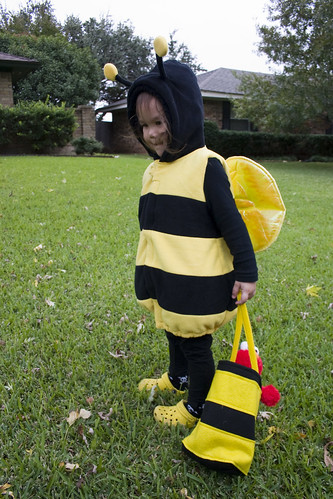
I opted not to make E's costume this year. She is notoriously moody when it comes to wearing the things I make her, and I knew that if I spent a lot of time sewing her a costume only to have her refuse to wear it, I would be crushed/furious. So instead, I bought her this simple, but cute bee costume from Old Navy. It was basically a fleece vest with wings and antenna on the hood, so not only would it be easy to get on and off, it would also be highly adaptable to any variations in weather.

True to form, as soon as I showed her the costume and asked her to try it on, she refused. This continued until literally minutes before the party we attended. I actually whipped this bag up the morning of the party after being hit by a wave of guilt that I hadn't made her costume. It's about as simple as it gets: yellow felt stripes appliqued onto black felt, then folded and sewn down two sides to make a bag. I did flatten the bottom into a gusset of sorts, but that's about as fancy as it got. I thought it made a pretty cute accompaniment to her costume, and it was WAY cheaper than the $12 Pottery Barn Kids version (although I'll concede that the PBK one is a lot cuter). If I'd had a little more time and energy, I probably would have found a way to add some wings, but oh well.

IMG_11825 by you.

My other major accomplishment this week was finishing the Stella Pixie baby hat that a friend had commissioned for her newborn baby. I absolutely adore the Cascade Heritage yarn that I used to make it, and I'm more than a little excited that I have enough leftover to make something for E too.
IMG_11805 by you.

A couple minor warnings for anyone else making this: first of all, even knitted to gauge, it's big. Since this was for a newborn, I made this a full size smaller than the pattern originally called for and cast-on 8 sts less than the smallest size they had listed. I read this same complaint on a few other blogs, but of course, not until after I'd already started mine.

The other complaint is that the pattern I linked to on Etsy's Storque blog has an error in it (the buttonhole section towards the end), so I would recommend downloading the PDF link they have instead, which comes from the publisher. I struggled for a while with the buttonhole part, which it made no sense, before finally giving up and doing a different kind.

Here's a pic of it on one of E's dolls. It's missing the bottom strap portion, but you get a better idea of the pixie shape when it's on a head.
IMG_11803 by you.

Last, and sort of least, there's this random stripey hat that I've been working on here and there for the last few weeks. I started it mostly to use up a few odds and ends that I had laying around, but I also wanted to try out an idea I'd seen where you knit the earflaps first and then incorporate them into the hat round. I hate picking up stitches almost as much as I hate seaming, and this was a nice compromise. This was also a nice chance for me to practice my "jogless jog" striping.

My original intention was to make a hat for E. Well, of course, it ended up HUGE so now I think it's going to be a hat for me, haha.
IMG_11807 by you.

Monday, October 12, 2009

I hate hot glue

I've never been big on bows. I think they look super cute on some kids, but they never seemed to go with my kid's personality. Plus, I just could never be bothered with them. However, lately my kid seems to prefer clips in her hair to ponytails, so I thought I may as well jazz them up a bit.

I recently saw this tutorial on how to make felt flowers and thought they'd make for cute hair clips. Super fast and easy and a great project to do in front of the TV. However, when it came time to glue them to the clips, I had nothing but trouble. Have I mentioned that I hate working with hot glue?

In the past, I'd covered some alligator clips with ribbon and again, had a helluva time getting the ribbon to stick properly. And even once I did get them on like I wanted, they ended up falling apart because E kept pulling them out of her hair and chewing on them. Ah, toddlers.

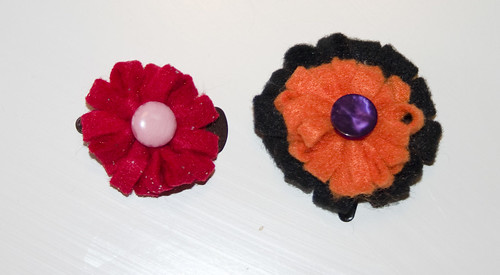
Anyways, after futzing with them for quite some time, here are two finished clips.
IMG_11540 by you.

And a pic of E wearing the Halloween one.

IMG_11551 by you.

The flower promptly fell off the clip about 30 seconds after I snapped the picture. I didn't even get that far with the red one. *sigh*

A friend told me I need a high-temp glue gun (I have low-temp). And that I have to be very very generous with the glue. I'm thinking I may find some other kind of adhesive because I've had it with the stupid glue gun.

Sunday, October 11, 2009

Another birdie sling

IMG_11545 by you.

A friend commissioned me to make another Amy Butler birdie sling bag for her to give as a gift. She picked out all the fabric (and did a fantastic job, as I adore the colorways) and I finally got it all sewn up the other day. These bags definitely get easier to make the second time around. I'm hoping it'll be even easier the third time, as I actually have all the fabric to make one for myself; I just haven't gotten to it yet. I think it's because I can't stand cutting & ironing all the fabric and interfacing, so I keep putting it off.

Here's a pic of the inside. I added a magnetic snap closure, which I meant to do last time but then forgot. Oops. I also used some of the leftover fabric from the exterior to make the interior pocket since I prefer a little contrast.

IMG_11547 by you.

I'll also reiterate my complaint that the pattern calls for WAY too much fabric for the bands and handles, especially is you use 60" wide home decor fabric. I think I got 3/4 yard instead of the 1 1/4 called for, and I still had a ton leftover. Next time I may take it down to a 1/2 yard and see if that works better.

Friday, October 2, 2009

Pants, pants, pants!

IMG_11358 by you.

For a long time, I've been intimidated by the thought of making pants. Or bloomers. Or pretty much anything with a crotch. It mostly stems from the time I tried to make a little romper for E and the crotch turned out just awful. Weirdly misshapen, with a point in the back, almost like a deformed tail. I've avoided anything crotch-y ever since.

My uber-crafty and ultra-wise friend,
Jacki, kept telling me how easy it really was and pestering me to try again and I finally decided to give it another go last weekend. She even traced a pattern for me and wrote out detailed directions. Of course, she was totally right (as usual). In fact, I knocked out these three pairs of flannel toddler pants in an afternoon! The sheep ones are for a friend's daughter. I also happened across a t-shirt I'd bought for either tie-dye or applique, but never used, so I put a little heart on that with the same sheep fabric as a bonus.

IMG_11356 by you.

The owl pants are for E. She also picked some ladybug flannel out of my stash for another pair of pants, but I realized I needed to wash the fabric first, so I'll probably do those another time. I'm thinking these will mostly end up being pajama pants or just lounge-around-the-house pants, especially once the weather gets cooler.
IMG_11355 by you.

And just in case you're wondering, the pattern is from the Kwik-Sew for Toddlers book, which I also got on strong recommendation from Jacki. It has really good, basic patterns for shirts, pants, etc., and they also give you instructions on how to alter the patterns to make them longer or shorter as needed. Perfect for my tall, skinny kid. So if you can look past the grotesquely dated fabrics on the cover, it's a really good book to have. I'm really eager to try and make some knit easy-pants and leggings next so I don't have to keep buying them from American Apparel!

Monday, September 28, 2009

Birdie kimono set

IMG_11350 by you.

I'm ashamed to admit, I have had this outfit 75% done for the last 2 months, only to get stuck on the binding and put it aside in frustration. Well, the pregnant friend that this was for had her baby last week, which lit a fire under my behind to get it done.

It's the Kimono PJ Set from Amy Butler's Little Stitches for Little Ones book, generously loaned to me by the above no-longer-pregnant friend. I had the bright idea to do it in flannel instead of cotton, thinking it'd be cozier. This actually worked out fine for the most part, except for the binding, which I foolishly also tried to do in flannel. Here's a tip for anyone trying to make tiny flannel bias tape: don't do it. Trying to get 1/2" flannel single-fold binding to hold a sharp crease was next to impossible. And then folding it over and pinning the now 1/4" on each side? Infuriating.

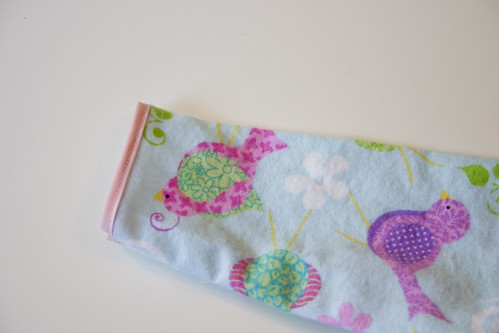
So instead, I went and bought some double-fold bias tape from the store and sewed it on the "wrong" way (meaning, I just jammed the raw edges into the fold instead of opening it up, sewing along the crease, then folding and sewing again). I also opted to put binding along the cuffs of the sleeves too. I think it added a nice finished-looking touch.

IMG_11346 by you.


Like other Amy Butler patterns I've tried, this was not a difficult project, but there were a lot of steps and the directions can be confusing at times. I think I read them about 20 times before I started, just to be safe. My main complaint though is that the pattern instructions were a bit lacking in common sense.

First off, folding 1/2" hems on the bottom of the pants and the bottom of the kimono top looks totally absurd on a tiny size 0-3 month outfit. I was unhappy enough with how it looked that I ripped it out and sewed a 1/4" hem with an additional row of topstitching along the edge.

IMG_11348 by you.

IMG_11349 by you.

Second, how the heck they expect you to be able to sew the hems on the sleeves is totally beyond me. I ended up ripping open the side seams so that I could open it up flat, sew on the binding, and then sew it back up. If I ever make another one of these, I'm going to be sure to do my hemming BEFORE I stitch everything up and overcast the edges.

A last note about working with the flannel instead of regular cotton: because the weave is a little looser, it is not as forgiving when you make mistakes and have to rip out seams. If you look closely at the pic above of the pants, you can still see all the holes from where the original hem was. Also, the edges tended to fray more easily and the fabric is overall less stiff, so it was a little trickier to keep it pinned into the bias tape. But like I said, it all worked out fine in the end, so don't be afraid to try it. I'm pretty happy with how this outfit turned out, and I'll likely make more in the future.

Sunday, September 27, 2009

Bumblebee tutu

IMG_11352 by you.


Despite my desire to be uber-crafty, I opted not to make E's Halloween costume this year. Being the ornery & mercurial little toddler than she is, I had a feeling that after killing myself to make her costume, she'd refuse to wear it. Instead, I picked up two moderately priced store-bought costumes that are big enough for her to wear for dress-up for a good long while. I figure she can pick whichever one she wants on the day of.

One of them is a bumblebee costume from Old Navy, which mainly consists of a fleece vest with wings & a hood. I thought it'd be cute to have a tutu to accompany it. There are a million tutorials all over the web on how to make no-sew tutus (in case you're too lazy to search, you basically just cut strips of tulle and knot them around elastic or ribbon). For some reason, the idea never really appealed to me until now, and I have to say, it was crazy mega easy.

I picked up a couple rolls of tulle on sale at Hobby Lobby last week, and I already had some black elastic laying around that I sewed into a loop. After that, it was just cutting & knotting. I did the whole thing in front of the TV and finished it in just an hour or two. And it cost under $5. My kind of project.


Of course, as expected, my child refuses to wear it. Or even touch it. I'm hoping that she comes around soon, but if not, whatever. At least I didn't spend a ton of time or money on it.

Saturday, September 26, 2009

Birthday cupcake


I whipped up a quick little cupcake last week for a sweet girl turning 2 years old. Unfortunately, me throwing my back out and the subsequent appointments that followed interfered with me being able to give it to her on her birthday. But I thought I'd go ahead and post it here, just for giggles. I'm not entirely happy with how the cherry on top turned out, so I may take it off and do it over.

Thursday, September 17, 2009

Return to knitting!

I honestly can't remember the last time I knit anything. Between the unbearably hot Texas summer, my newfound obsession with sewing, and also just general impatience for how slow knitting can be, I sort of lost interest for a while. But last weekend, I went to visit my best friend in Philadelphia and at the last minute grabbed one of my many unfinished projects work on during the plane ride.

It turned out to be a lifesaver as my flight ended up delayed over 3 hours; I had no music to listen to, and I couldn't focus enough to read the book I'd also brought. I'd forgotten how soothing it can be to just mindlessly knit while watching crappy TV or chit-chatting with a neighbor.

Sadly enough, the project I brought ended up frogged, but I did find some fun new yarn & related supplies to work with on my trip. I got a very cute toddler sweater pattern and some more circular needles (one can never have too many!) at Loop. I also couldn't resist some of the adorable fat quarter bundles at their sister store, Spool. And then I picked up some crazy fun "marshmallow" yarn at Nangellini, which I ended up mixing with some hot pink eyelash yarn to make this funky scarf.


I very rarely work with bulky yarns, and it was really gratifying to be able to start and finish a project in a day. It really re-inspired me to pick up my knitting again and now I'm combing through my various bookmarked and queued patterns trying to decide what to work on next. In retrospect, I should have sprung for a second ball of the marshmallows so that I could have done a tighter knit, but I think the eyelash yarn fills in the holes nicely. I also picked up some super soft green & brown variegated wool that was half off. Score! Not sure what I'm going to do with it just yet though. Oh and of course the pattern I bought calls for bulky yarn, which I don't have, so I guess I'll need to make another trip to my favorite local yarn store. ;)

Oh, and I had to come back and add that the yarn stores I went to in Philly were so different from one another, but both absolutely fabulous! Nancy, the owner of Nangellini, was particularly friendly and cool and my friend and I had a great time chatting with her.

Wednesday, September 9, 2009

Another bento lunch

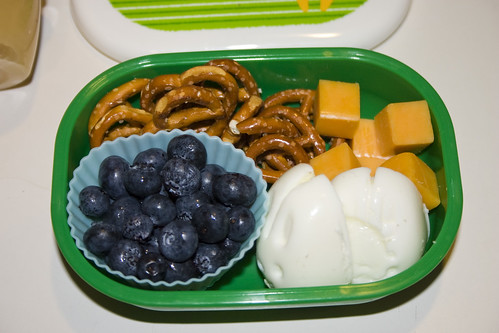
Here's E's lunch for her second day of school. I featured the bunny-shaped egg this time, cut in half and with yolks removed. Otherwise, it was the same old, same old: cubed cheese stick, pretzels & blueberries.

IMG_11240 by you.

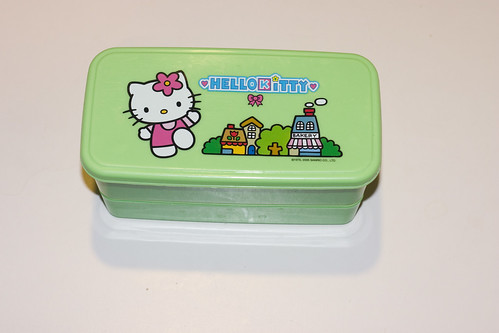
Oh and here's a shot with the super cute lid, which I realized I forgot to show last time I used this bento box. I also decided to get crazy and add an applesauce cup to her lunch, which I've never done before. I forgot to ask how she did with it.

IMG_11241 by you.

Wednesday, September 2, 2009

First day of school bento and egg molds!

Tomorrow is E's first day of preschool, and I've been super excited about packing her a cute bento lunch. So much so that for what is probably the first and last time, I made it the night before.

Since she's been a chowhound lately, I decided to use one of the few two-tiered boxes I have. I don't use them often because I usually don't have enough food to fill them, but not today! In the top part, I made four little sandwich cut-outs, plus some blueberries, and a stick of colby cheese. The bottom tray I just filled with Veggie Booty.
IMG_11102 by you.

IMG_11109 by you.


It was only after I packed the lunch, took pics and then put it away in the fridge that I remembered I had made eggs earlier and forgotten to put them in.

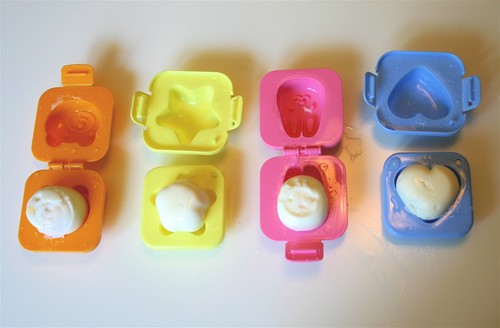
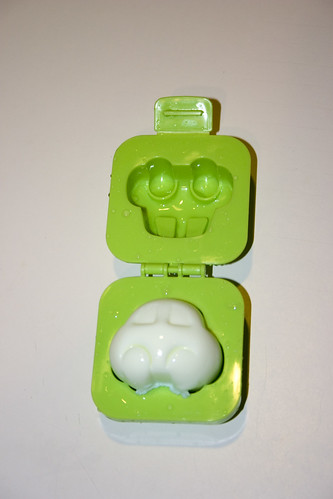
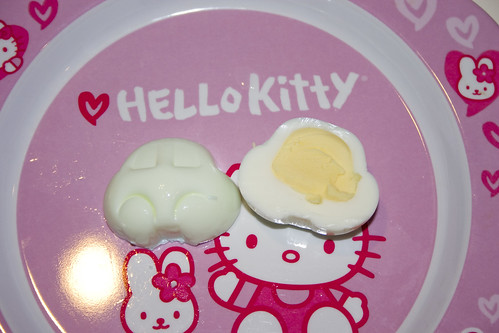
On my trip to California both this year and last, I picked up some egg molds. For the uninitiated, they're plastic molds that you shove a warm hard-boiled egg into that forces it into a fun shape. I briefly tried them out last year, with lukewarm results. At that point in time, E was decidedly not interested in eating eggs, cute shapes or not.

Here's a pic of my lame attempt from last year. I will add that I did indeed use XL eggs, and they STILL were not big enough!

IMG_5456.JPG by you.

But a lot can change over the course of a year. E's little palate has definitely broadened a bit and while she still claims not to like hard-boiled eggs, I knew that if I let her help me make them, she'd change her tune. Just like with sandwiches - she used to hate them, but now happily eats them if I let her make them herself. Of course it takes about 45 minutes to make one sandwich, but that's a different can of worms.

Generally, I've always been told that you need to use extra large eggs, and that some brands tend to be larger than others. I had exactly four large organic eggs left in my fridge that needed to be used up, and I figured it couldn't hurt to try.

Oddly enough, I went 2-2. Two molds turned out great, two did not. I honestly don't know if it's the eggs or what, but I'm thinking next time, I might orient them a different way before I press them in there.

In any case, E was super excited about the whole process and could not wait to open them up and see. And when I told her she could eat the car...I think she was in hog heaven.

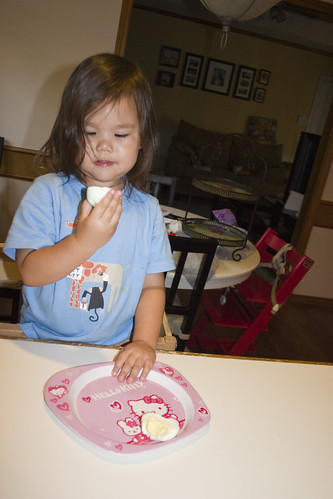
Here she is, waiting patiently.
IMG_11069 by you.

We opened the car first. Success!
IMG_11076 by you.

It has a bit of a greenish tinge because I tried putting it in a cup with water & food coloring. But both E and I were too impatient to wait for the dye to take, so I pulled it out.

IMG_11080 by you.


She ate most of a whole egg - a first! I don't think she cared for the yolk, so I picked it out of the second half after she spit the first half in my hand - lovely.

IMG_11083 by you.

Here are pics of the second set (minus the car). I'm hoping to get her to eat one for breakfast before school tomorrow.

IMG_11088 by you.

Sunday, August 30, 2009

Can't wait for school!

E starts up with preschool (better known down here as "Mother's Day Out" or MDO) this week and I cannot wait! It's partly because I'm excited to have a couple days to myself (thus the term, "mother's day out"), but mostly I'm just excited to use all our new bento stuff to make her lunches!

I got these little sandwich cutters that I've been dying to try. Usually, I just use mini cookie cutters, but from the picture on the packaging these appeared to be specifically for sandwiches. They even have a stamp, so that you can stamp the outside of the bread. So neat!

bento_cutterset by you.

Anyways, I took advantage of our trip to the aquarium last week to do a little test run. E is really really into making her own sandwiches. It takes about 20 minutes to make one sandwich, but I figure it's worth it since she actually eats the sandwich when she's done (as opposed to wasting it, which was her previous MO). She LOVED cutting out the shapes and stamping the tops. So much so, that she's been asking me to make them every day since. Of course, I wish these didn't result in so much waste since I can only get 4-5 shapes out of a full size sandwich, but for now it's a price I'm willing to pay.

So here's a picture of her lunch, packed in the cute new giraffe bento box I picked up in San Francisco last month. The box turned out to be a bit smaller on the inside than I anticipated, so I ended up having to pack the pretzel sticks in a separate baggie. That partly defeated the purpose, but I was in a hurry to get out the door. Next time I'll try to be more strategic. Stay tuned for more bento lunches!

IMG_10986 by you.